LMS Course Schedule
In order to add students to participate in your course, you will first need to set a schedule for your course.
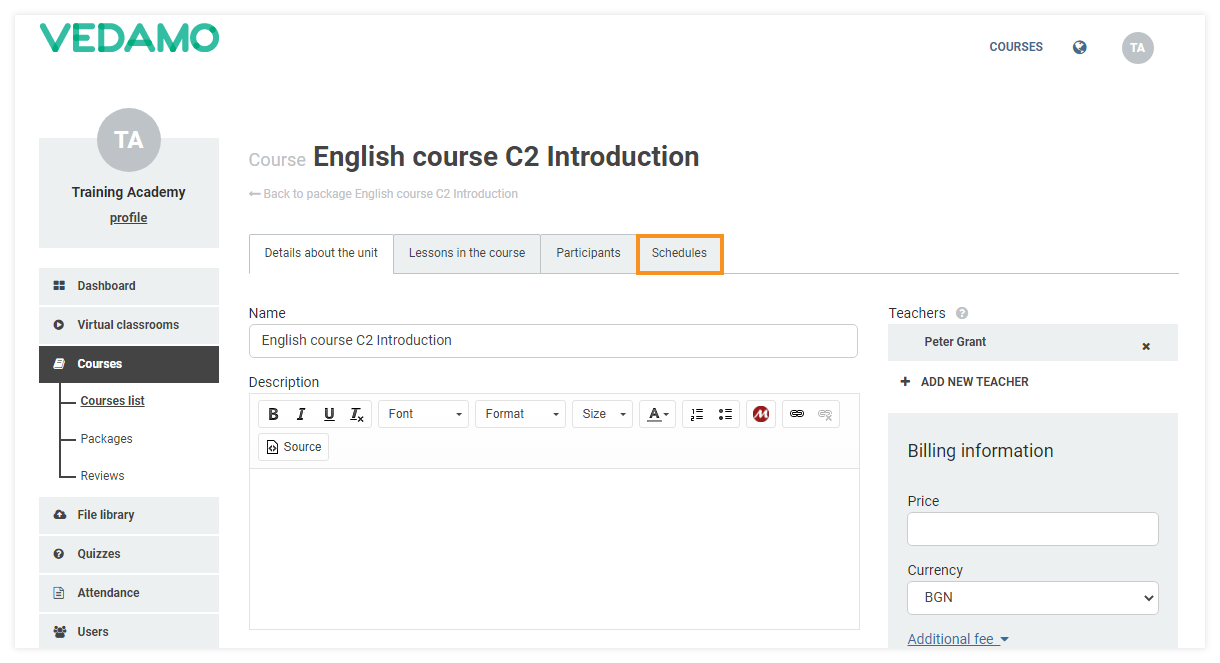
To set the LMS course schedule, log in with your Organization account and go to the Courses section. Click on the course of your choice and the course edit window will open. From the available tabs select Schedules.

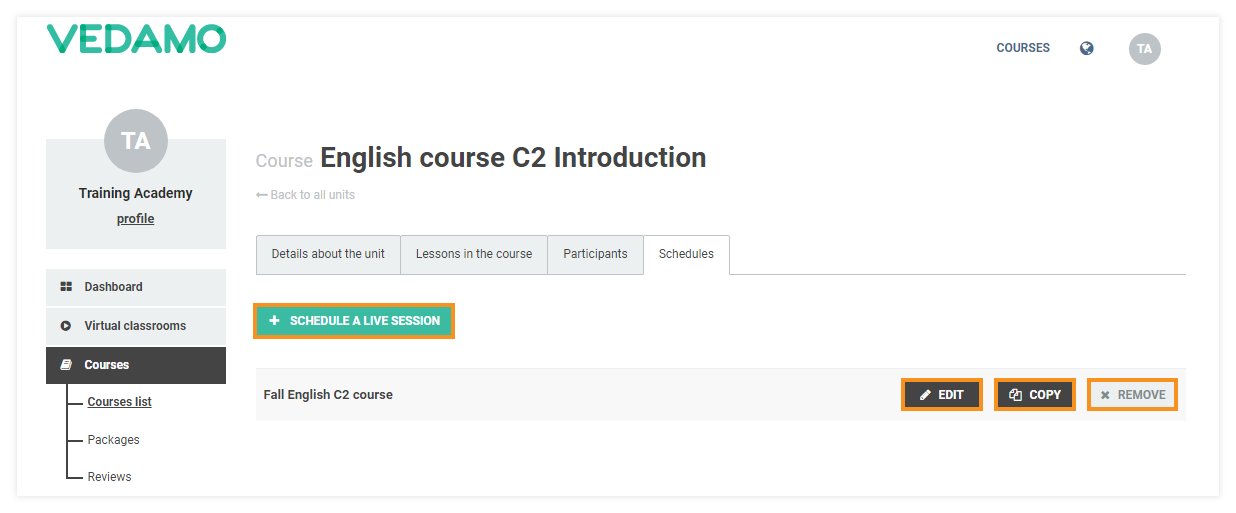
Once you click Schedules, a new window will open. You will see a list of schedules that you can edit, copy or remove (if you have previously created any) or you can create a new schedule. To create a new schedule, click on Create new schedule/Schedule a live session.

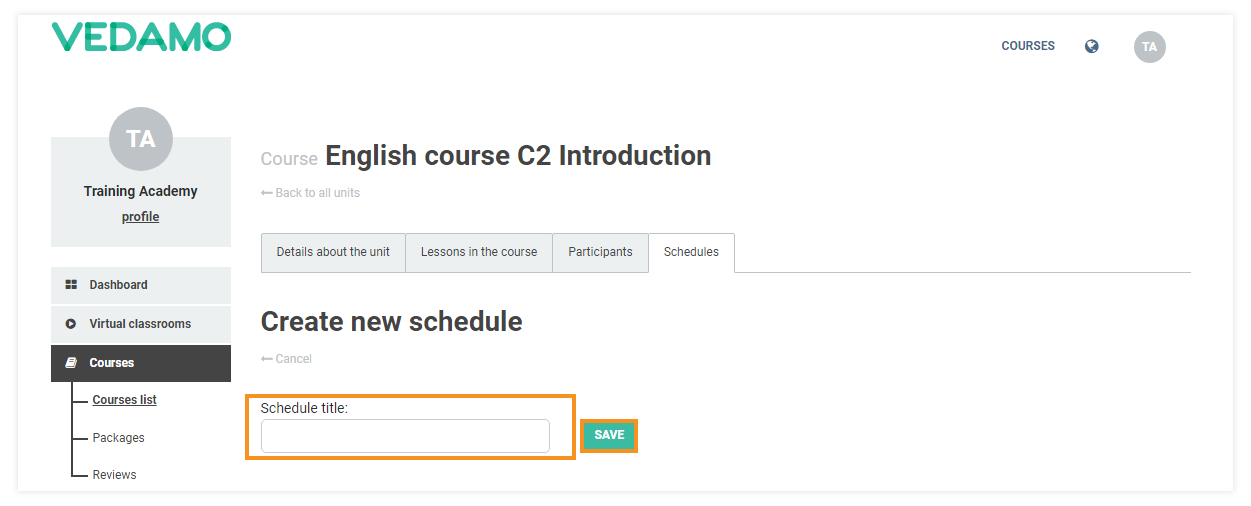
If you are creating a new schedule you will see a field to enter the Schedule title:
Enter a title and click Save.

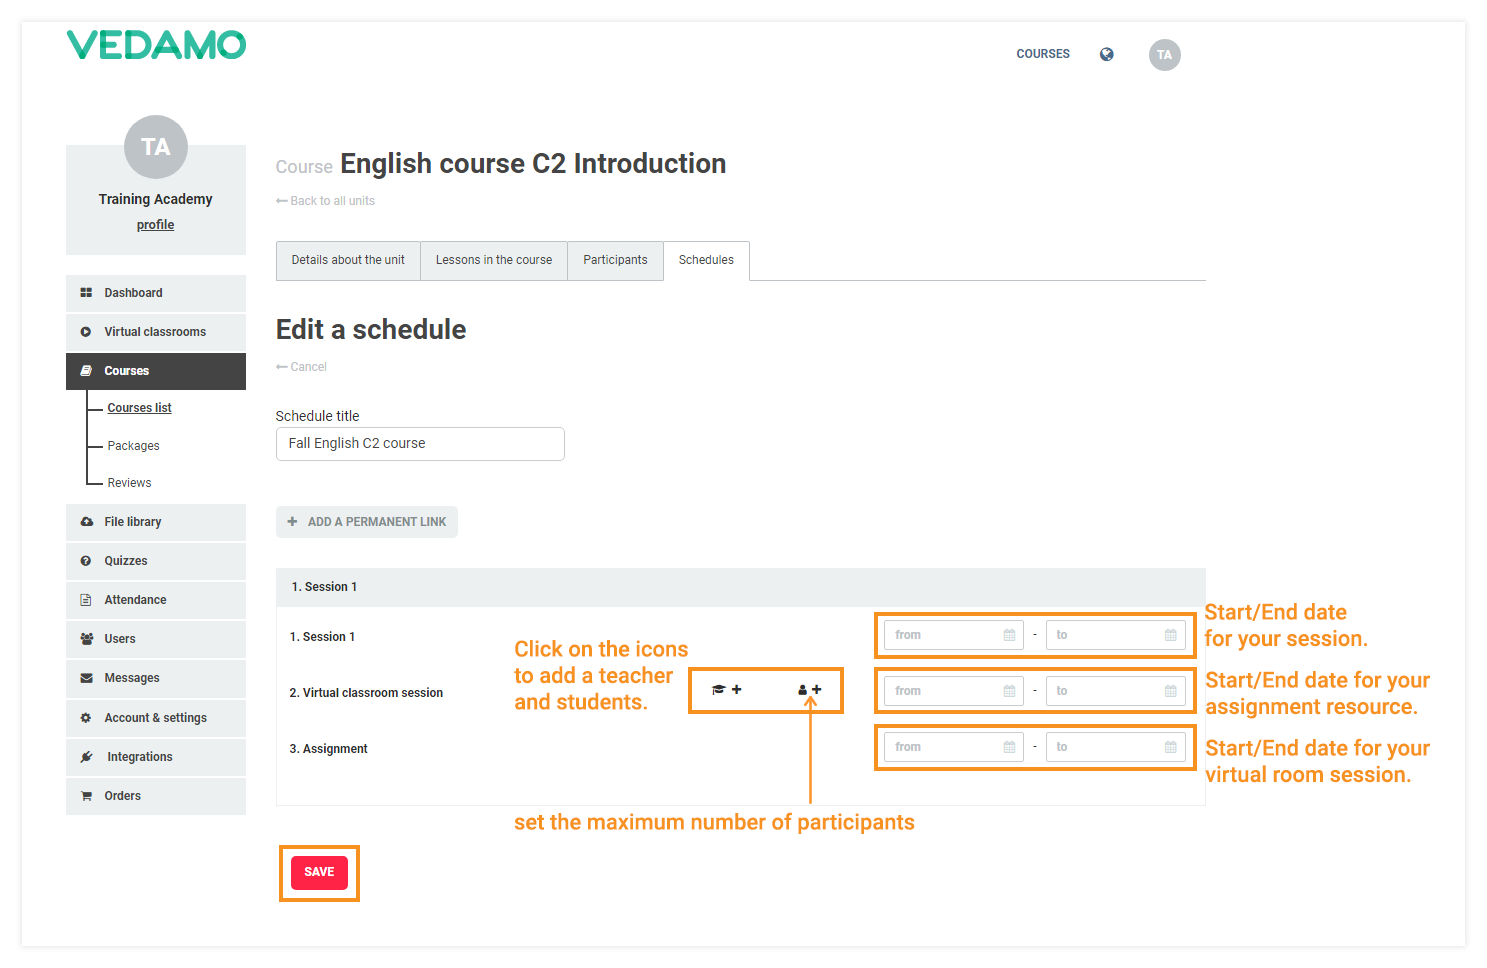
You will then see a menu including several tabs. On the Lessons in the course tab, you can enter the start and end dates of your lessons, of the assignment’s resources (if you have added that kind of resource), and of your Virtual Classroom section (if you have added such). For further information about adding a section, check: Add teachers, lessons and sections in LMS.
NOTE: It is obligatory that you select a teacher and maximum participants limit for all virtual classroom sessions added to the course. You cannot save the schedule unless you fill these in.
Click Save to confirm the changes.

Congratulations! Your course is now complete and you can start the enrollment process. To see how you can enroll students in your course, you can read through the next article.