The Premium LMS Subscription for the VEDAMO Learning Management System offers a host of further benefits in addition to the features of our 30-days trial plan. The article will explain in detail the process you have to go through in order to find out what those benefits are, choose the subscription plan that’s good for you or your organization, and create your brand new Premium Learning Management System using VEDAMO.
Pricing page
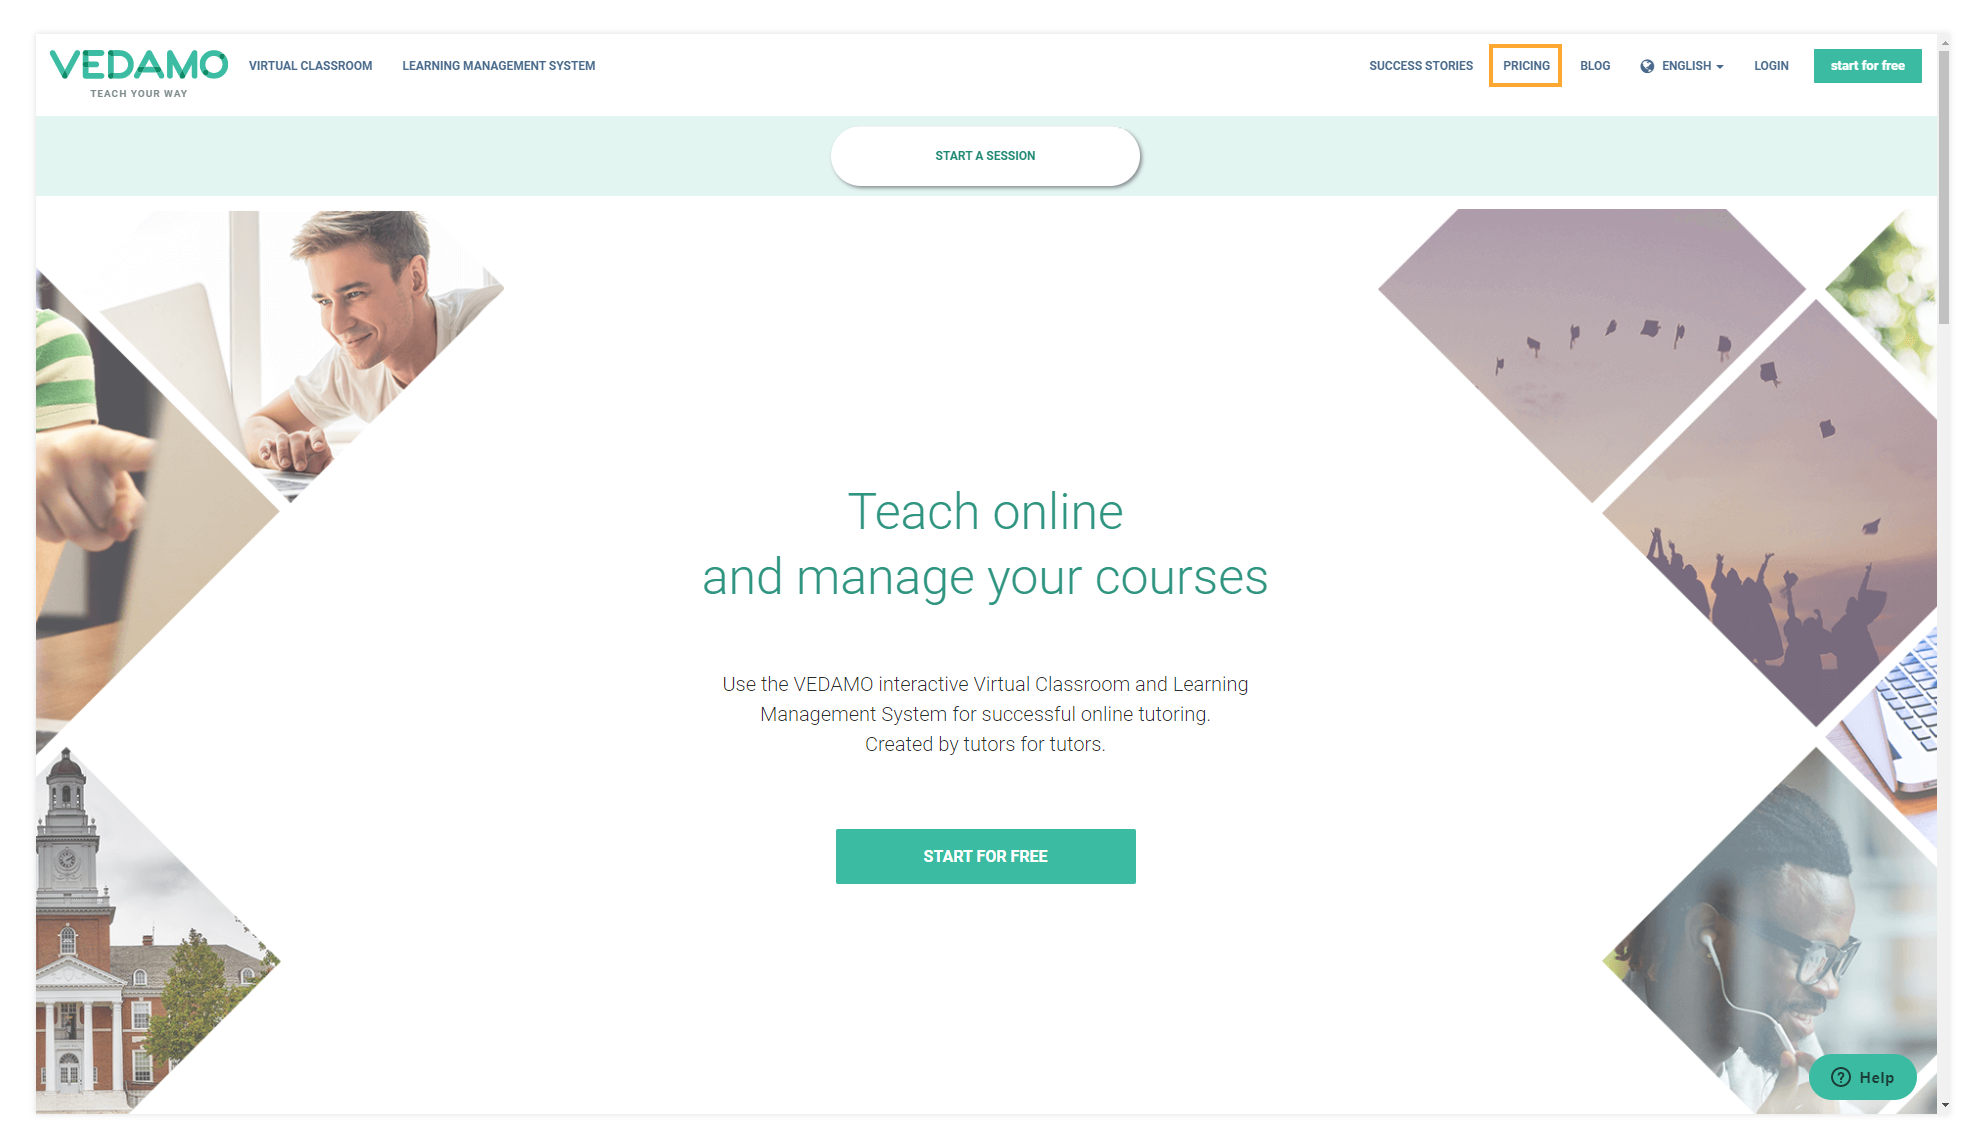
In order to create a new account and subscribe for the Premium LMS Subscription, please click on the Pricing page link located in the header of the VEDAMO homepage. The pricing page of our website contains details regarding the VEDAMO Virtual Classroom and Learning Management System.
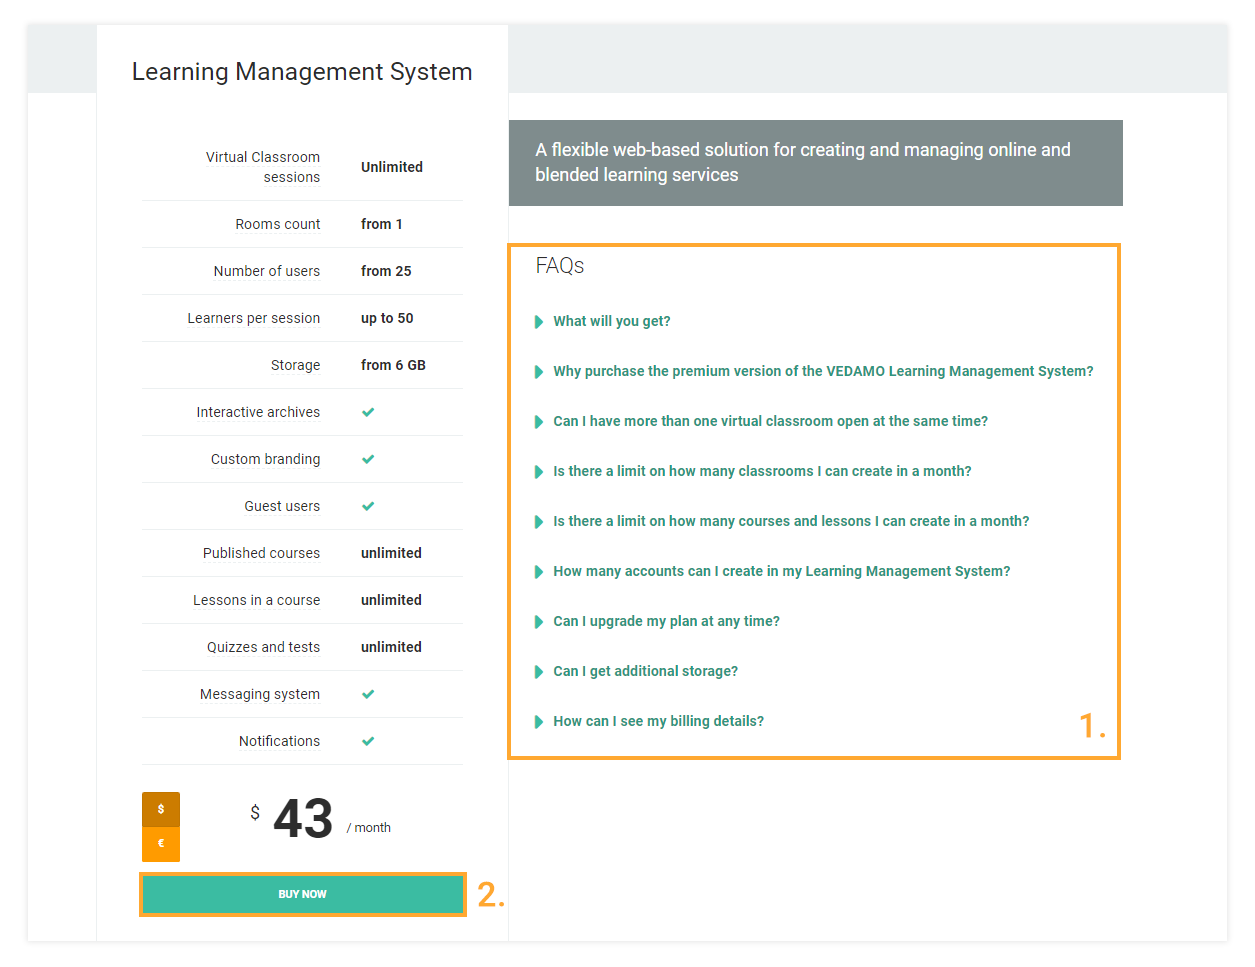
Pricing page FAQs
Here you can check FAQs regarding the plan of your choice, see all of the features it will grant you, and how they can help you.
Here is a quick breakdown of the features of the Premium LMS subscription plan:
By subscribing to the premium version (43 USD package), you get access to the following features
One virtual classroom (1 teacher with up to 50 students)
You gain access to a virtual classroom where one teacher can teach up to 50 students. You can also add more classrooms to your plan if necessary. The license per classroom is 25 USD and each license allows you to open one more virtual classroom at the same time. You will also receive an additional 5 GB of storage space per classroom.
Guest users
Allows you to open virtual classrooms where you can invite participants who have not registered an account on your LMS.
Interactive archives
Let’s you view recordings of past lessons from the point of view of each participant. You can also download the recordings as a video file. Each registered user can see a recording of their past sessions through their account. Guest users, however, cannot access recordings.
Recordings are stored in your academy and will take up storage space. You also have the option of turning them off. See the Account and Settings – General Information article for more information on how to do that;
Courses
You can create as many courses as you want;
Course lessons
You can create as many lessons as you want per course;
Quizzes and tests
Allows you to create quizzes as part of a course or assign them directly to a group of students.
Messaging system
Gain access to the internal messaging system, which you can use to quickly send messages to anyone with a registered account on your LMS;
User accounts
Lets you create up to 25 accounts on your (basic) LMS. You also have the option of purchasing additional accounts if needed. Use the “user accounts” drop-down menu to review the price for the number of accounts you want;
Storage
Grants you 6 GB of file storage ( + 5 GB per additional classroom licence). You also have the option of purchasing additional storage.
Notifications
You and your students will receive automatic system notifications for events in the system (like upcoming lessons, etc. ).
Custom branding
Let’s you upload a custom logo or a favicon for your LMS and the virtual classrooms you open. For further details, check the article Custom Branding.
Once you’re ready, you can click on CONTINUE to start the purchase process.
Create your account
On the next page, you will be asked to create and configure your account for your Learning Management System, as well as its features.
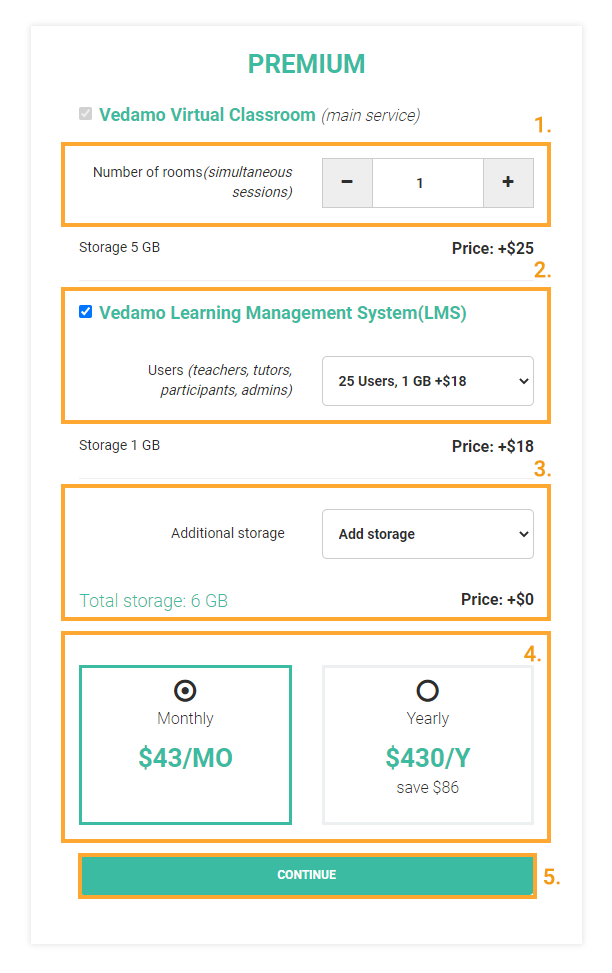
Select the number of classrooms that you will use in your academy (1), then select the features you want from the following list:
Select the number of users accounts you would like to have from the User Accounts dropdown menu (2);
Also, if you want to add additional storage for file uploads and session recordings, you can do that through the Additional storage dropdown menu (3).
The system will calculate the price of the features (4).
Finally, click on Continue (5) to progress to the next step.
Note: The Virtual Classrooms menu lets you add multiple Virtual Classroom licenses. You can open as many virtual classrooms simultaneously as the number of licenses you have purchased. Each virtual classroom license also adds 5 GB on top of your current storage quota;
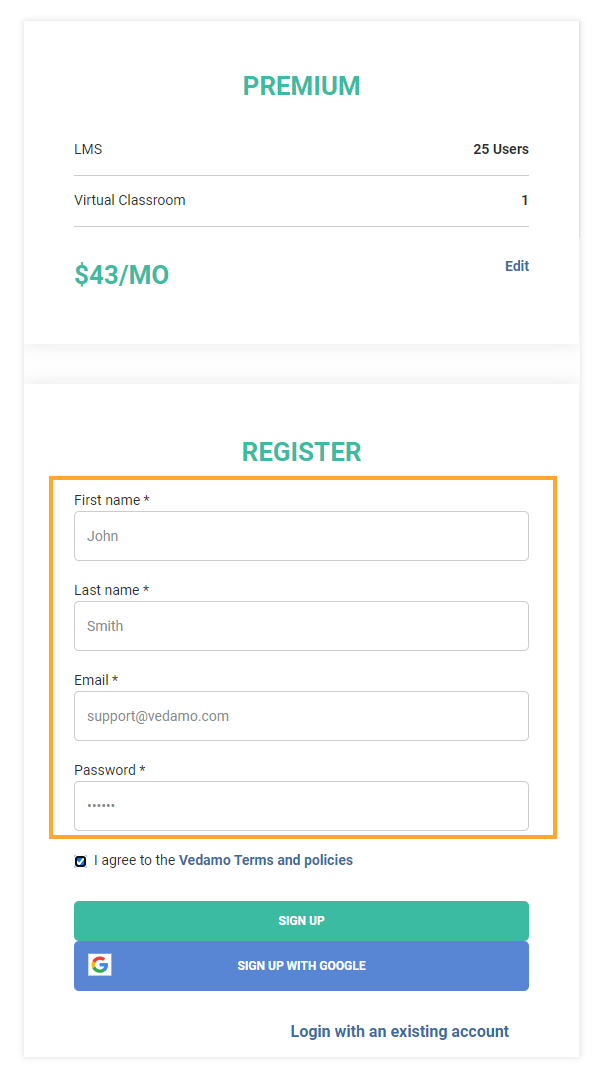
This is how the page will look once all the fields with the organizational account information have been filled in. When done you will have to press the Sign up button.
Note: Do not forget to agree (tick) to the Vedamo terms and policies as this is mandatory in order to proceed to the next step.
On the next screen, you will have to enter your academy’s custom URL (public web address).
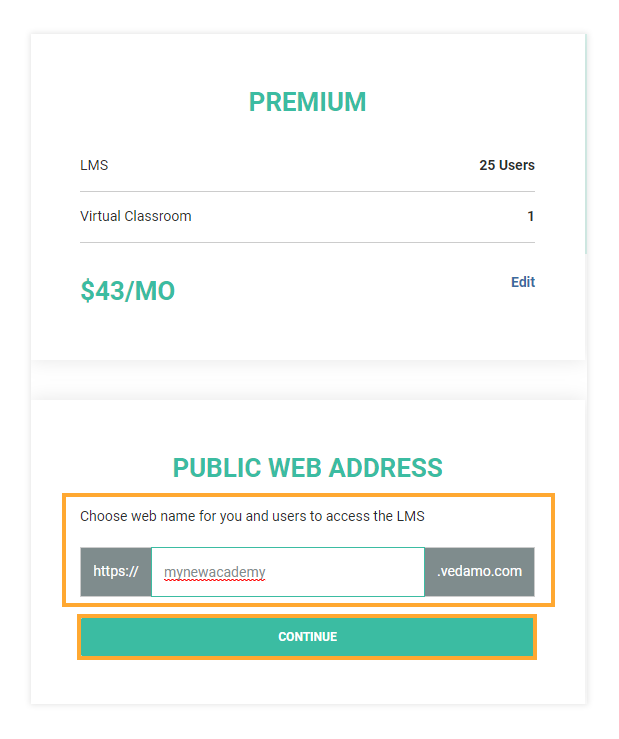
Billing details page
First, you will have to add your Credit/Debit card.
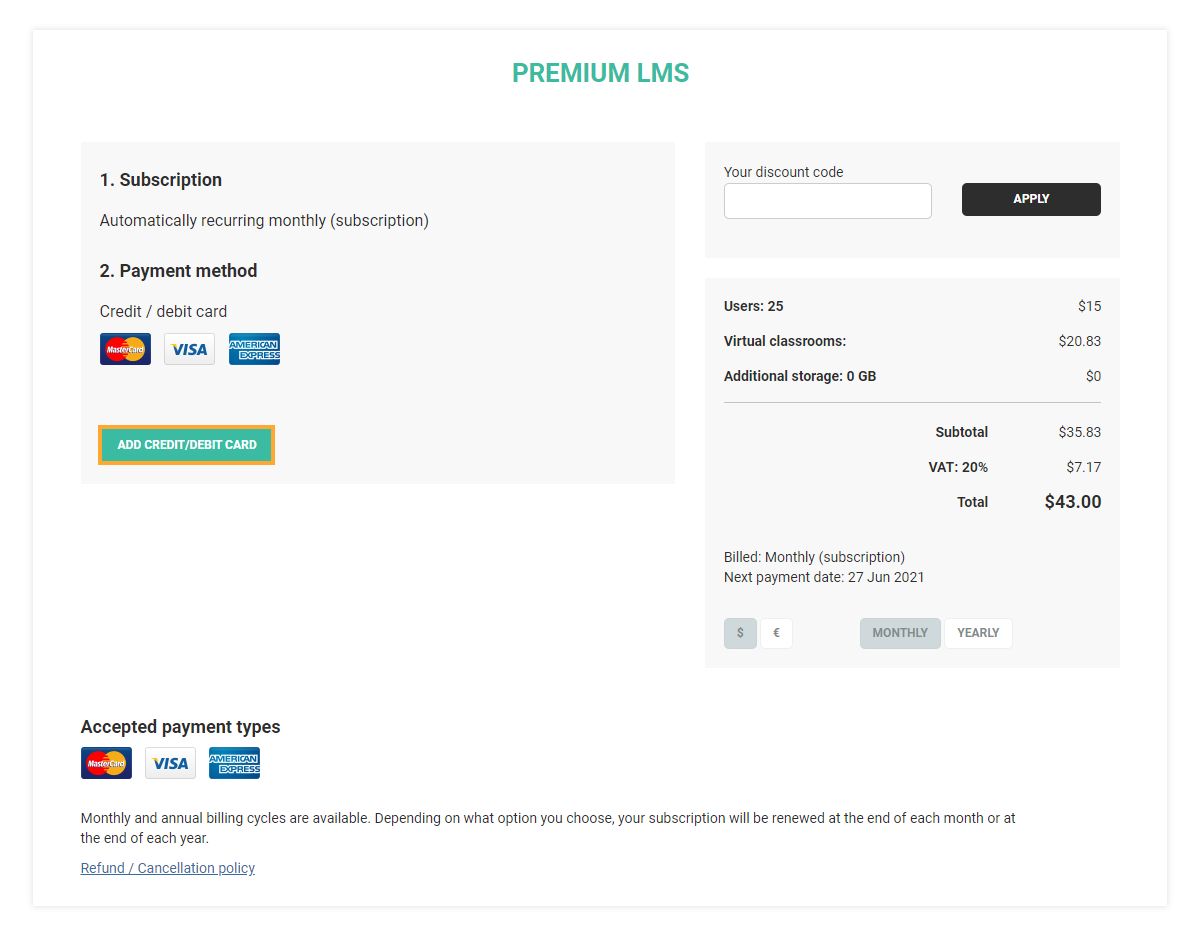
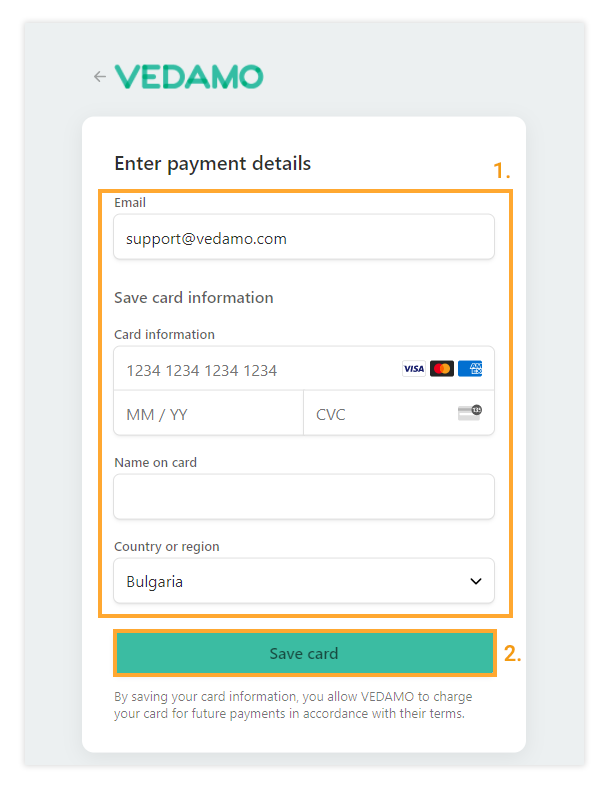
In the next step, you will have to add the Credit/Debit card details.
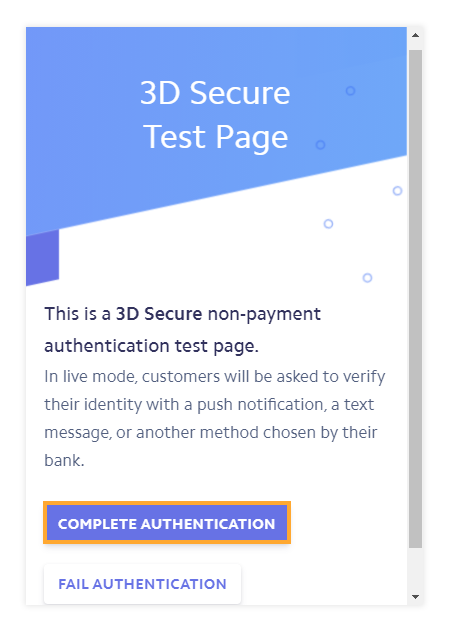
If your bank card supports 3D secure authentication you will have to press “complete authentication” in order to progress to the next step.
Payment page
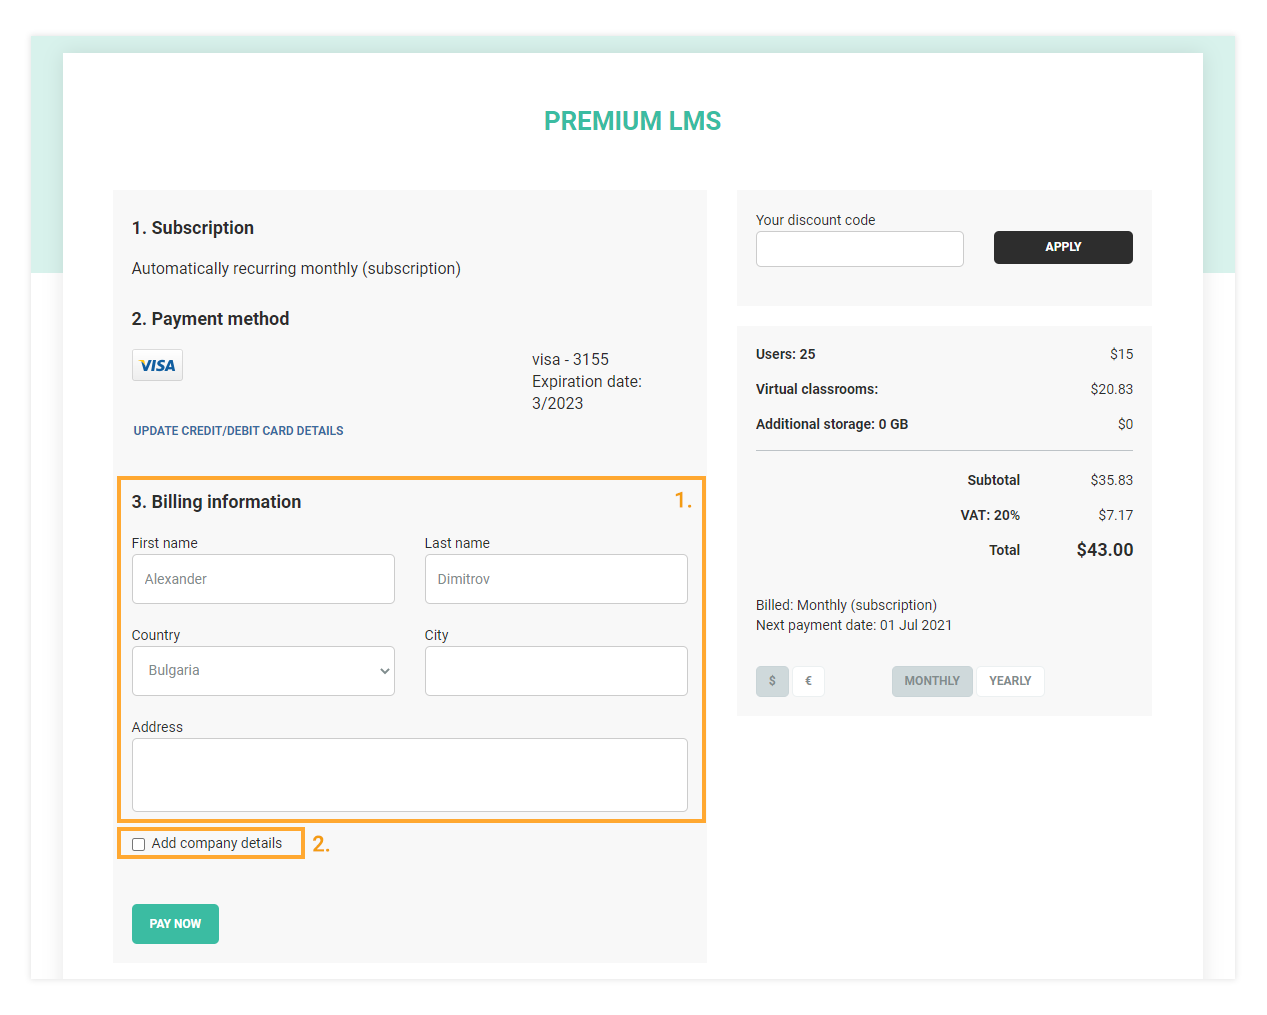
The next menu lets you put in your Name, Country, and City as well as your Billing Address (1).
The Order summary (left) section lets you see the features you will be buying, as well as a breakdown of the price for each one and the overall price for the package.
Tick the Add company details (2) box, to include your Company Name, VAT Number, and Company number, which will appear on your invoice.
Once done, click on Pay now in order to complete the payment.
Success page
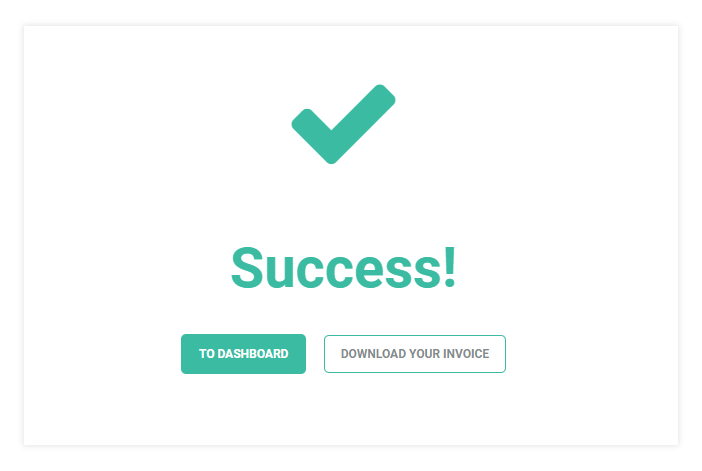
Once the purchase has been completed, you will be redirected to a success page.
You can click on DOWNLOAD YOUR INVOICE (1) to receive your invoice right away.
Click on TO YOUR DASHBOARD (2) when ready to access your LMS account.
Email confirmation
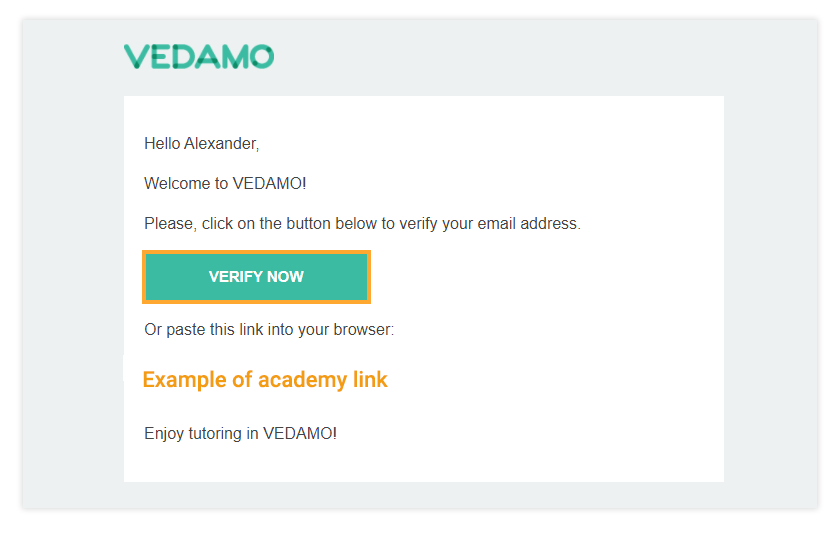
Finally, the system will alert you that you have received an email with a confirmation link.
Go to the email address you registered for your account and click on Verify now in the email sent from VEDAMO to confirm your email address and access your account.
The link will redirect you to your account dashboard. From there you can start using your newly created academy. To find more about the Dashboard and further features of your new Learning Management System, click on the NEXT ARTICLE below.