Knowing how to tеаch online is a must, if you want to conduct an online session. Otherwise you may miss an exciting opportunity to learn the benefits of live online teaching. We offer you a few examples of forms of educational interaction and an 8 steps process to go through. You can conduct your first online session masterfully by following the links with details for each step, functionalities and features of the online virtual classroom.
The following are only some examples of the forms of educational interactions that are possible:
- One-on-one session – one tutor works with one learner online;
- Group sessions – one tutor works with a group of learners online;
- A connection between parallel traditional classrooms in different locations;
- Seminar sessions with two tutors and a group of children;
- Blended learning – online learning is blended with real classroom learning. VEDAMO’s Virtual Classroom can be implemented in a traditional classroom by inviting remote guest-teachers to conduct lessons with the students.
Steps:
- Get to know the Virtual Classroom
- Get to know your learners
- Prepare the content for your session
- Prepare the physical environment
- Perform a test with somebody you know well and watch the recording (Optional)
- Schedule your first welcome session with the learners
- Plan your programme and start teaching
- Collect feedback from your learners
Step 1: Get to know the Virtual Classroom
If this is your first experience as a virtual tutor in a synchronous online platform, do not worry – VEDAMO’s Virtual Classroom is highly intuitive and provides you with all the tools you need to deliver sessions that feel like face-to-face training. When you create your VEDAMO account, explore the Virtual Classroom’s features and see how they can support and enhance your tutoring style.
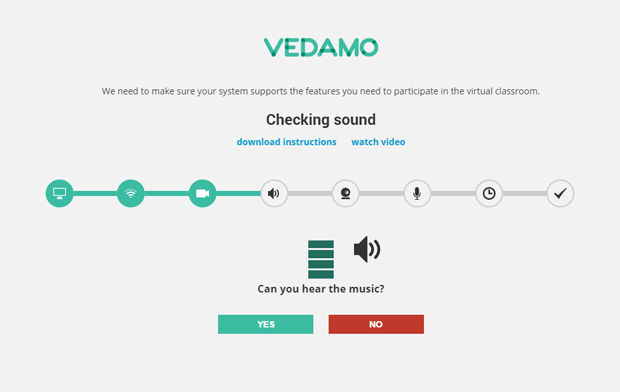
Before start teaching make sure that your device and internet connection cover the minimal technical requirements by making a system check from your dashboard. This will ensure the smooth conduction of your virtual sessions. It is recommended that you share these technical requirements with your participants as well before the sessions begin.
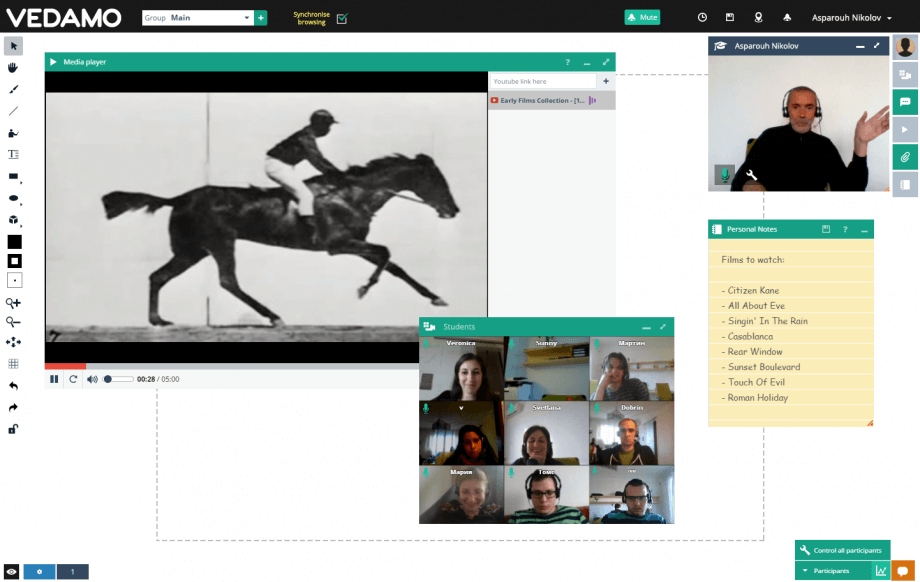
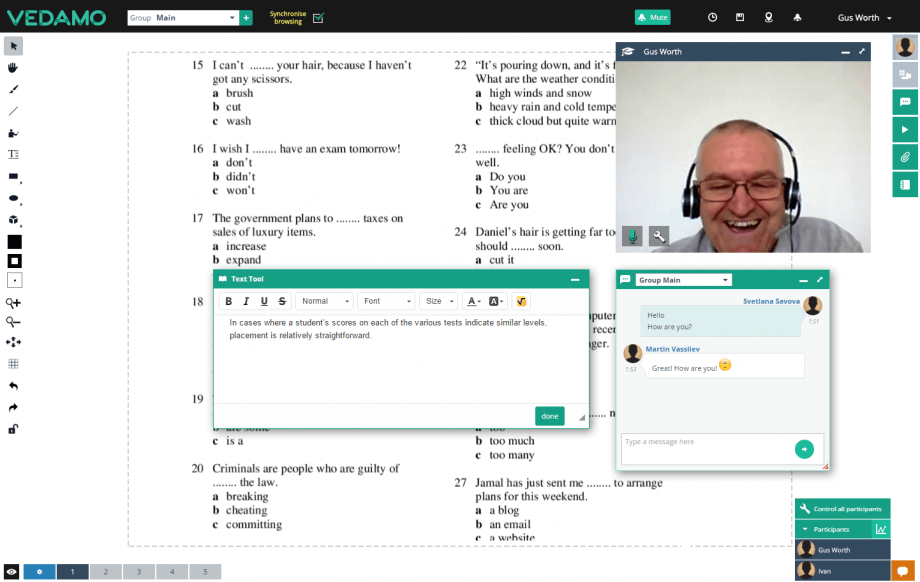
The VEDAMO Virtual Classroom is equipped with tools for communication, sharing learning content, collaboration and classroom management.
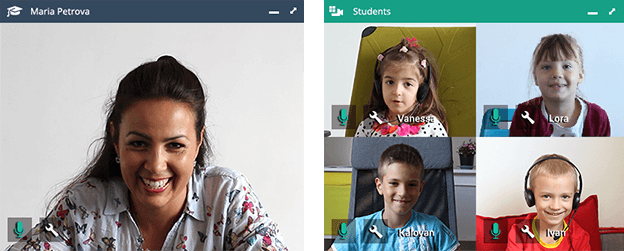
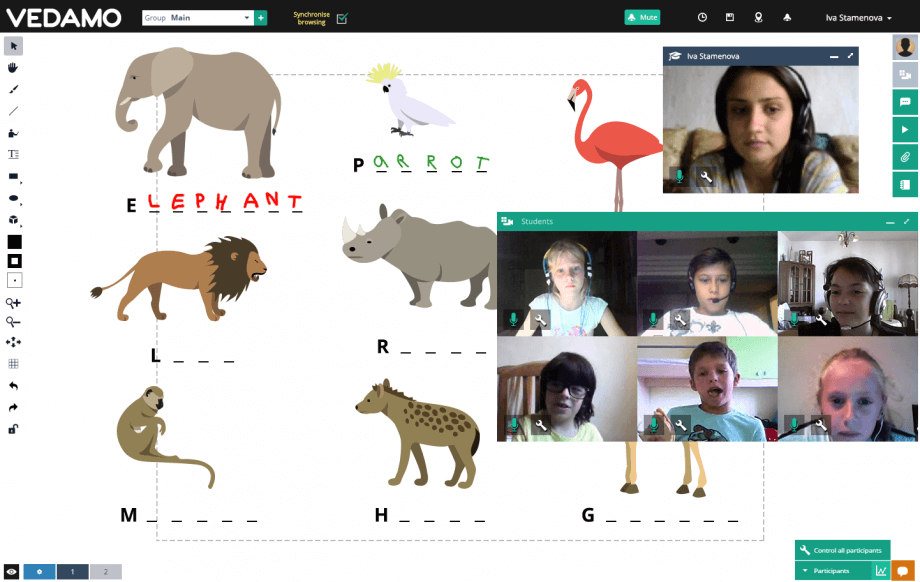
The tools for communication allow you to interact in real time with your learners as well as to conduct discussions, role plays, conversational classes, and other interactive activities with them. For this purpose, you can use the video-conference connection which allows to see and hear simultaneously up to 25 participants in the so called functional windows.
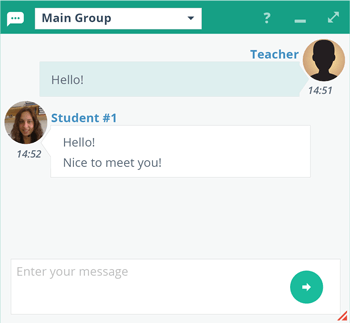
You can also use the internal chat to write messages to the whole group or to a certain participant. The chat can be used when some of the participants have no audio connection. It can also be used for brainstorming, reflection, writing question during a presentation without interrupting the presenter, etc.
The tools for sharing learning content give you opportunity to present the learning content in various media formats – images, text, videos, audio files, tables, schemes, etc. This will help you respond to the different learning styles and make your sessions dynamic and engaging. When preparing for a session upload all learning materials in the upload box. Your presentations, text files, images and tables can be shared with the participants on the online whiteboard.
- You can find more information about the upload box in this article.
- Learn how to manage the whiteboard pages here.
- To make sure that all the participants see one and the same content on the whiteboard use the synchronise browsing mode.
All video and audio files as well as YouTube links can be shared with your learners through the Media player. (You can find more information about the media player in this article). Keep in mind that in live virtual teaching it is recommended to ensure interaction with the participants every 3-5 minutes. That is why if your video files are longer, you can stop them and ask the participants questions or assign them a task while watching the video.
If you need to use external applications or software programmes which cannot be shared on the whiteboard you can use the screen-sharing functions.
The VEDAMO Virtual Classroom is an interactive virtual environment which gives a lot of options for collaborative learning activities. Your learners can create and edit content on the whiteboard both individually and together using the tools for writing, editing, drawing, and creating graphic objects.
During the session you can ensure optimal balance of individual, small group and entire group activities by using the breakout rooms. For example, you can start your session with a presentation of the new information in the main virtual classroom. Then you can divide the participants into small groups and assign them a task to discuss and practice the new knowledge. After that you can gather the participants in the main group again and encourage them to present the results for their collaborative work.
The VEDAMO Virtual Classroom provides the tutor with an easy-to-use control panel for classroom management. This function allows you to control the participants’ access to the different functionalities, such as video-audio connection, whiteboard tools, upload box, etc.
These are the key functionalities of the Virtual Classroom. For detailed information about them and the other features in VEDAMO’s Virtual Classroom, please visit this section.
Step 2: Get to know your learners

VEDAMO’s Virtual Classroom is a dynamic virtual learning environment aimed at fostering collaborative learning. That is why it is very important to have some information about your learners and their levels, needs and interests, before the learning takes place. Synchronous virtual teaching gives us an experience close to that found in a traditional classroom, even though the tutor and the learners are not in one and the same physical environment. For this reason, the better you know your learners and create content that is relevant to them, the faster they will adjust to the computer-assisted learning environment. This will help them feel part of a learning community and will motivate their active participation and collaboration with others.
You might not only prepare an entry test to detect their level of knowledge, but also conduct a short survey to collect information about their interests, learning styles and expectations. Afterwards, you can use this information while designing the learning activities by including real-life examples, as well as content relevant to the learners’ interests. Knowing your learners is fundamental to achieving differentiation.
You can find more information about differentiated instruction in the virtual classroom here.
Step 3: Prepare the content for your session
VEDAMO’s Virtual Classroom has a variety of functionalities and tools to enhance your creativity as teachers. If you use them to their maximum potential, you will achieve a high level of interest and attention from your learners throughout the virtual session. These tools are designed to facilitate interactivity, discourse and teamwork.
When planning your sessions, include various activities. In a synchronous virtual environment you have to interact with your learner(s) every 3-5 minutes. For example, if the goal of your session is to present new knowledge, avoid conducting a long lecture in the virtual classroom. Instead, divide the content into 3-5 key moments and switch between a presentation of key concepts and practical exercises or discussions. In this way, you will be able to keep the learners’ attention by fostering their active participation.
VEDAMO’s Virtual Classroom allows you to prepare content rich sessions. You can:
- Present new knowledge – by uploading images, documents, presentations, tables, schemes, etc. on the whiteboard, as well as by sharing video files and YouTube links in the media player or sharing your screen to demonstrate external applications.
- Include collaborative activities – by using the tools to write and edit text, draw and create graphic objects on the whiteboard; by conducting small group activities in the breakout rooms.
- Organise group discussions, brainstorming sessions and other interactive activities – the combination of the video-conference connection and the interactive whiteboard gives you the opportunity to conduct activities requiring active participation and contributions from the learners.
- Assign individual tasks – you can use the breakout rooms to give the participants individual activities. While in the breakout rooms they will not be able to see and hear each other. You, as a tutor, can visit all breakout rooms and monitor their work.

These are only some examples of the variety of learning activities you can plan for your online sessions. Regardless of what you decide to prepare for your sessions, it is recommended that you upload all learning materials into the virtual classroom beforehand and save them as a session template. These templates save the arrangement of the materials in the virtual classroom and can be uploaded and reused in an unlimited number of sessions with only one click of the mouse.
- You can read more about the whiteboard pages management in this article.
- Learn more about session templates here.
- More tips about the structure of your online sessions can be found here.
Step 4: Prepare the physical environment
Although learning in the virtual classroom is computer-assisted, it is still instructor-led and depends on the interaction between the tutor and the participants. The video-conference connection allows visual and audible contact between the participants, which makes the experience resemble a face-to-face interaction. As a result, the participants are able to follow facial expressions, reactions and other elements of non-verbal communication of both their tutor and peers. Inside the virtual classroom the role of the tutor changes significantly and they mainly act as a moderator and counsellor. The tutor serves as a group facilitator during collaborative activities and as an expert when learners need their help.
As a moderator of the interaction, the tutor has, by default, a separate video screen with а high-quality connection. Thus, the participants are able to follow the tutor’s instruction both audibly and visually. The clear audio and video connection depends not only on the internet speed and the hardware specifications, but also on the arrangement of the physical environment.

Keep in mind the following tips when preparing for your virtual classroom sessions:
- Make sure that there is enough light in the room. If there is not enough natural light, you can switch on an extra lamp behind your web camera.
- Do not sit with your back towards the light source. Participants will not be able to see your face but only your silhouette. Choose a place where you are clearly visible – the best option is to face the light source so that the light falls on you. If the light is too bright, make sure you dim it appropriately. Otherwise, light and shade contrast too much and will deform your image on the screen.
- Choose an appropriate colour of clothing so that it is different from your background.

- Make sure that the background is clean and tidy, otherwise it can distract the participants. Your bedroom or your kitchen are not the best places to position your laptop, as they may lead to associations with having a rest or a meal. You may choose a clean wall, bookshelves or any other interior that resembles a working environment. Avoid bright colours and curious objects that might be distracting. Of course, you may intentionally choose to use these types of objects or interior elements for the purposes of a certain session (e.g., objects for foreign language sessions, teach from your kitchen when having a session about a certain culture and cuisine, etc.), but this probably will not be the usual case.
- When you switch on the camera, make sure that you can see your whole face on the video screen and at least part of your torso. Make an effort to position your image in the centre of the video screen.
- Make sure that there is no background noise in the room or something that might block your microphone.
You can find more tips on your preparation for online sessions here.
Step 5: Perform a test with somebody you know well and watch the recording (Optional)
If this is your first experience as a virtual teacher, it will be a good idea to perform one or two test sessions with some of your friends, colleagues or relatives. Activities in the virtual classroom sometimes take shorter or longer to conduct compared to a traditional classroom. These tests will help you explore these differences and plan your sessions more precisely.
The test sessions will also help you try out the Virtual Classroom’s tools and the teacher’s classroom management tools in a real-time interaction with participant(s). This will serve as inspiration for more ideas and will make you more confident during you real online sessions.
You can watch your performance during the test session from the interactive archives on your dashboard. See how here.
See how to invite participants into your virtual classroom in the “Invite Participants” section in this article.
Step 6: Schedule your first welcome session with the learners
VEDAMO’s Virtual Classroom is highly intuitive and the learners do not need any special training to use the tools. However, the first session is usually a new experience for them and they are often curious to explore the variety of tools and possibilities. That is why we recommend to plan a longer first session and spend some time getting to know each other and introducing them to the environment.
During the first session you will be able to learn more about your learners, their interests and expectations. Also, they will have the chance to try out the tools they are going to use during your sessions. You can prepare some funny exercises and ice breakers for this purpose. For example, you can ask them to draw on the whiteboard the animal that best describes them. Thus, they will have the chance to use the brush tool or the graphic objects tool. (See how to use the whiteboard tools here)
More ideas about ice breakers in the virtual classroom can be found here.

Step 7: Plan your programme and start teaching
Once you get used to working with the tools of the virtual learning environment, you can build the structure of your online course. You can plan this by yourself using documents or relevant applications but the VEDAMO Learning Management System can help you organise and manage this process faster and easier.
First, distribute the study content into separate small sessions. Create a session timetable with a clear time framework. When the sessions’ schedule is ready, share it with the participants. If you use the Learning Management System, they will be automatically notified and the sessions will be organised in a calendar on their personal dashboards.
Make sure you plan activities for interaction among participants that foster the creation of an online community. Select and use appropriate electronic materials and resources relevant to the learners’ experiences, interests and levels. Create varied study activities that correspond to pre-set educational aims. Carefully consider the Virtual Classroom’s tools that you are going to employ for each learning activity. Balance the activities of individuals, small groups and the entire group.
Step 8: Collect feedback from your learners
VEDAMO offers the opportunity for real-time discussions. This makes it possible for the tutor and the participants to express their opinions as immediate feedback, which enhances the feeling among participants of working in a shared space.
As part of the working process, learners’ feedback helps you improve your performance as a virtual teacher. At the end of your session, as well as at the end of the entire course, you can prepare a short questionnaire for your participants.

If the questionnaire is distributed at the end of the session, it can be carried out orally or in writing and the questions must be of an open-ended type, allowing for short answers (For example: “What did you like about the role play we did? What didn’t you like? How did you feel in your role? What would you improve?”, etc.).
The written questionnaire at the end of the course must be more detailed, with both closed and open-ended questions). There should be questions about the electronic learning materials that were used, the methods that were applied, interactions with the other participants, technical problems and suggestions for improvement. From the participants’ answers you can draw conclusions about their feelings, what they liked and did not like about the session/course and about their suggestions for improvement. This information allows you to adjust and restructure the design of the virtual session/course, as well as to improve, add or change some of its elements accordingly. All of this allows you to personalise the study process based on the needs of both the entire group and the individual participants.
For more information about reflection and feedback in virtual environment read this article.

