In one of our previous articles we stressed the benefits of creating your own blog.
Now we are turning to Facebook as one of the main channels that you should to use to promote your online teaching business.
Why Facebook?
Facebook is the most widely used social media platform in the world. If you have taught traditional classes in the past then you have probably noticed that most of your students are using Facebook. If they are already on your network, you can now contact them directly and tell them about your online course. In addition, the platform allows you to target potential students according to their interests, demographics, age, language used, etc. Through Facebook you can also retarget people who have visited your blog and display the ads for your courses specifically to those users.
Facebook also lets you generate contacts directly through your page. You can add a sign-up button to your page, gather valuable emails, and send promotional messages about your courses to them after that.
Last but not least, you can host a webinar on Facebook and let your clients ask you questions about the course directly.
Getting started with a Facebook Business page

We recommend that you create a separate page to promote your online courses. This way you will be able to create ad campaigns and target specific audiences who are interested in e-learning.
Steps to create your Facebook page:
- Log in to your personal profile
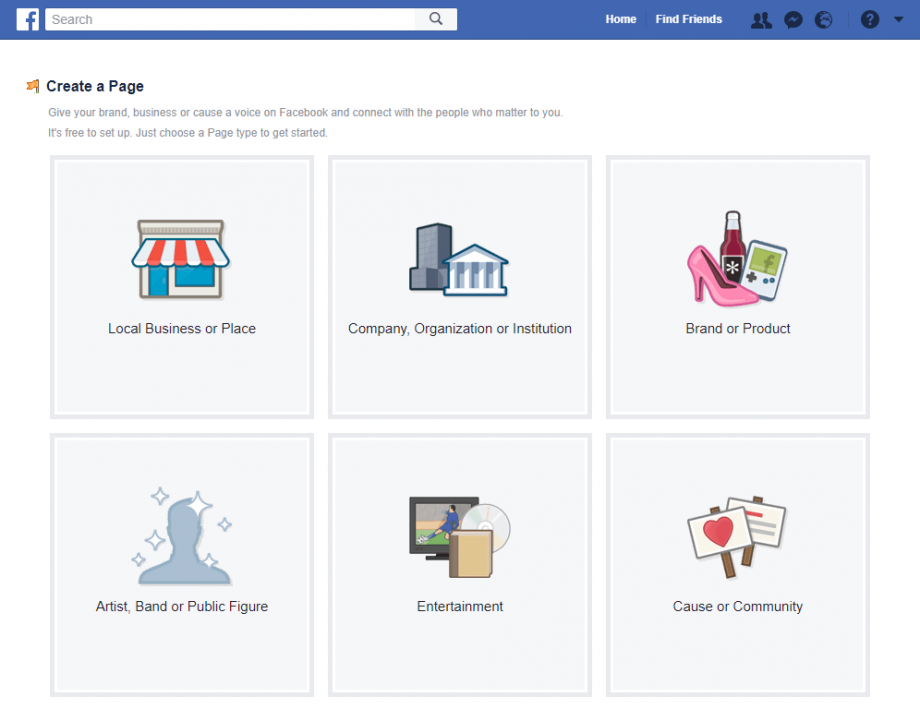
- Choose Create Page from the upper right drop down menu or go to facebook.com/pages/create.
- Choose the right type of business or organization – If you are offering online courses, we recommend that you choose the Company, Organization, or Institution option.
- Choose your category – What industry are you operating in?
- Choose a name for your page – Choose the name of your page carefully. It should be short but should also thoroughly describe your service. For example, if you are planning on teaching English, you can name your page “Online English Courses.”
- Add a profile picture and cover photo – We recommend that your profile picture be your initials or logo. For a cover photo you can always choose something relevant to your online courses. For the right sizing of the images, use this cheat sheet (for 2018).
- Fill in the About section – Be as detailed as possible, fill in each field, and make sure you share all of the information that is important to your story.
- Share your first post – Mark the start of your page. Click here for some good advice on the types of posts you can share.
- Like your own page – Your friends on Facebook will see that and will be more likely to follow it as well.
- Tell your network – Now you can share your page through your personal profile or in relevant groups and invite people to follow it.
These are the steps you should follow to create your Facebook page. You can take a look at the other tabs and sections in the page to see how you can create events, upload photos and videos, and create albums. More details about the Facebook page sections can be found here.
How to promote your Facebook page?

Once you have set up your page, you are ready to go. Please remember that before inviting your friends, students, and connections to like it, it is a good idea to share some posts on your page. Tell the world why you created the page, the type of page content that people can expect, etc.
Once you have shared some updates on your page, you can think of ways to promote it.
Here are some tips:
- Use your network – Invite your previous and current students to like your page. After all, they are your main target audience and the people who can turn into your ambassadors. This initial audience will help you establish credibility and build a reputation.
- Don’t forget your blog – Now is the time to add a follow-up button on the blog you have already created. You could even create a short blog post announcing your new online presence (please refer to our blog article How to Start Your Personal Teaching Blog).
- Add a sign-up button for your blog posts and newsletters – You can do this through MailChimp very easily. Read more about the steps in the process here.
- Keep your page fresh and up to date – You should create posts at least two or three times a week. Share photos from educational events you attend and post updates about upcoming courses, valuable advice about e-learning, curated content from other resources you find useful, etc. You are the one who decides what types of posts to share, but make sure that they are relevant to your target audience and are mainly connected to their interests. The content should be creative and valuable to your audience, otherwise they will not be inclined to engage with it.
- Other social media channels – If you are active on other social media channels, you can tell your followers that they can now reach you through Facebook as well. Share with them your new initiative to teach online.
- Send an informative email – If you have a list of emails from your business contacts or previous customers, you can send out an informative email about your page.
- Associate with your page – Facebook allows you to plug any pages you manage and displays this information in your personal profile.
- Interact with e-learning groups in Facebook – Join groups connected to e-learning in Facebook and share your page there.
- Create Facebook ads – Here comes the real stuff. After you have gone through all of the above organic ways to promote your page, you can now start using Facebook as an advertising tool as well. Using Facebook’s targeting features, you can create ads that reach people with certain characteristics like age and location. You can use Facebook ads not only to promote your page, but also to build brand awareness, promote your upcoming online courses, gather valuable leads and contacts, and much more.
Now that you have read this article, it is up to you to create your own Facebook page. Our next article will focus on advertising options and how you can use them to achieve your marketing goals.
