Introduction
Windows 10 camera and microphone permissions when using the virtual classroom – Step by Step instructions to select which applications can use your camera and microphone.
Some applications on Windows 10 may need to access your camera and microphone devices in order to work as intended. Those programs will require your permission before they can access the webcam or your microphone. You can change these permissions in the settings of the Windows 10 OS. Windows settings give you control over which programs have allowed or denied camera/microphone access. Some video-conference apps may prevent you from accessing the virtual classroom if they are still running in the background and using your devices by default. Here’s how you can change that.
To choose which applications can use your camera and microphone. Click on the Windows Menu button which will open the Start Menu.
From the Start Menu select the Settings menu which is located directly above the Power button.

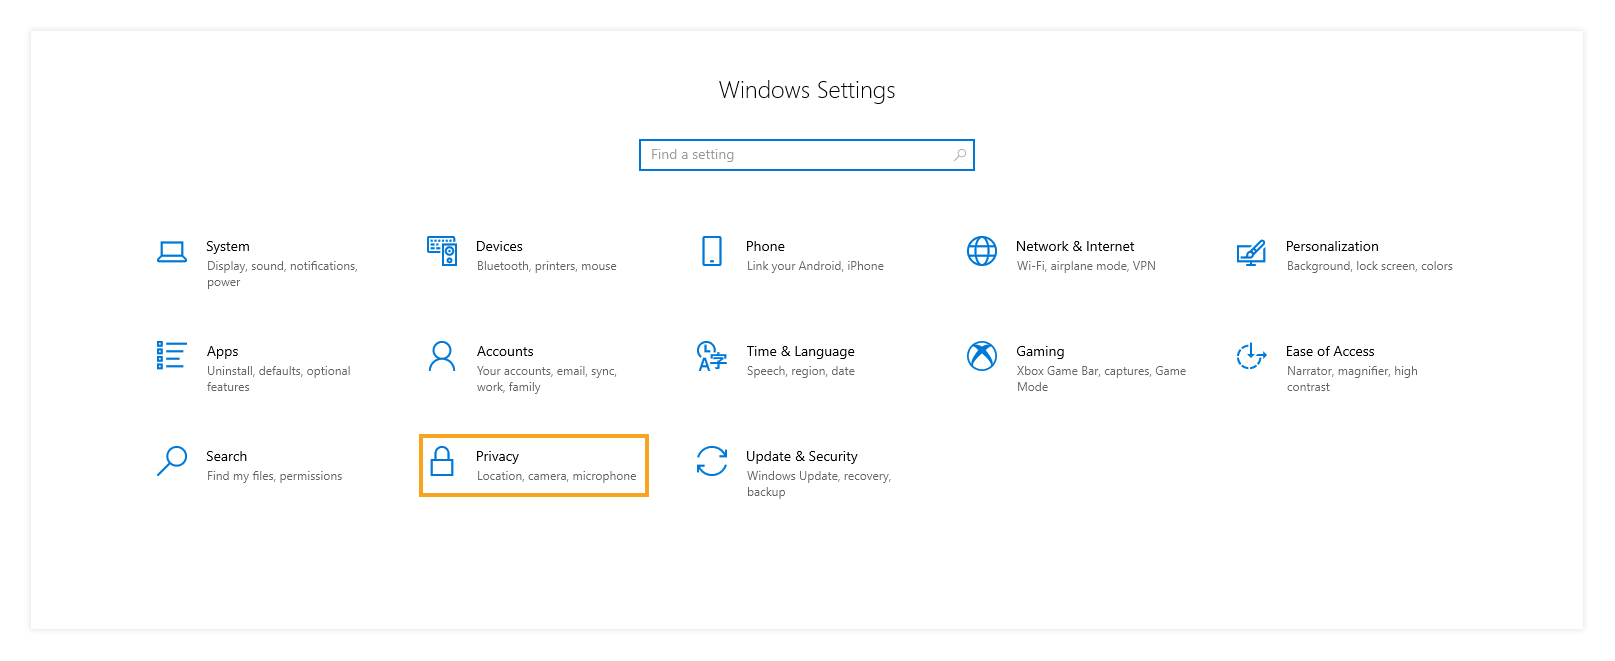
Click on the “Privacy” tab. You will see this menu:

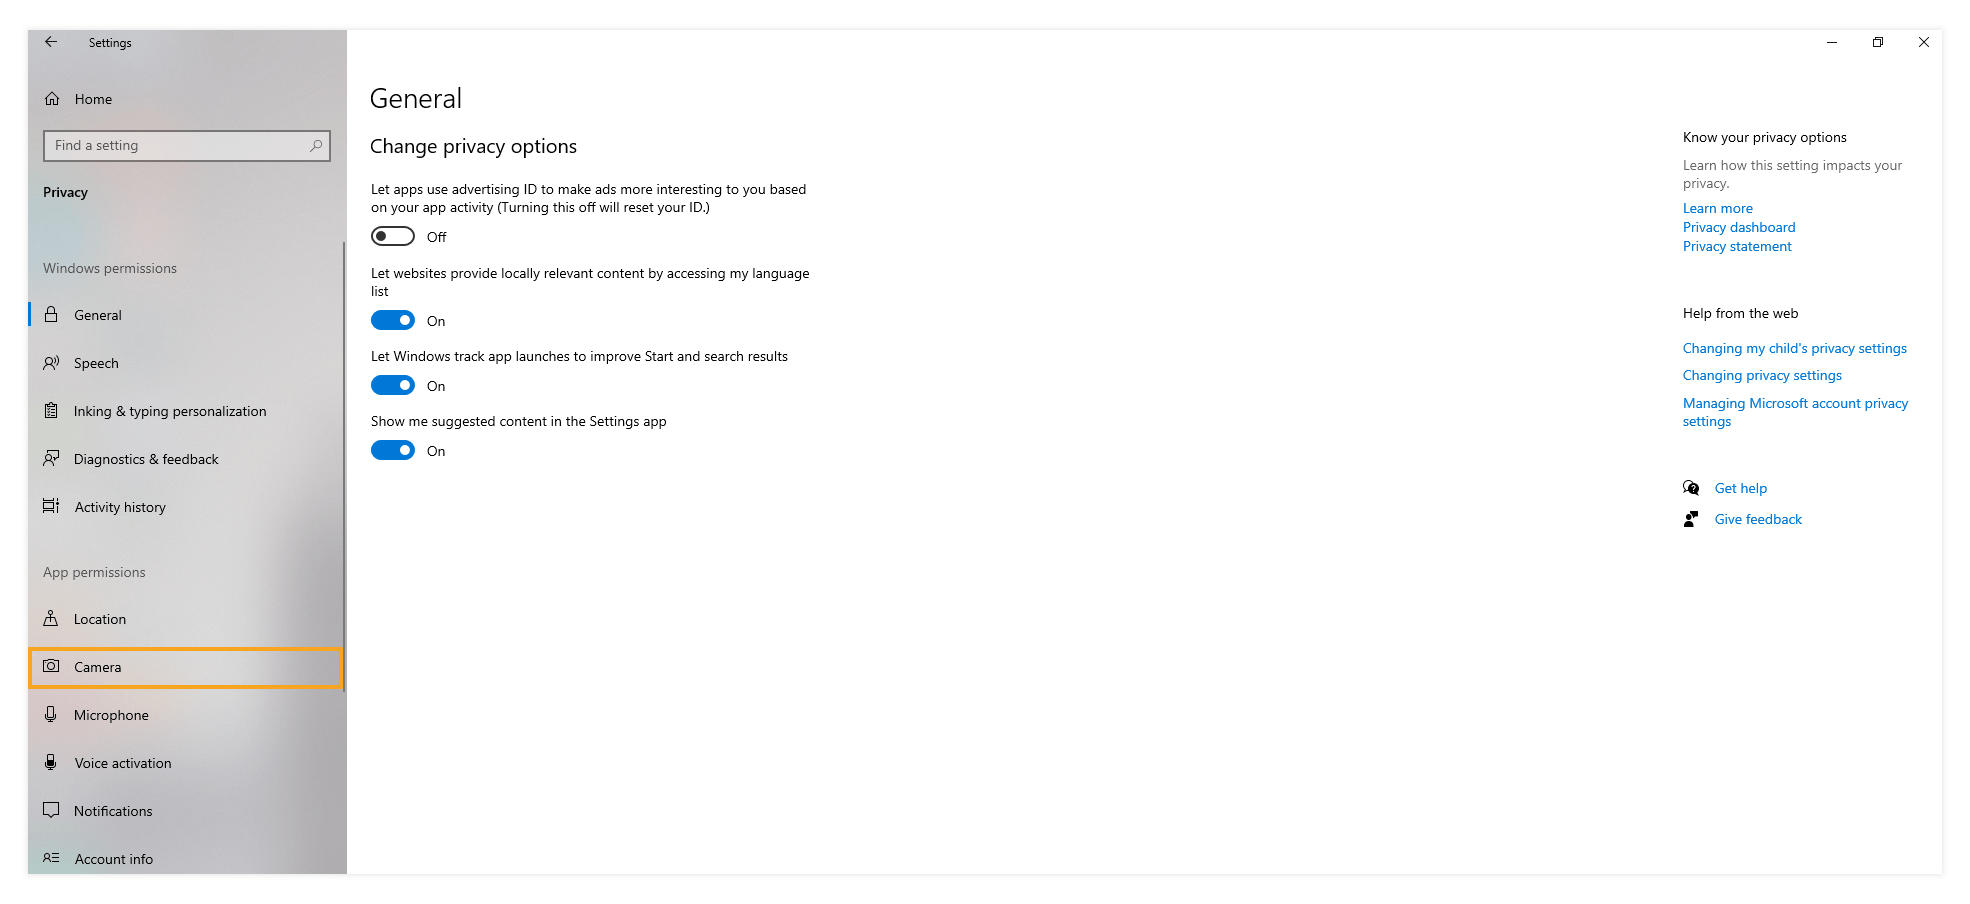
Navigate to the “Camera” section to choose which apps can use your Camera.
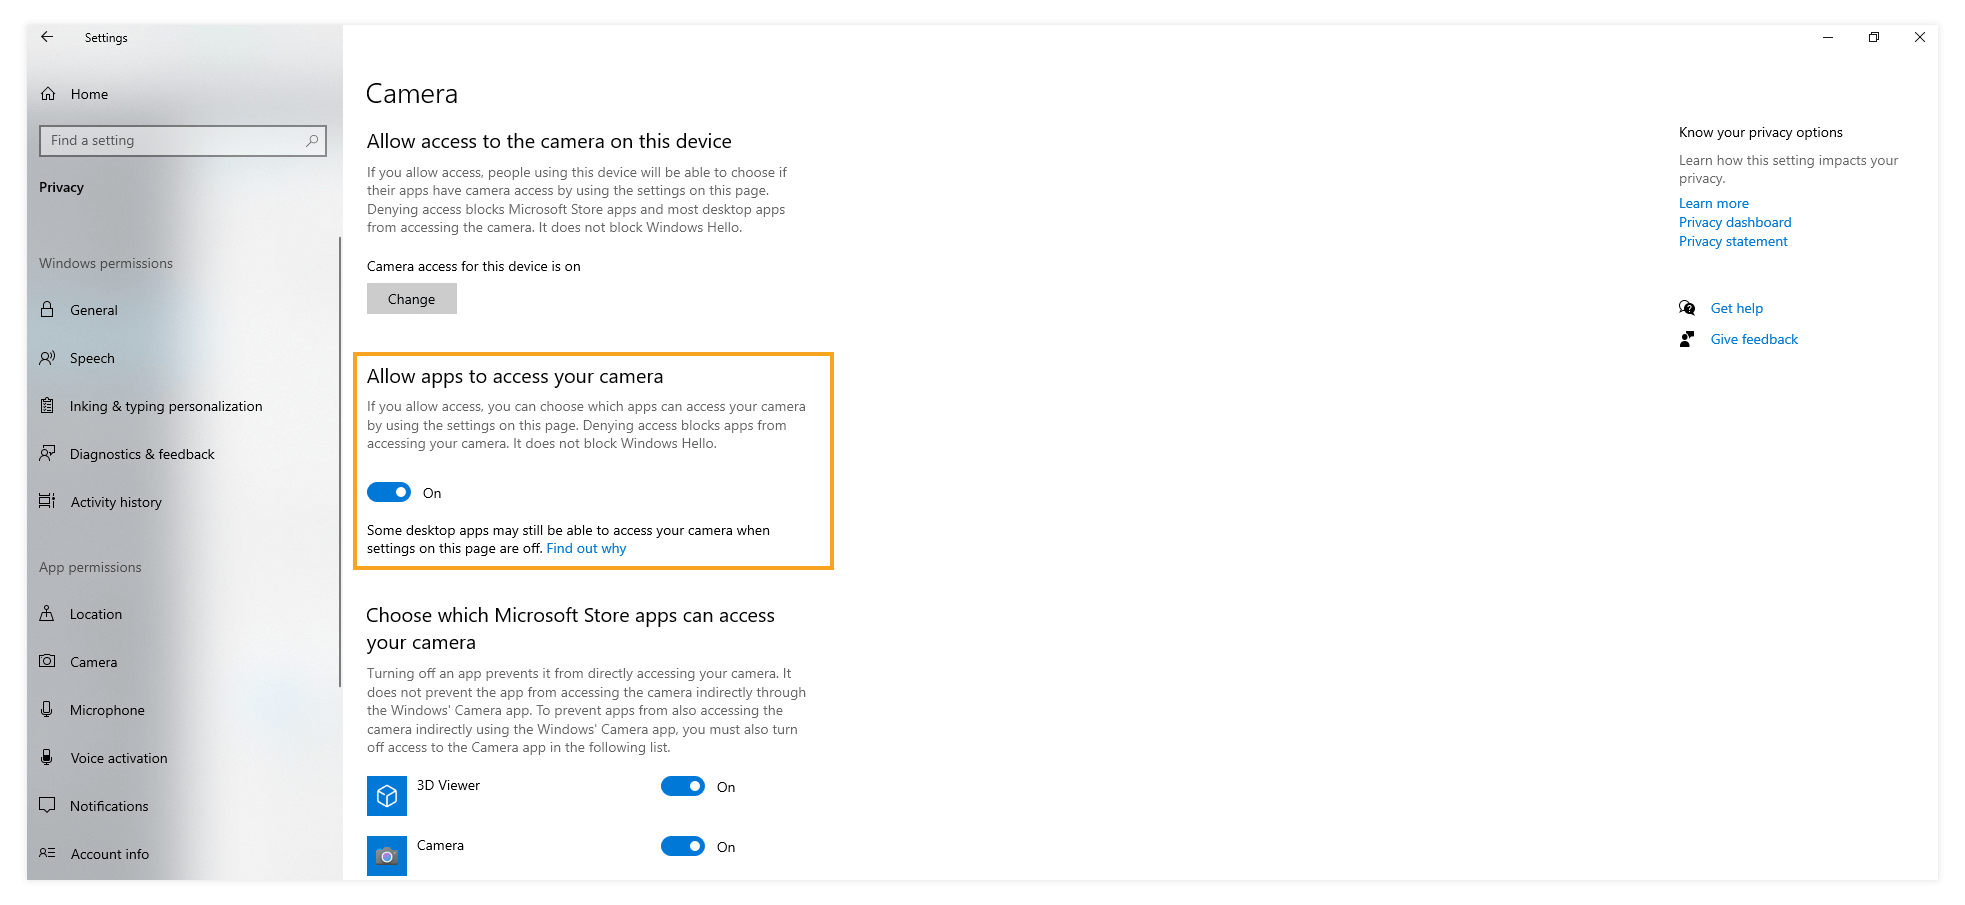
In the Camera menu, you can choose which programs can use your camera. To allow an application to use your Camera click on the slider for each individual application.

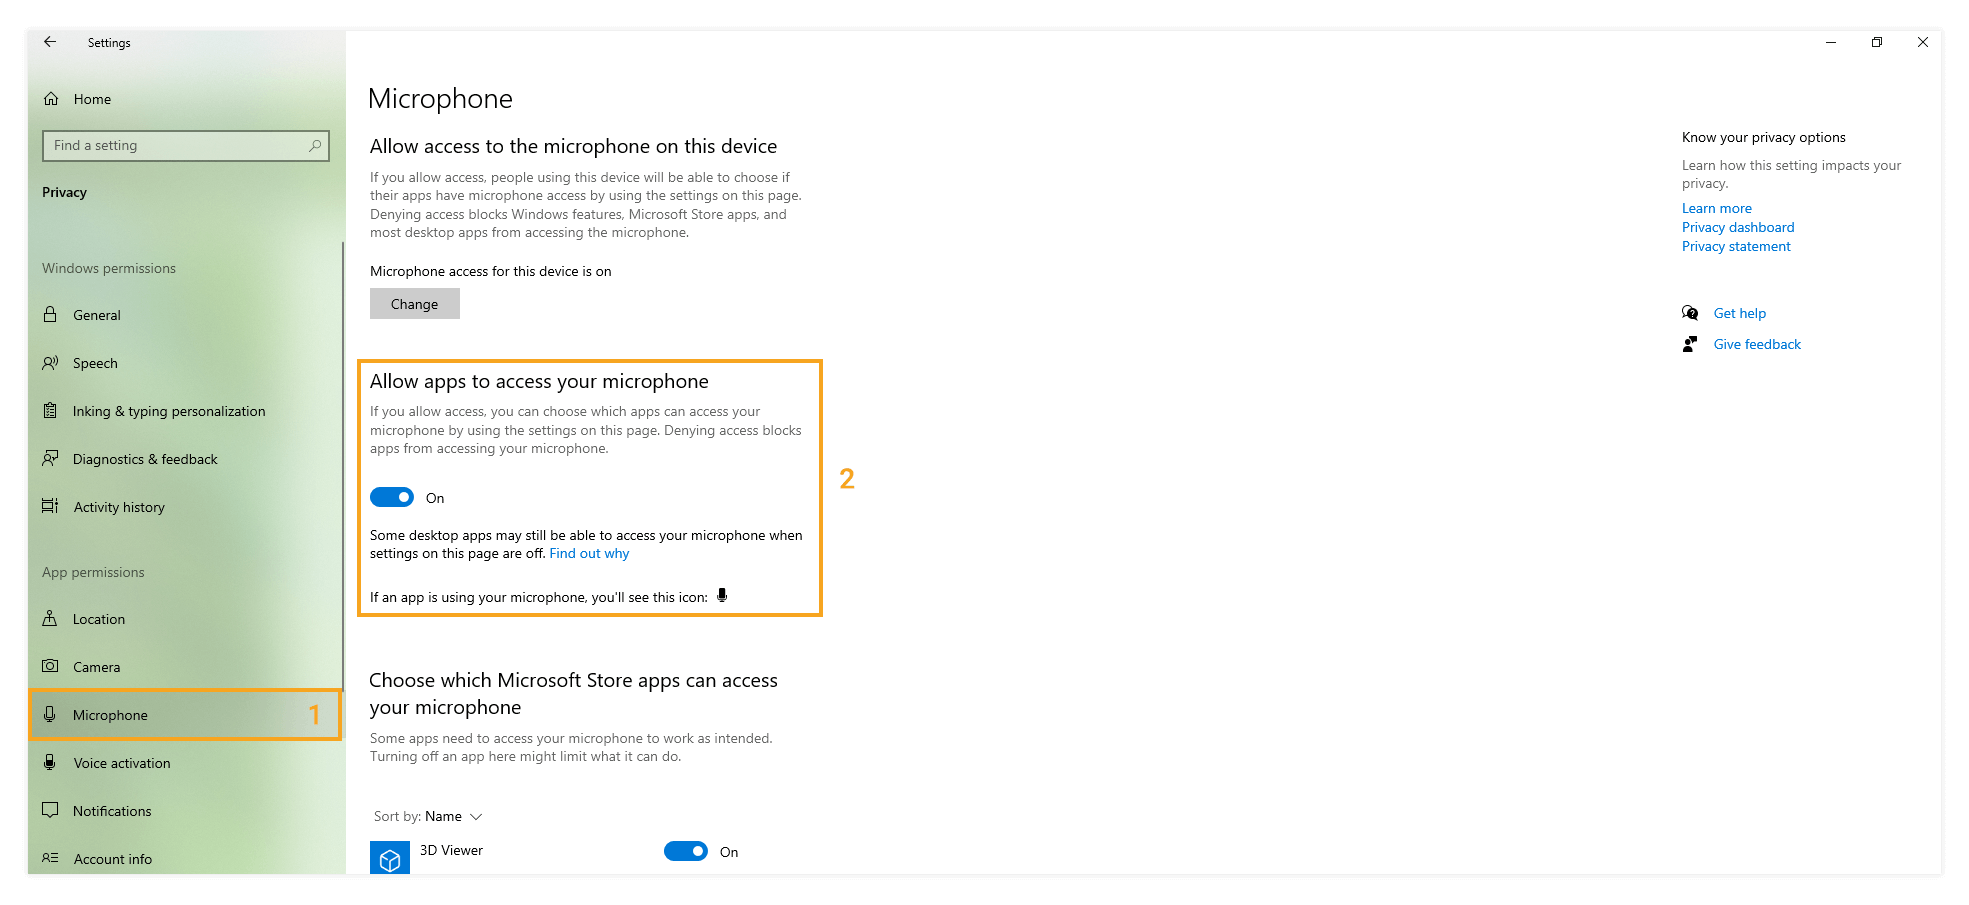
To choose which apps can use your Microphone navigate to the “Microphone” section.
In the Microphone menu, you can choose which apps can use your microphone. To allow an application to use your Microphone click on the slider for each individual application.
Once done adjusting your Camera and Microphone settings you can close the menu by clicking the button on the top right of the window.
