Introduction
Recordings of virtual classroom sessions are a feature that is available to premium customers and allows them to watch the playback of every recorded virtual classroom session. You must first log into your account in order to access the recordings.
Location
To access the interactive recordings, go to the Virtual Classrooms menu (or Sessions > Live Sessions) and find the lesson you want to watch. Click on the room’s title and then click on Play Recording. For more information go to the Virtual Classrooms article.
After clicking Play Recording you will see a window appear. Press the Play button to watch the playback.

Playback will begin and you can fast-forward, pause the video, or rewind the recording using the slider on the bottom.
Recording Controls
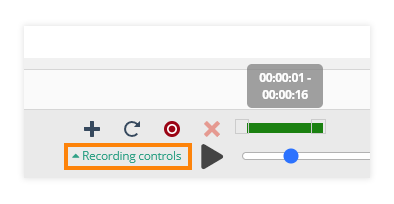
You have the option of selecting a portion of the recording to start converting it immediately. To do so open the control box labeled Recording Controls and click on the red dot icon.
You can drag the green slider to select the exact part of the recording that you would like to convert.
The curved arrow icon will allow you to clear any recording ranges you’ve set, while the plus icon will permit you to add another recording range for potential conversion.
There is also the option of converting the archive into a video file. To do this click on Convert to Video in the room details (next to Play Recording).
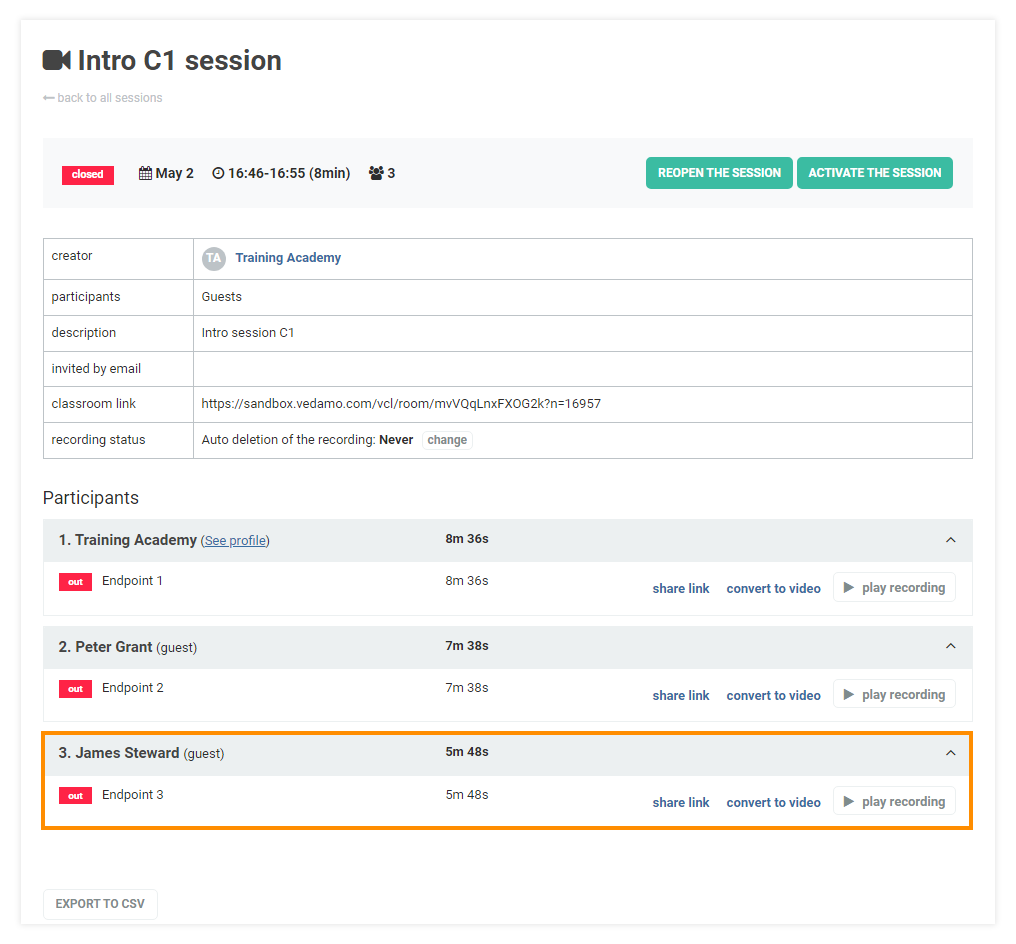
Once the conversion is finished, you can download the file. Click on the Download video button, which will appear on the same page.
You also have the option to keep recordings of your virtual classroom sessions. Navigate to the Account Settings menu > General Settings ,
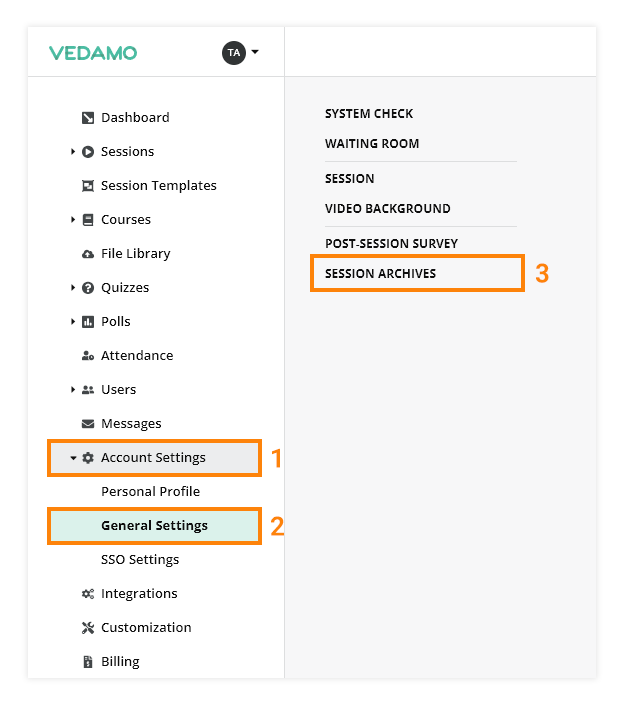
and locate the Session Achieves section.
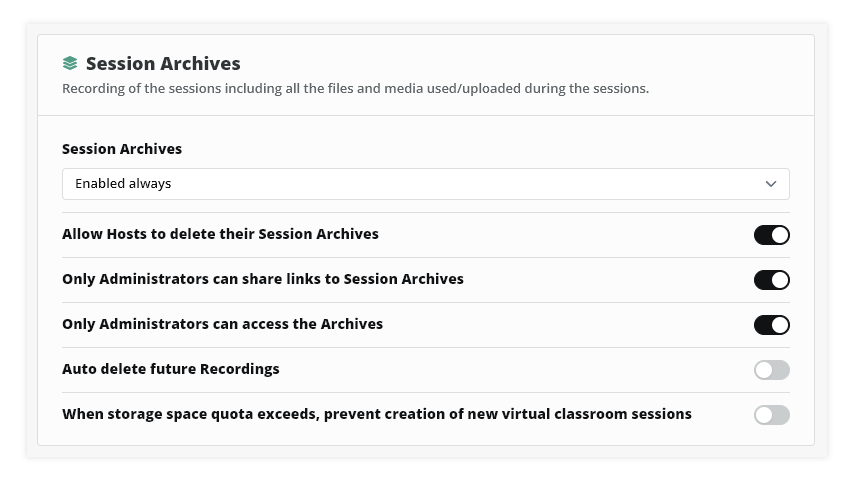
Session achieves options:

Click the Save changes button after editing the settings.
Note: The default setting is set to Enabled always.
Share the session archives
The organization and/or the hosts (depending on the general settings, see below) can give anyone access to the recording of the session. This is done by sharing a link, which can be made active for a limited time, or always be accessible.
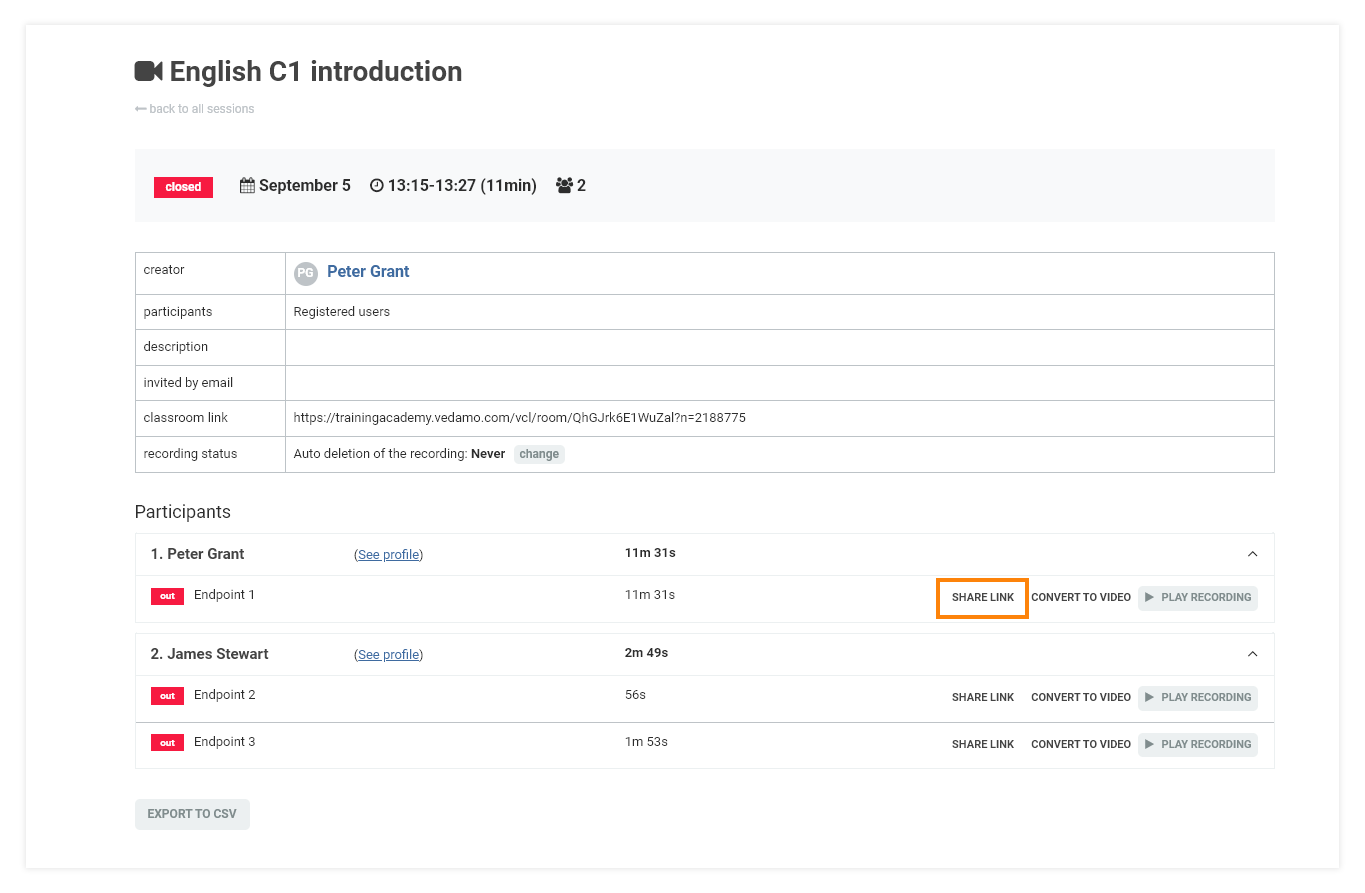
You can find the “Share link” button in your Virtual Classrooms (Live Sessions) menu: first, select the session and you’ll see it below the user’s point of view you want to share:
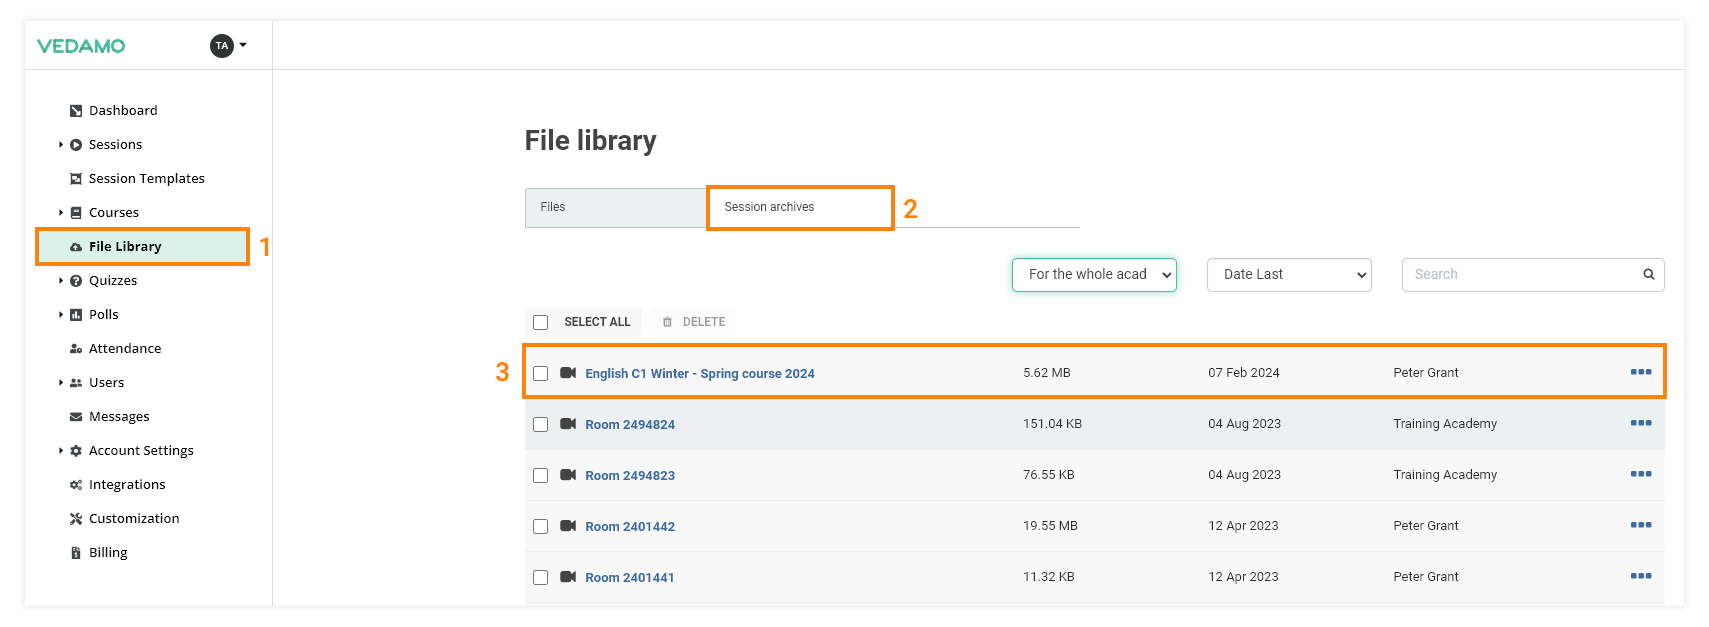
Note: You can also access your Virtual Classroom Archives from the corresponding menu in your File Library:
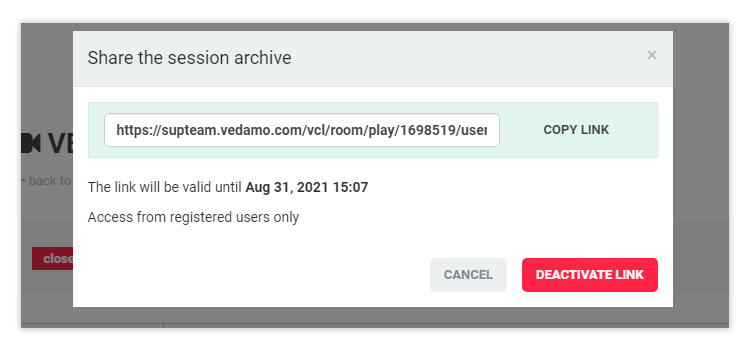
Click on the “Share link” button to open a new window, where you can set a time limit, and/or give access to the link to non-registered users. Please bear in mind that if you give access to users, who are not registered to your academy, the archive can be watched by anyone who has the link.
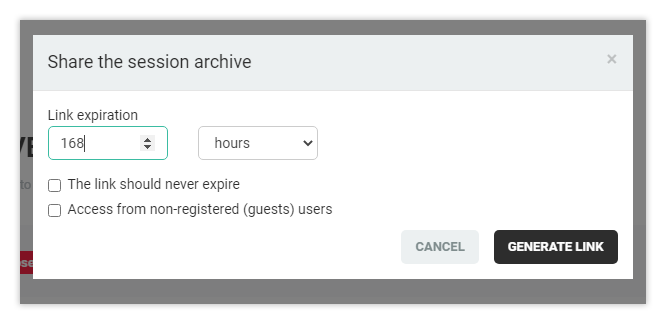
You can always deactivate the link, regardless of whether a time limit was set or not:
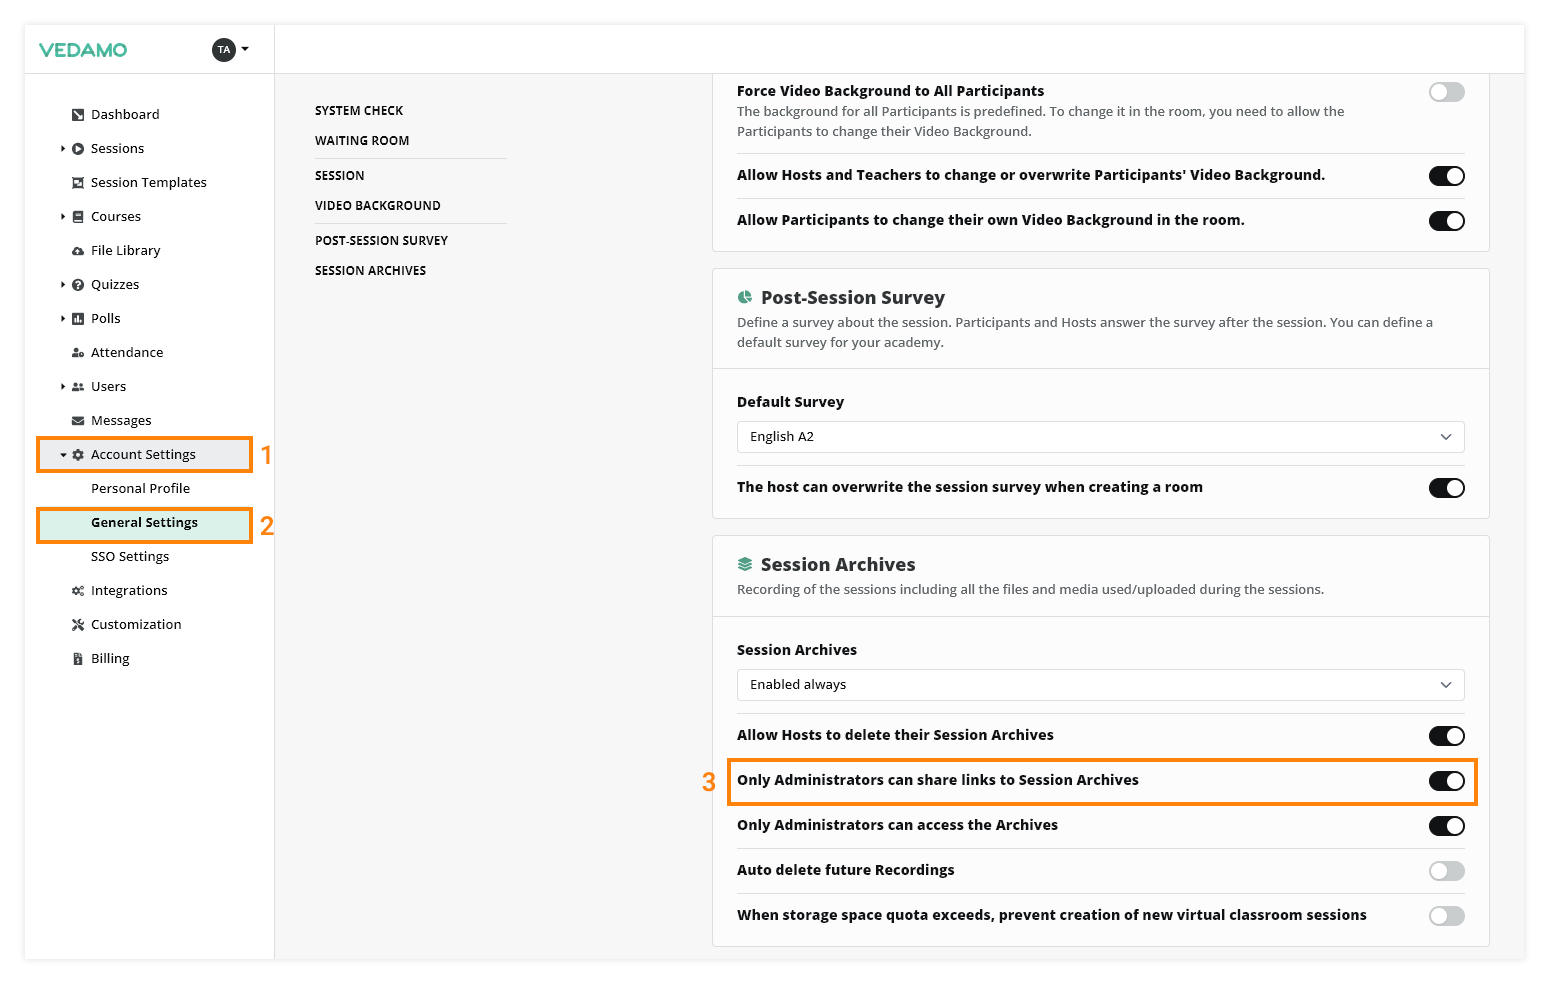
In addition, the owner of the organization account, as well as the administrators, can set a general setting to allow/disallow the hosts to share the recordings of their own session. This is located in Account Settings menu, General Settings, under the Session Archives settings:
Auto Delete Recordings
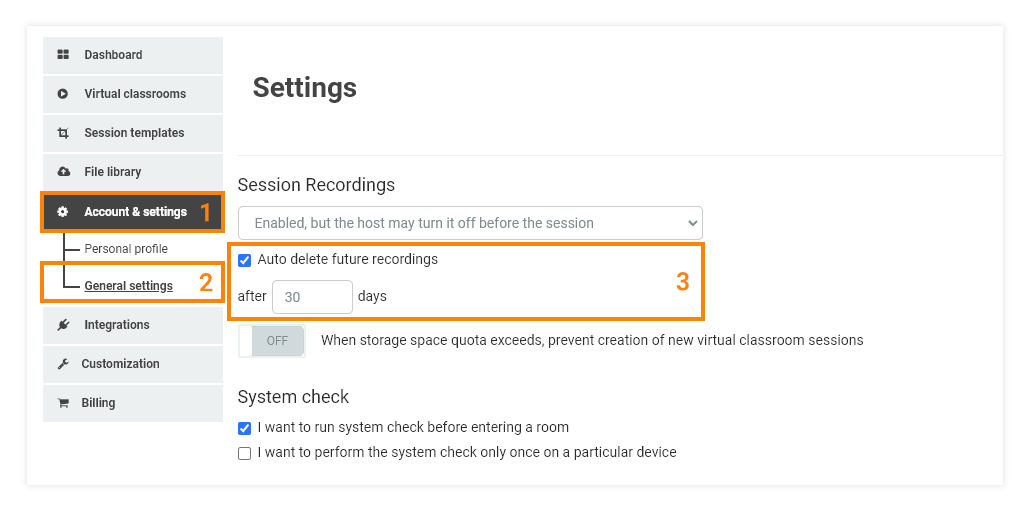
You can choose whether all future session recordings will be auto-deleted or not. A time period for deletion can be set as well. This selection can be made as follows:
In the “Accounts Settings” under section “General Settings” you will locate the “Session Archives” tab, there as a global setting you can set the “Auto Delete Recordings” feature (accessible by the organizational account and the admins).
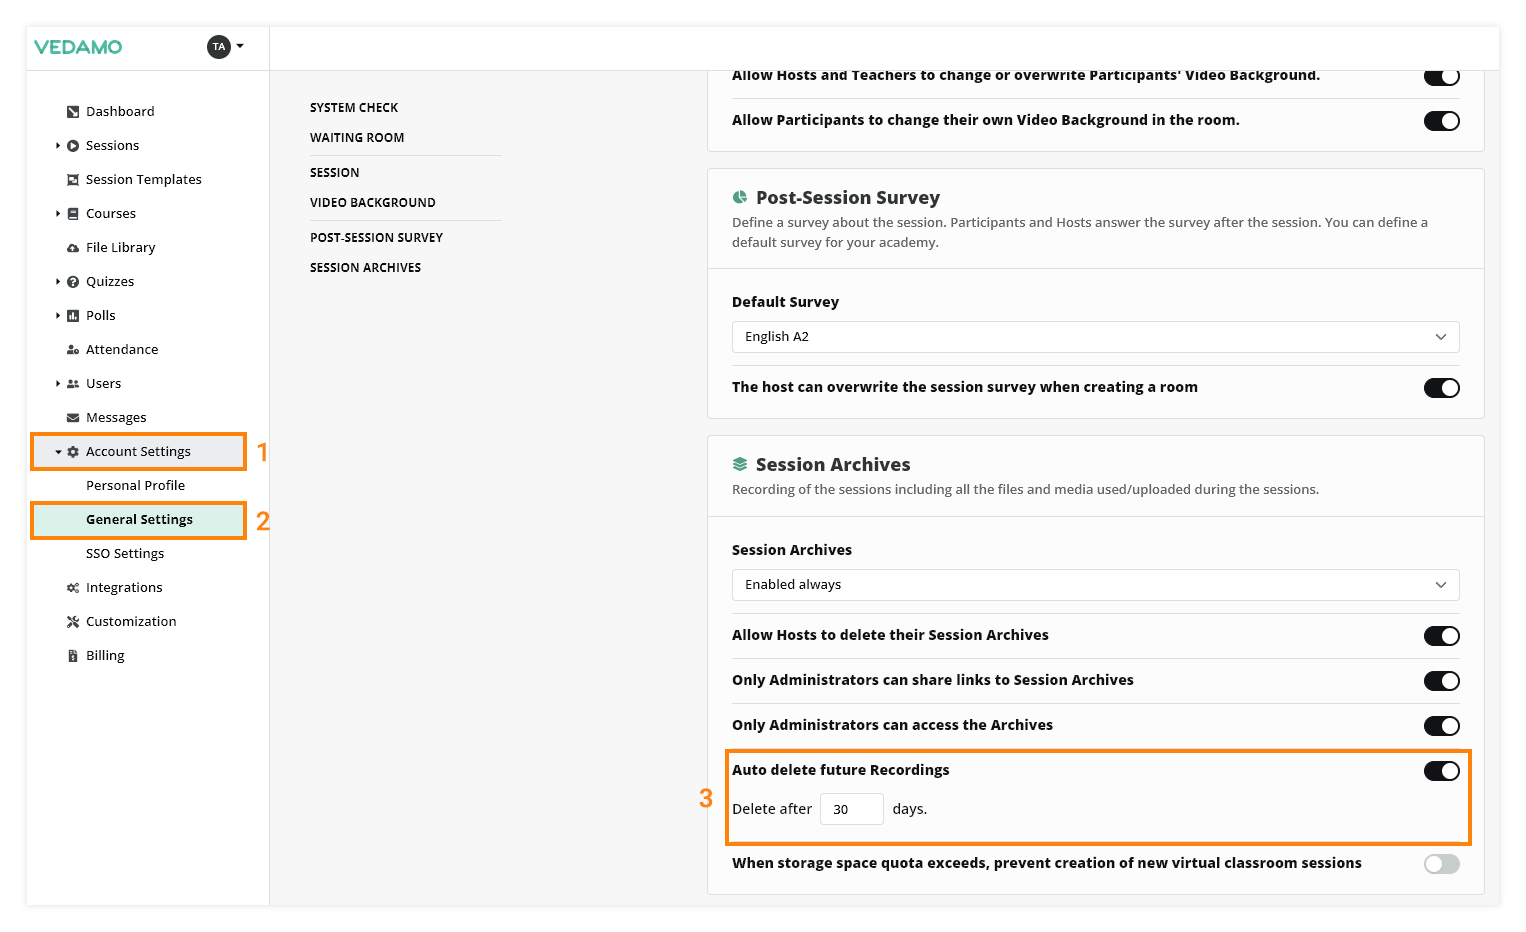
The global option is off by default. If someone from the academy (organizational account or admins) turns it on, all recordings created after this, will be included in a list for automatic deletion and will be deleted once the specified number of days have passed (counting begins from the creation of the archive).
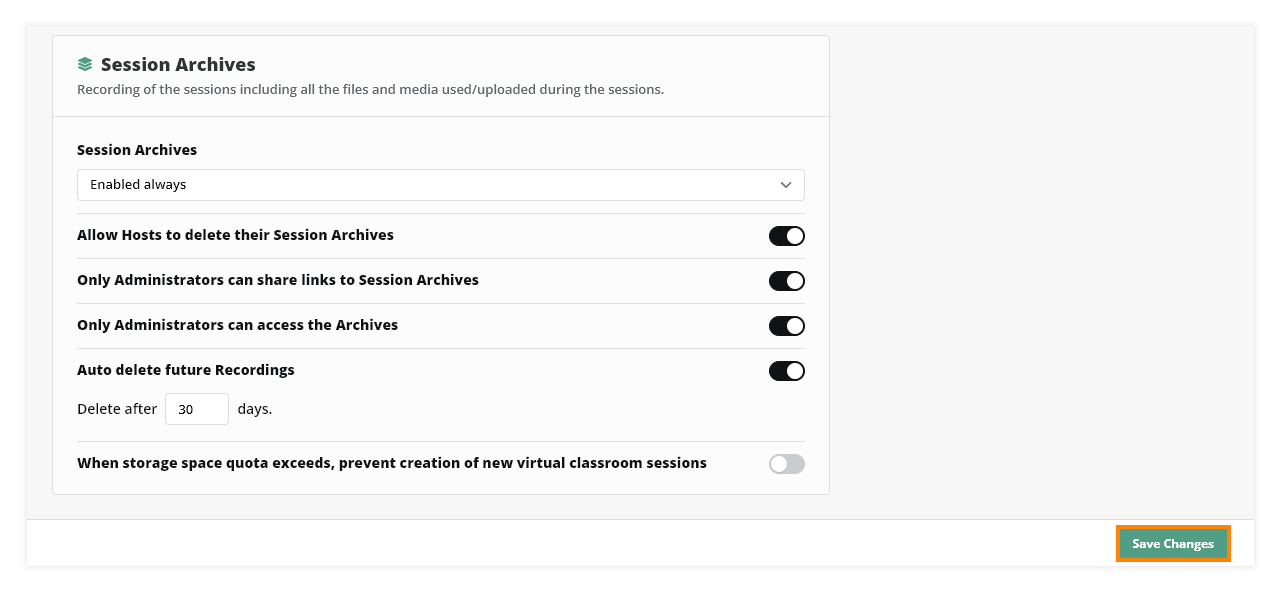
Note: Do not forget to save the changes by clicking on the green “Save changes” button at the bottom of the page.
It can also be found in the details page of a particular room and seen and managed by the organizational account and the admins. Accounts with a teacher or a user role do not have access to it.
To turn the setting on, enter the number of days and click on “Set“. You can cancel the deletion using the button labeled Cancel Deletion.
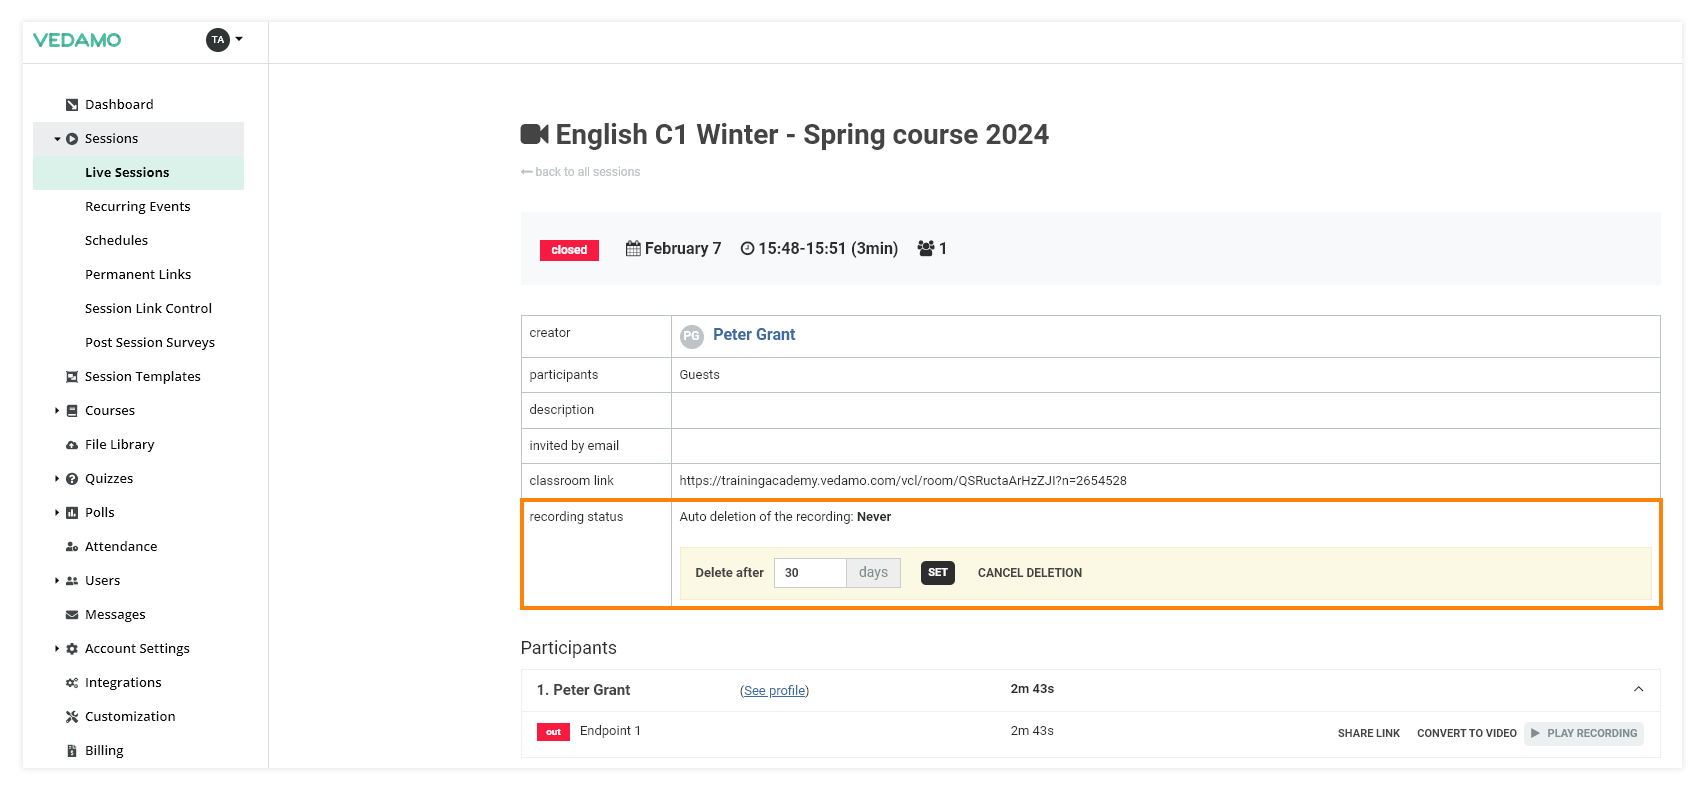
The recording status can also be checked on this page. It provides information about whether or not this archive will be automatically deleted and when.
Keep in mind that the setting for auto deletion in the details of a particular room overwrites the global setting.
To make things clearer, here’s a simple example:
The organizational account turns on the setting in “General Settings” and sets the time for all future recordings to be deleted after 30 days. Later, a few rooms with video archives are created. However, an admin decides that the recording from one of those rooms needs to remain in the system and cancels the deletion from that room’s details page. This will lead to the recording not being deleted after the 30 days have passed, but the rest of the recordings will be.
Here is another case:
The global setting is turned off. The admin (or the organizational account) decides that one or a few rooms’ archives will not be needed after some time and will take up an excessive amount of storage, so they go to these rooms’ details pages and turn the auto deletion setting on. This action will result in those recordings being deleted after the specified period of time, regardless of the global setting.
If the global setting is turned on and then later, after some time, gets turned off, all session recordings created in between those two actions will not be deleted unless the auto-deletion is set from a particular room’s details page.
For example:
The global setting is on and the deletion period is set to 30 days. After the setting is turned on, several rooms with archives are created. The admin decides that one of those rooms’ recordings will not be needed for such a long period and sets its deletion time to 10 days. A few days later the global setting is turned off. This means that all except those that were set for deletion from the page details.
Virtual classroom Plan
This setting is available in the Virtual Classroom subscription as well. The difference here is that there’s only one account that can manage it from the “Account & Settings” section, as well as from the rooms’ details pages.
