Introduction
Learning Management System Create a Package – The Packages option allows you to bundle two or more courses together. Students will be able to subscribe to the entire package rather than having to subscribe to each course individually. Only Organisation accounts have access to the Courses menu where they can create a package in an LMS.
Create a package in an LMS
In order to create a package, follow these steps:
Step 1
Log in to your learning management system with your Organisation account;
Step 2
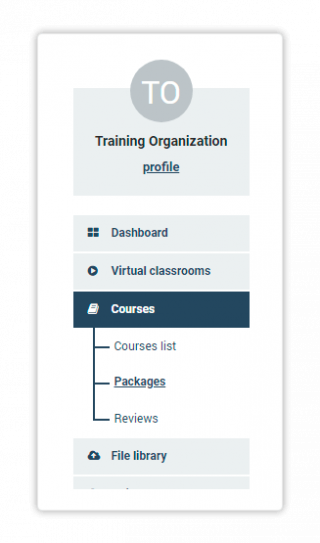
Select Courses from the menu on the left, then click on Packages;
Step 3
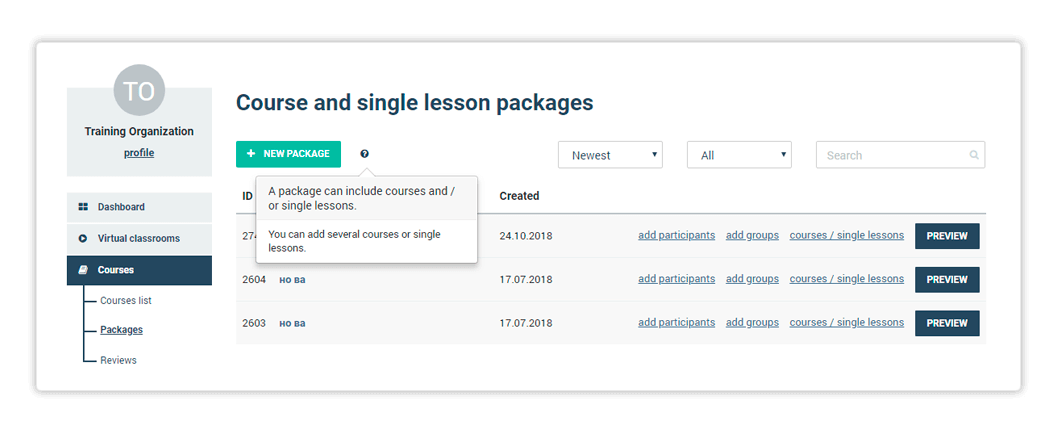
A new menu will open, where you can see a list of all the currently available packages, as well as the option to create a new one;
Step 4
In order start the package creation process, click on New package;
Step 5
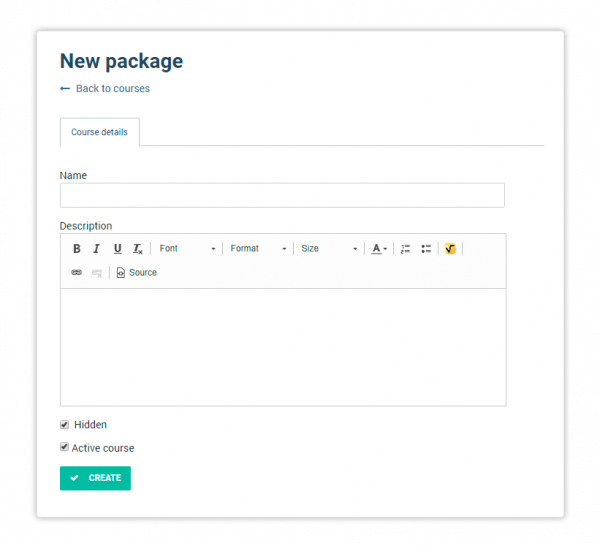
Once the package creation menu appears, there are a few fields for you to fill out:
- Name: Provide a name for your package. This field is obligatory;
- Description: Put in a description for your package. This field is optional;
- Active course: Check this to make sure that the package is available for subscription.
- Hidden: When this option is selected, the Package will not be visible in the Preview page.
Step 6
Once done, please click on Create to set up the new package;
Step 7
A couple of new tabs will open allowing you to add more information.
Package a course
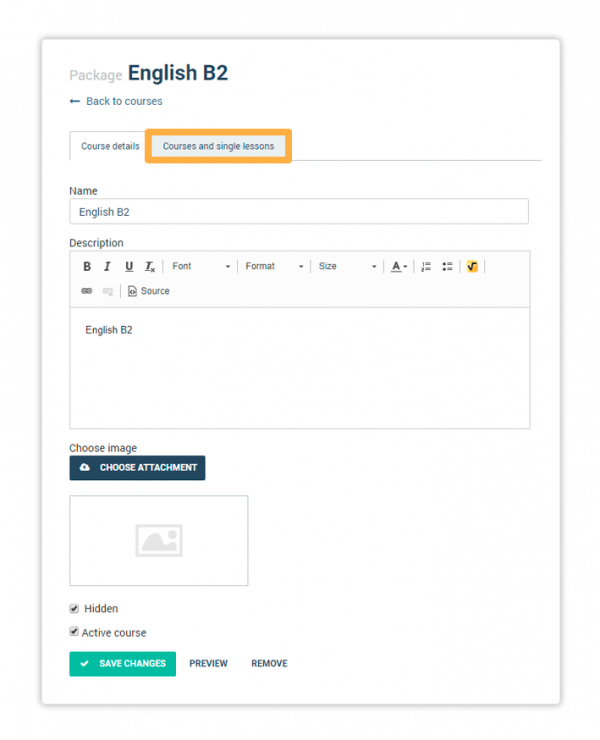
When you create a new Package you will see two additional tabs – Course details and Courses and single lessons
On the Course details tab you will see the following fields where you can put in information regarding your package:
You can review the name of your Package, upload an image for your Package and review the description.
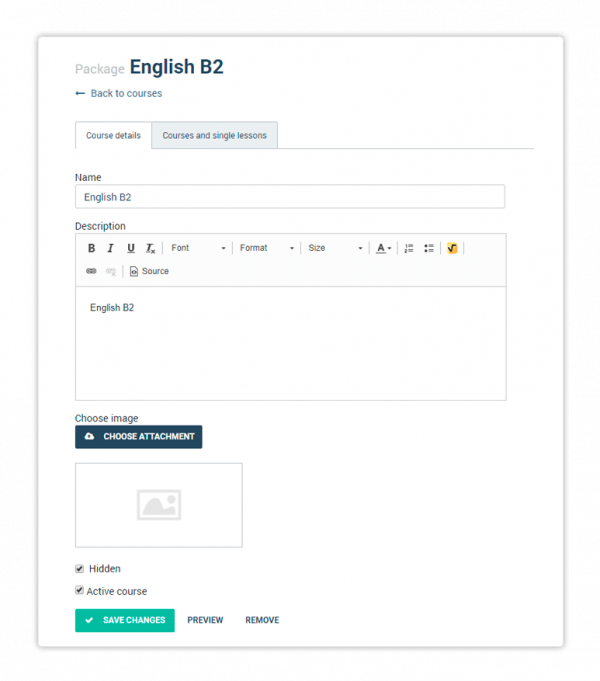
To upload an image as an attachment for the package, click on Choose attachment, select the image you want to use locally from your computer and click Open.
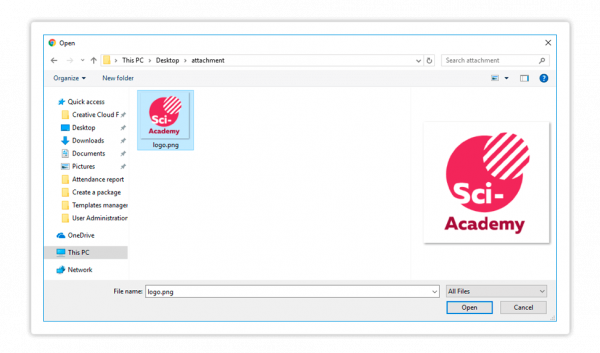
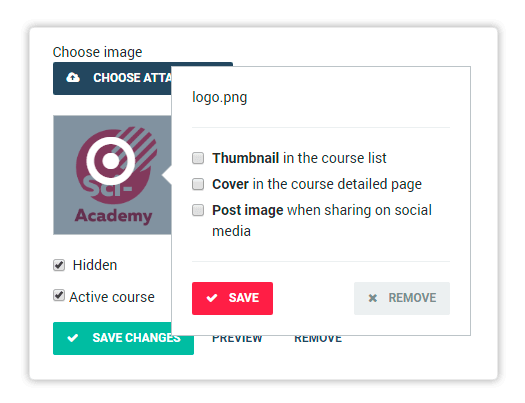
Once uploaded, click on the image and select any or all of the options below:
- Thumbnail in the course list: this option will set the image as a thumbnail in the Courses menu on your LMS.
- Cover in the course detailed page: You will use the image as a cover image for the course details page (when someone click on the thumbnail)
- Post image when sharing on social media: If you choose to share a link to your course on social media,
Click on Save to confirm.
Review the information you filled in for your package, then click on Save Changes in order to finalize its creation.
Adding a course to your package
To add a course to your Package click on Courses and single lessons.
A new menu will open.
The Courses and single lessons tab contains a list of every course that has been created in your learning management system. To add a course to a package, click on the course, e.g., Italian B1 (screenshot above), and drag and drop it into the bordered grey-colored field.
If you have not yet created a course and would like to know how to do that, you can check out the next article listed below first.
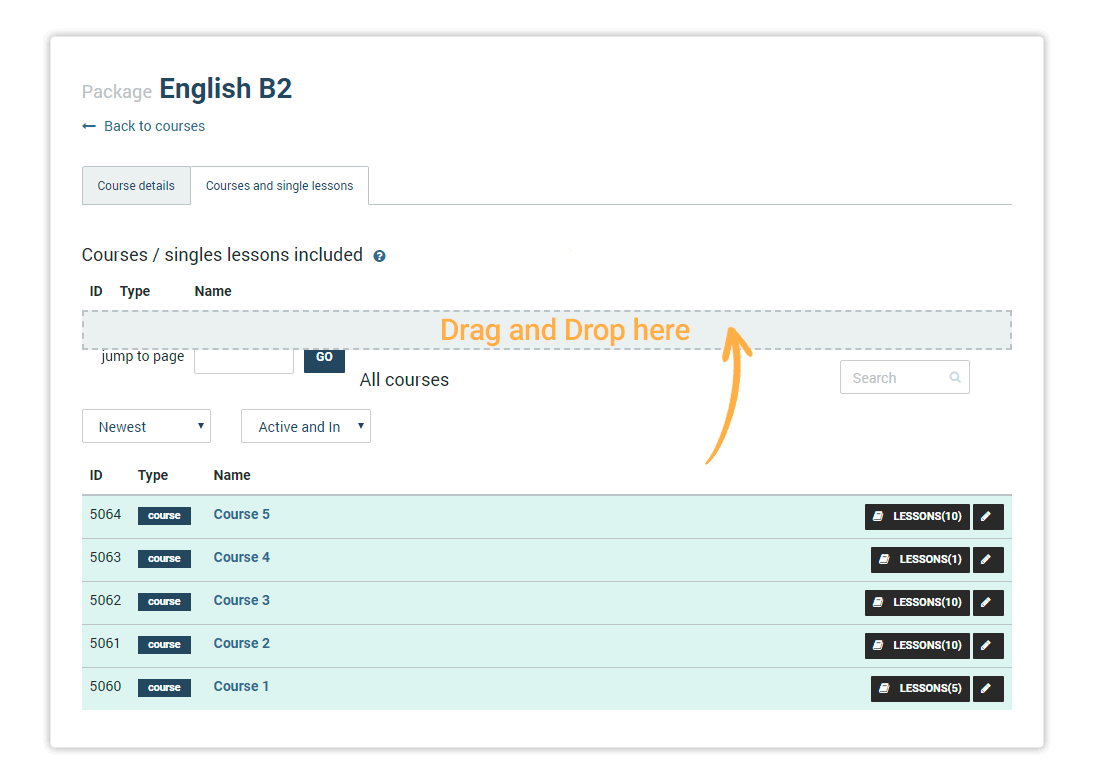
Once you drag and drop the course into the bordered grey-colored field, you will see that the field will get filled in with the course.

To save the changes, go to Course details and click on Save Changes. Once done, you can move on to choosing a teacher as well as adding lessons and sections to continue developing your course’s content. You can see how to do that in the next article.