Virtual Classroom Schedule
Creating schedules for virtual classrooms: Both plans Virtual Classroom and the LMS (Learning Management System) offer the feature of creating schedules for your virtual classroom sessions so that participants could receive an invitation link for them and be aware of the starting and finishing date and time of each one of your sessions.
How to create schedules:
To set a Virtual classroom schedule, you need to log in with your account and access the “Virtual classrooms” tab on the left side of your screen. You then need to select the “Schedules” so you can access the schedules menu.
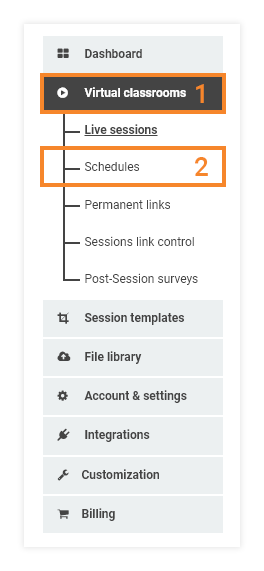
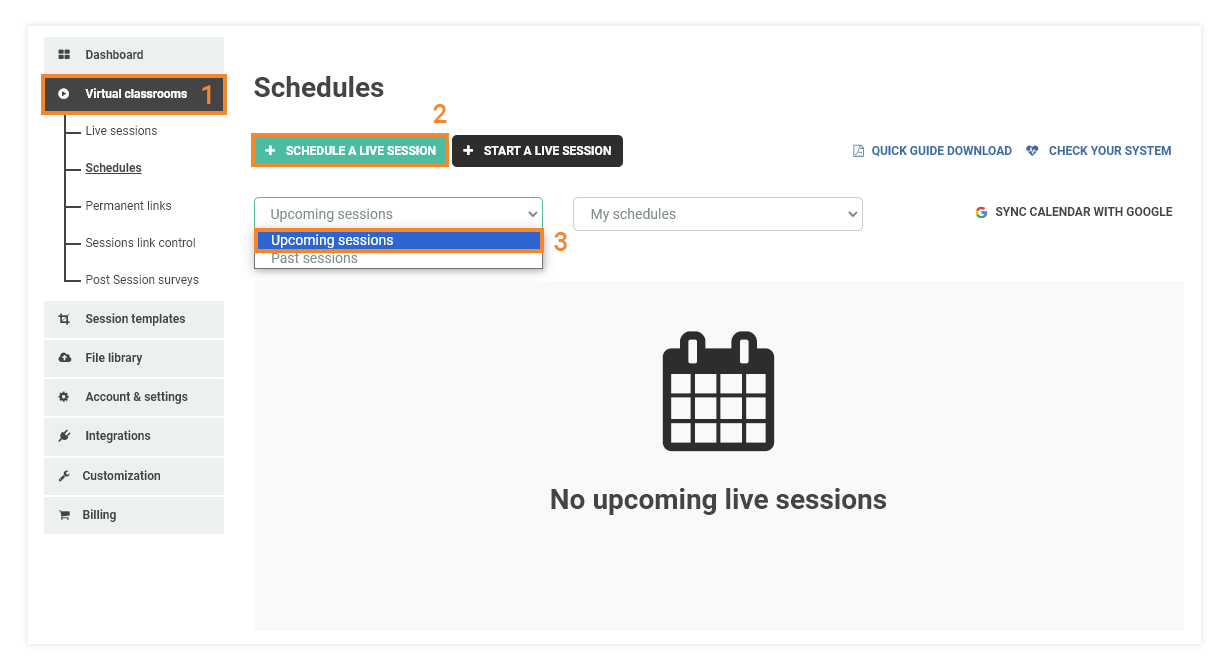
To create an upcoming session, click on the “Schedule a live session” button.
From the same menu panel, you can also see all upcoming and previous sessions by using the drop-down menu on the left side.
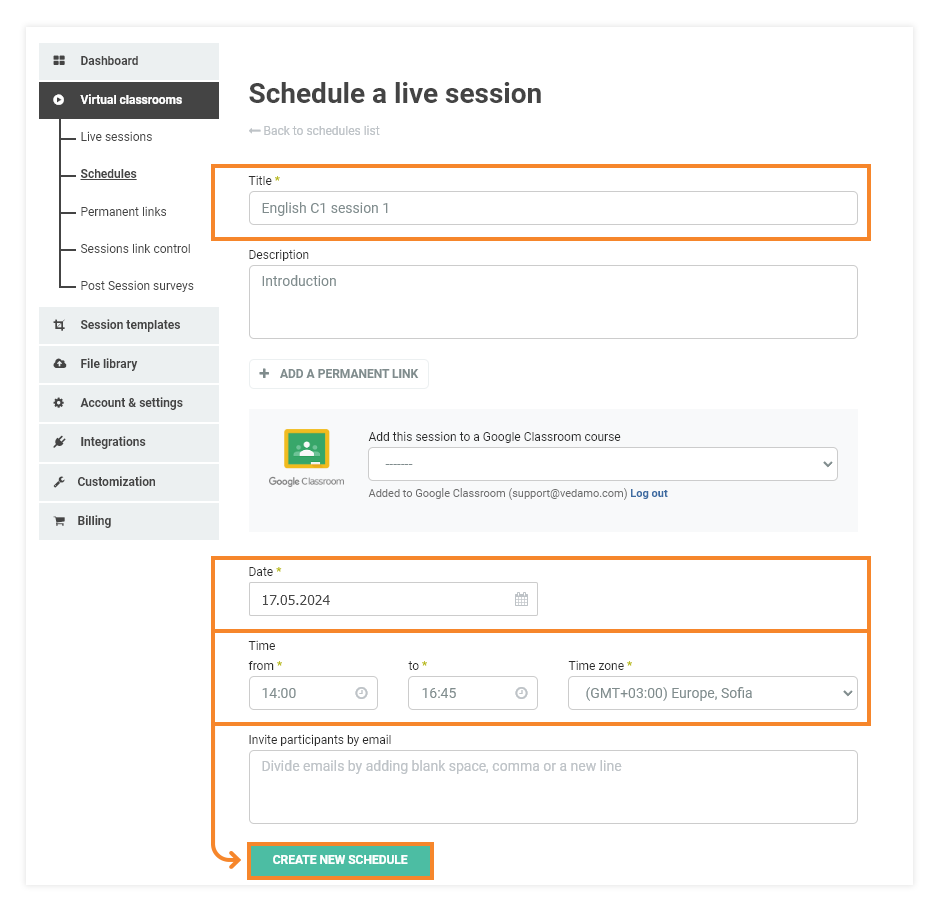
Once you click on “Schedule a live session” a new page will open where you need to choose a title for the schedule, add a description set the date and time of the session, your local time zone as well as add the emails of the desired participants.
Note: Тhe marked (with a star icon) rows are mandatory.
Once done click on the Create new schedule button so you can proceed further.
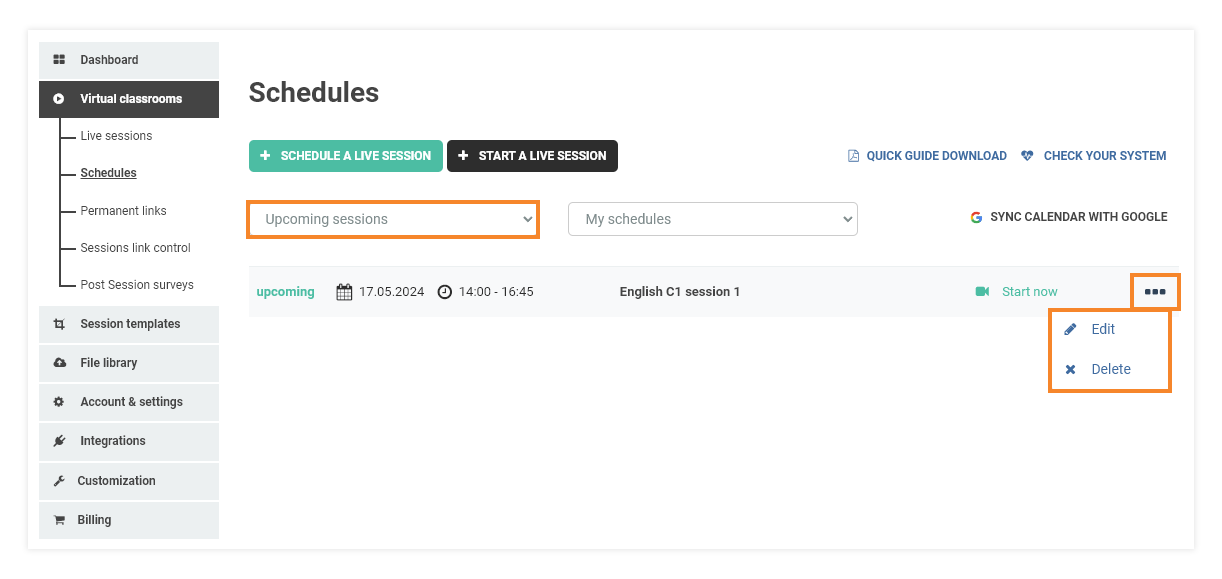
Incoming see access to all upcoming virtual classroom schedules you have created, also you will be able to edit or delete them by clicking on the three dots sign on the right side of any given schedule.
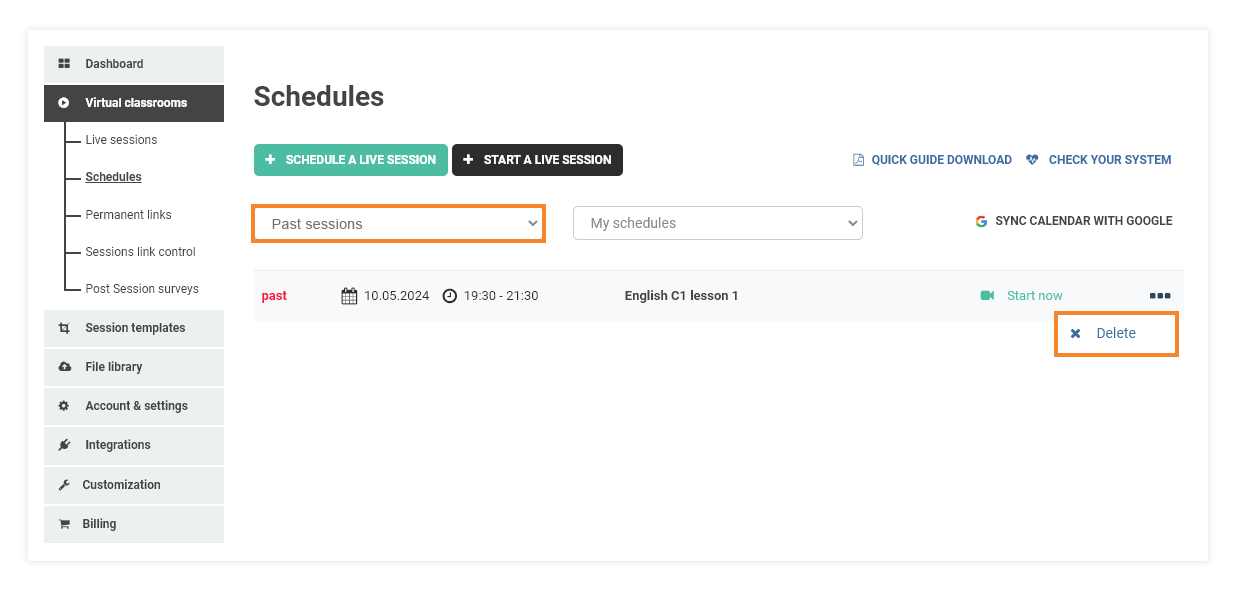
Past virtual classroom schedules can be deleted only by clicking on the three dots sign on the right side of any given schedule, after clicking on the Past sessions button first.
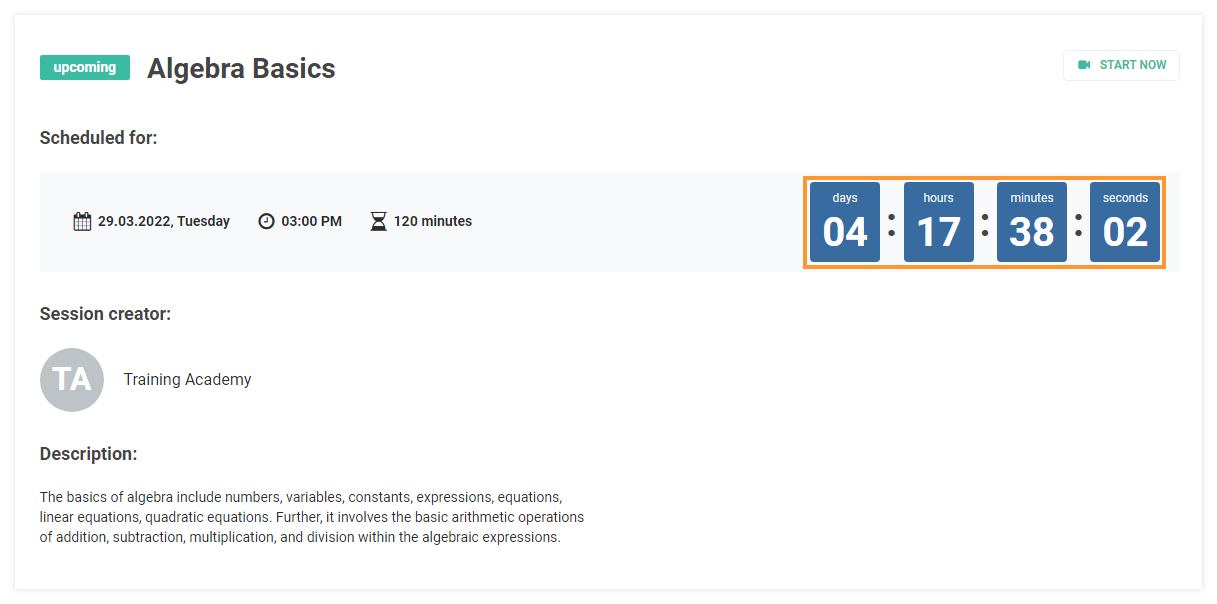
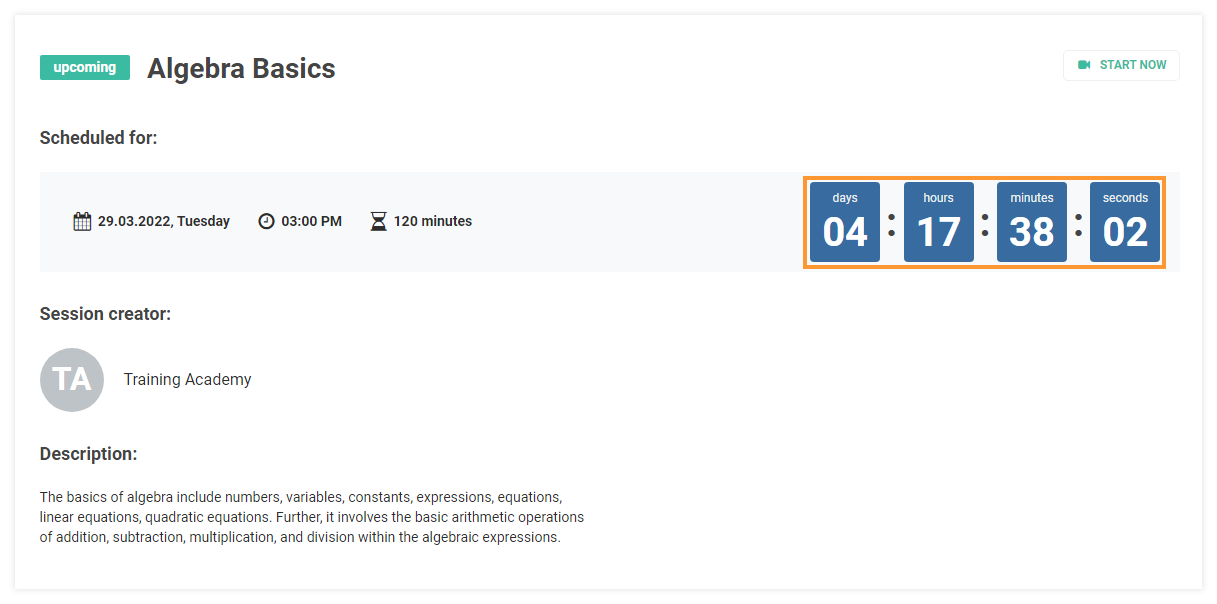
If you click on the session name you will be greeted with the full details of the scheduled session: name of the teacher, countdown timer (to the start of the session) and you can share the session as an activity in Google Classroom.
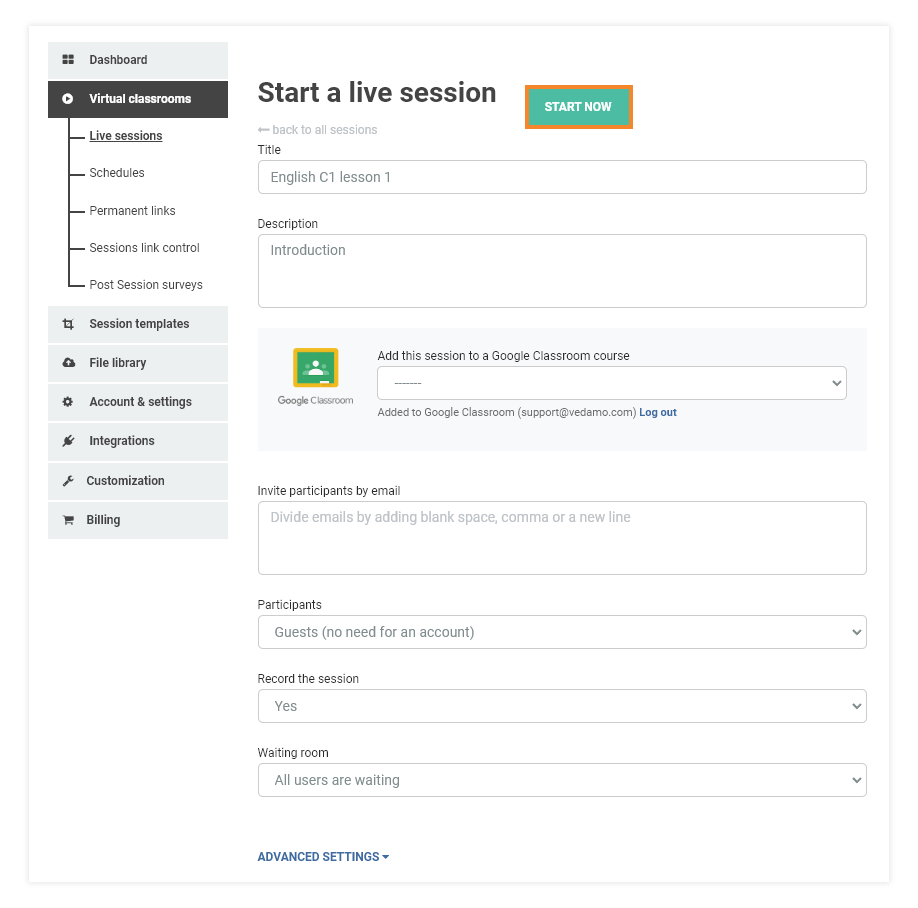
If you select the “Start now” button (in any of the previous pages) you will be redirected to the Virtual classroom opening page where you can still edit the Title, Description and invite additional participants by email. Pressing the “Start now” button will open the room.
Schedule a VEDAMO Virtual classroom session integrated with Google Classroom.
The integration steps with Google Classroom when scheduling VEDAMO Virtual Classroom sessions are the same as when you are starting a Live Session. Once you connect successfully with your Google account you will have the option to add a scheduled Virtual Classroom session to your Google Classroom course, same as when starting a Virtual Classroom.
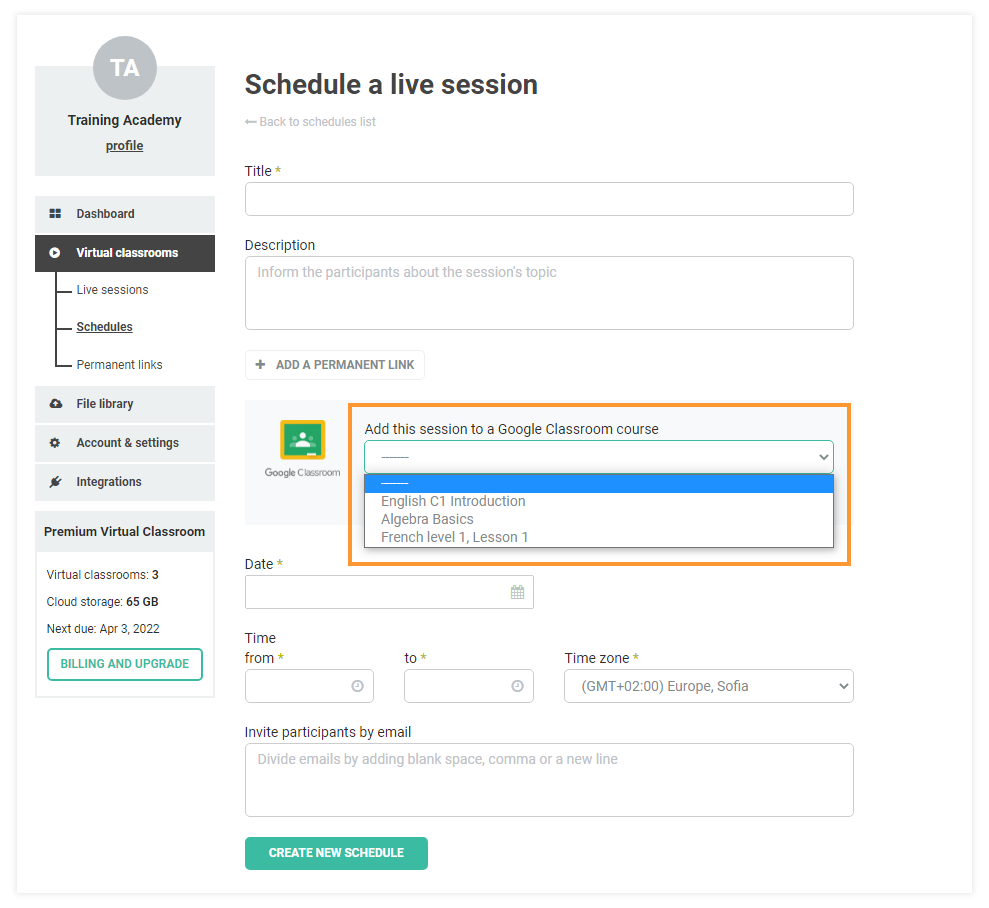
When you make the selection and add all specific details such as title, date, and time for your upcoming session simply press “Create New Schedule”.
From the drop-down menu, you will see your Courses from Google Classroom and you can choose to which one you want to attach a Virtual Classroom Schedule. As soon as you choose the Google Classroom course and create the schedule, it will automatically become visible in your Google Classroom course.
How will my students see the scheduled session in Google Classroom?
The Scheduled session will show in the tab of the Course to which it was assigned in Google Classroom as shown below:

When a student clicks on the newly created assignment they will be prompted to a page where they can see details of the upcoming scheduled assignment:
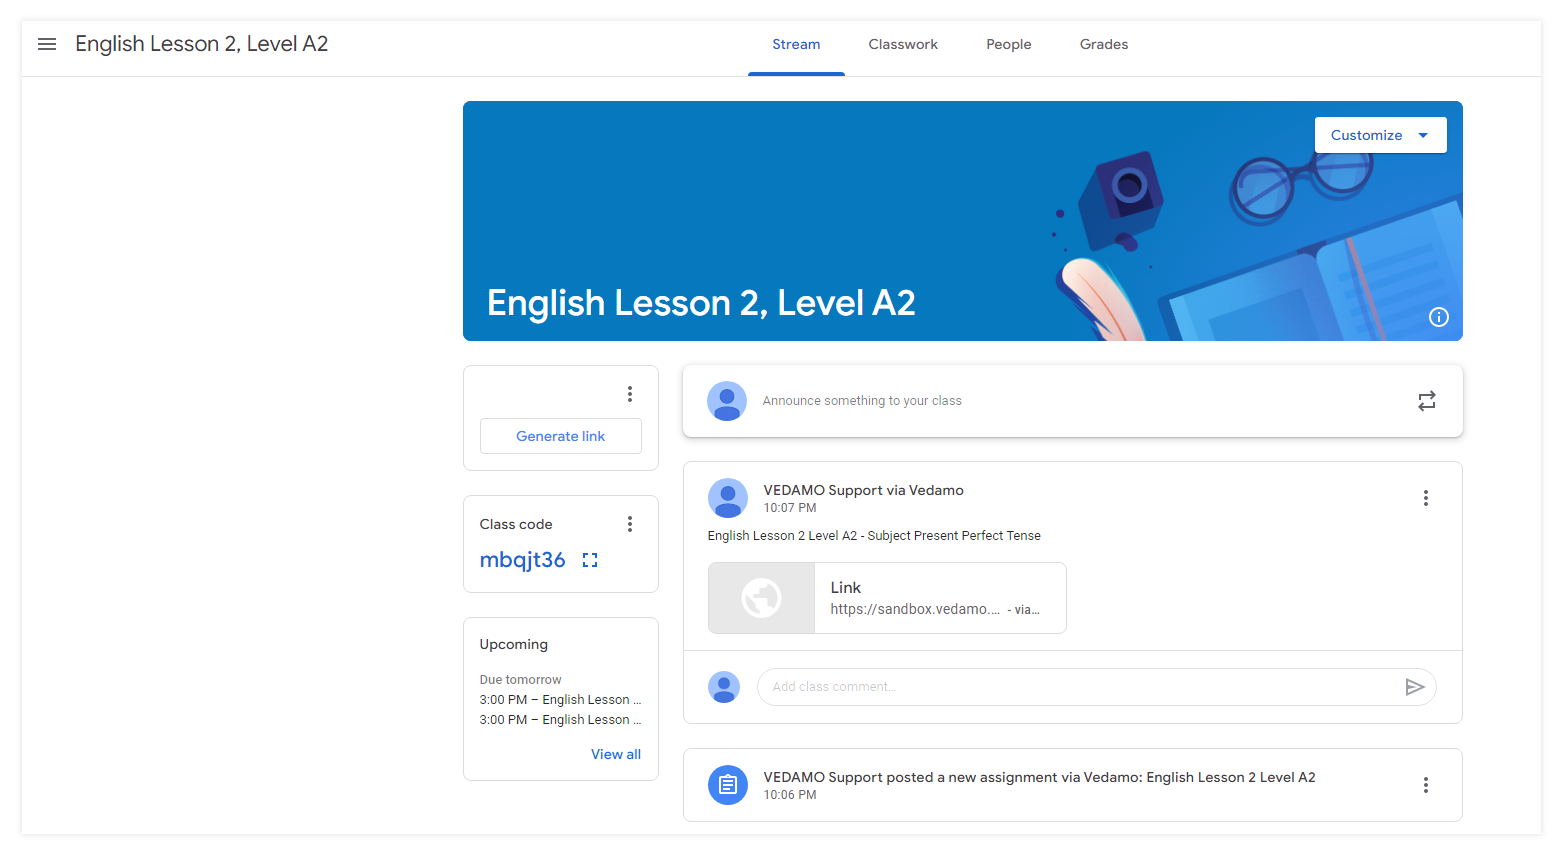
When the student follows the link to a scheduled classroom they will be redirected to the VEDAMO page where they will view details of the remaining time until their scheduled Virtual Classroom session will start:
