Virtual Classroom Online Whiteboard Tools
The online whiteboard is the primary interactive element of the Virtual Classroom. It’s a white background where you can upload files, draw a variety of shapes, type text, and basically do anything you would on a physical whiteboard. In order to make all that possible, the whiteboard comes with a variety of tools, which allow you to create and modify items, as well as modify your view depending on your needs. Below is a table detailing all of the available Virtual Classroom online whiteboard tools.
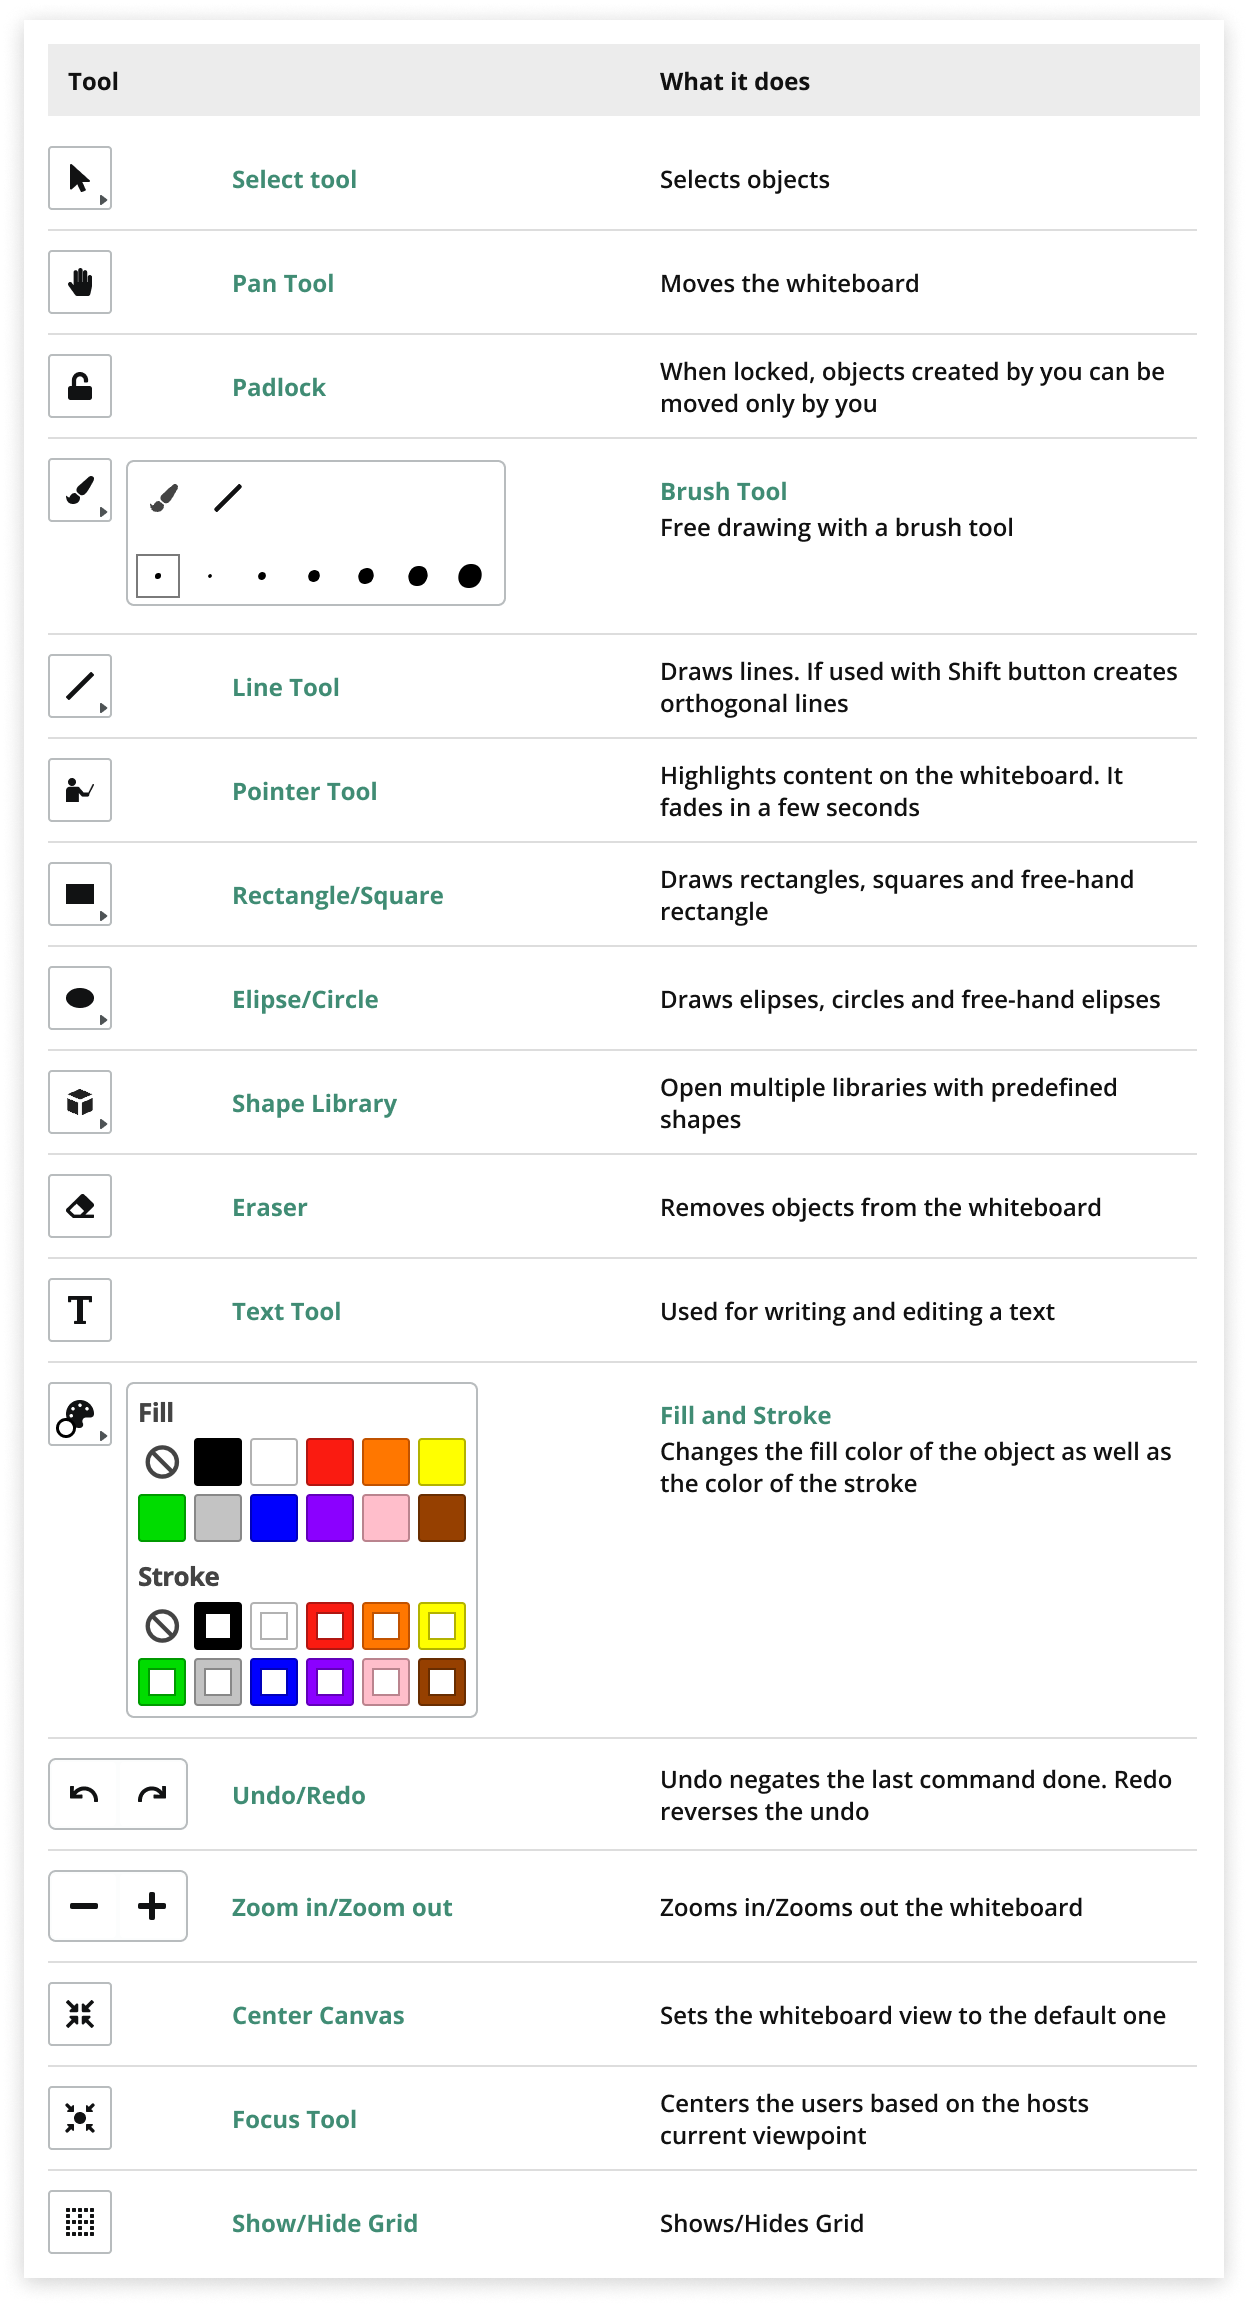
The following tools are visible only when you select an object with the select tool.
We will continue with a breakdown of the above tools, their functions, and tips on utilizing them on the whiteboard.
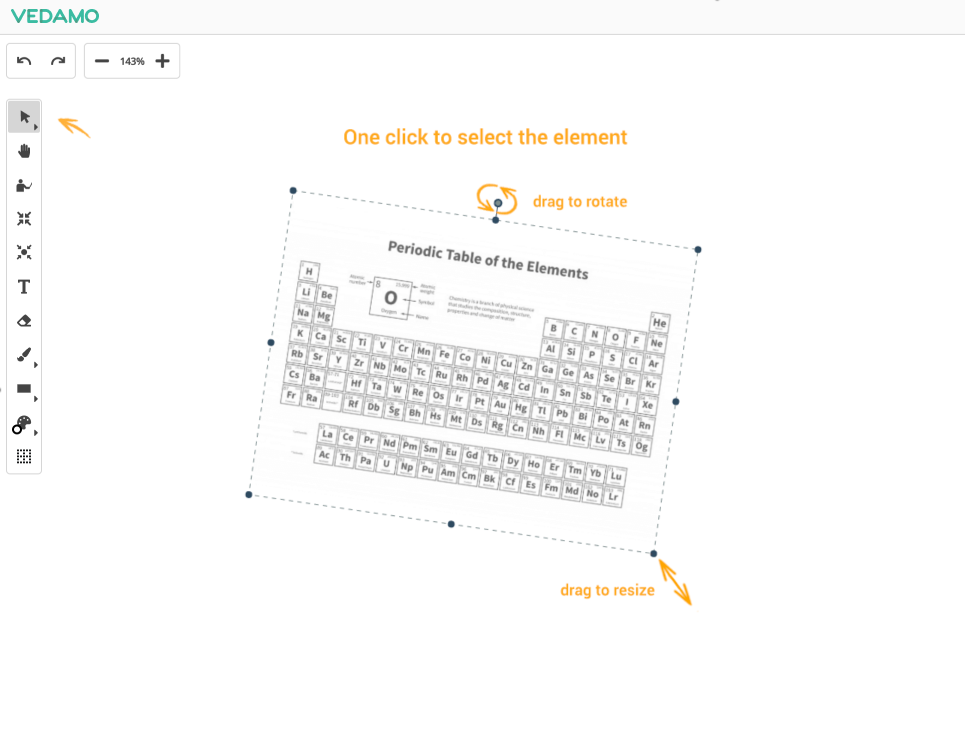
To select objects on the whiteboard, click on the select tool (Mouse pointer icon), then on the element you want to edit. Once you have selected the element you will see markers for resizing and rotating. You can use this both for files you have imported on the whiteboard, as well as objects you have created using one of the other Virtual Classroom online whiteboard tools.
The pan tool (Pan) allows you to move the whiteboard in order to see all of the objects in the room more clearly. The whiteboard has no specific borders and you can move around it infinitely in any direction. The part of the dashboard you can see at any time is only limited by your screen resolution.
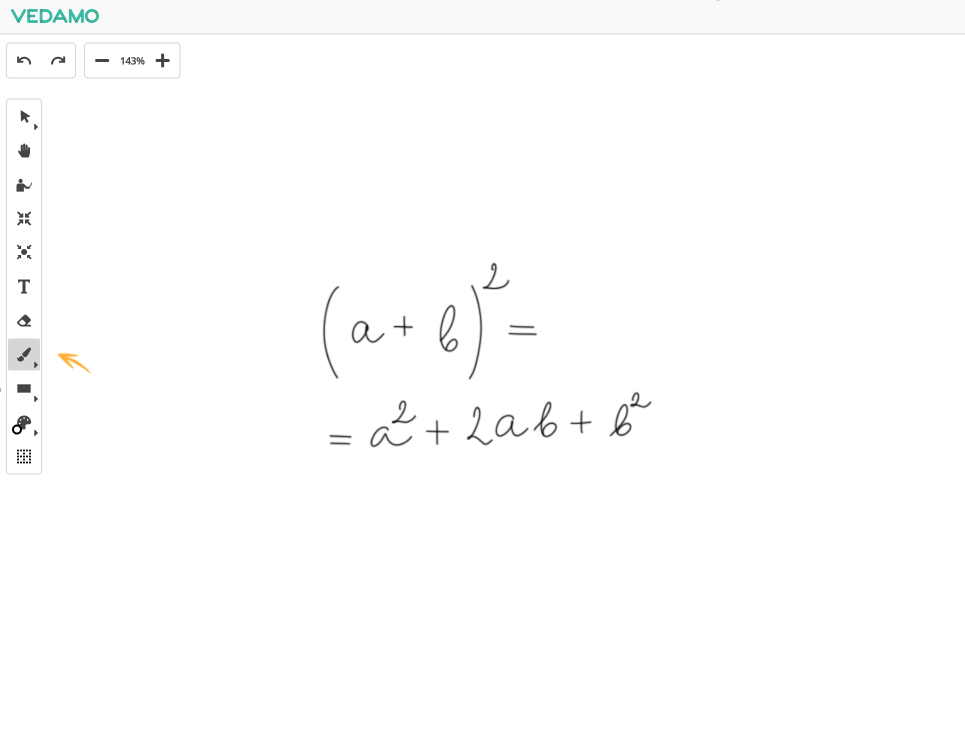
The brush tool (Brush) aids the tutor in sketching objects on the whiteboard, e.g. in sketching lines, rectangles, circles, ellipses, etc. Additionally, you can use this tool with a graphics tablet.
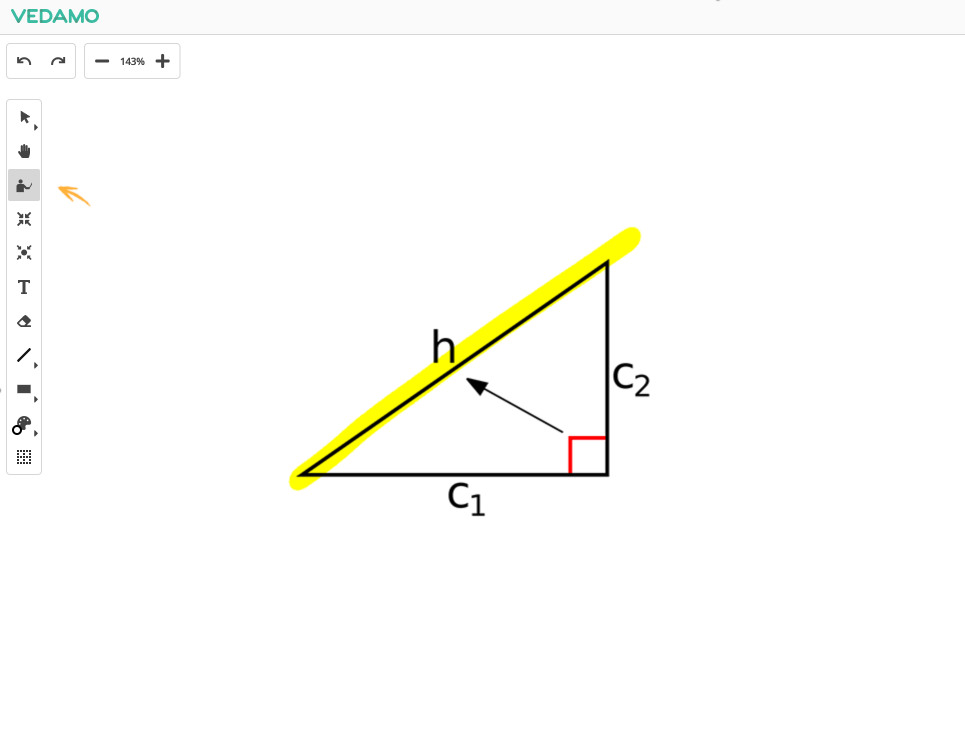
The pointer tool (highlighter) aids the tutor in highlighting a part of a text or a picture he or she may have on the whiteboard. The trail of the pointer tool dissolves after a few seconds and does not stay permanently. This makes it an excellent short-term highlighting tool, which doesn’t create clutter.
The system also has a convenient text editor tool that allows simultaneous writing and editing by many participants.
To use it select the text tool (T icon). Make sure it is selected (Text) and then click with the mouse on the canvas where you want the text to appear – this opens the text editor.
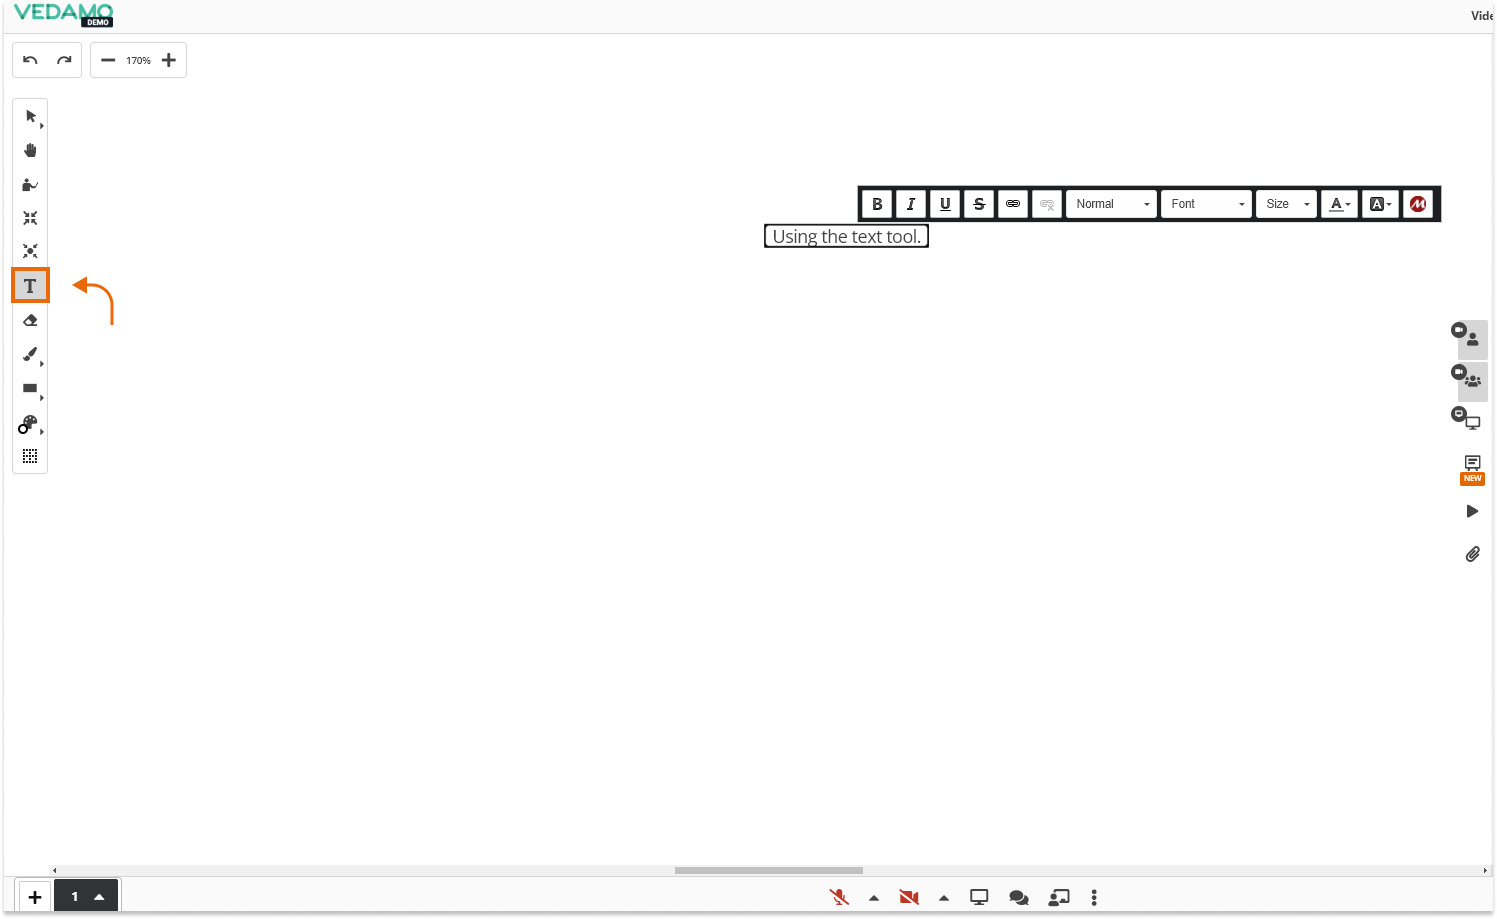
Now you can start writing text and it will appear on the canvas at the same time. Everyone who has access to see the whiteboard will read while you type. When ready, click the Done button.
NOTE: To edit other participants’ text elements you need to have permission to Edit Objects Created by Others.
NOTE: The created text can be resized and thus the box can be scaled and the aspect ratio configured based on the user preference.
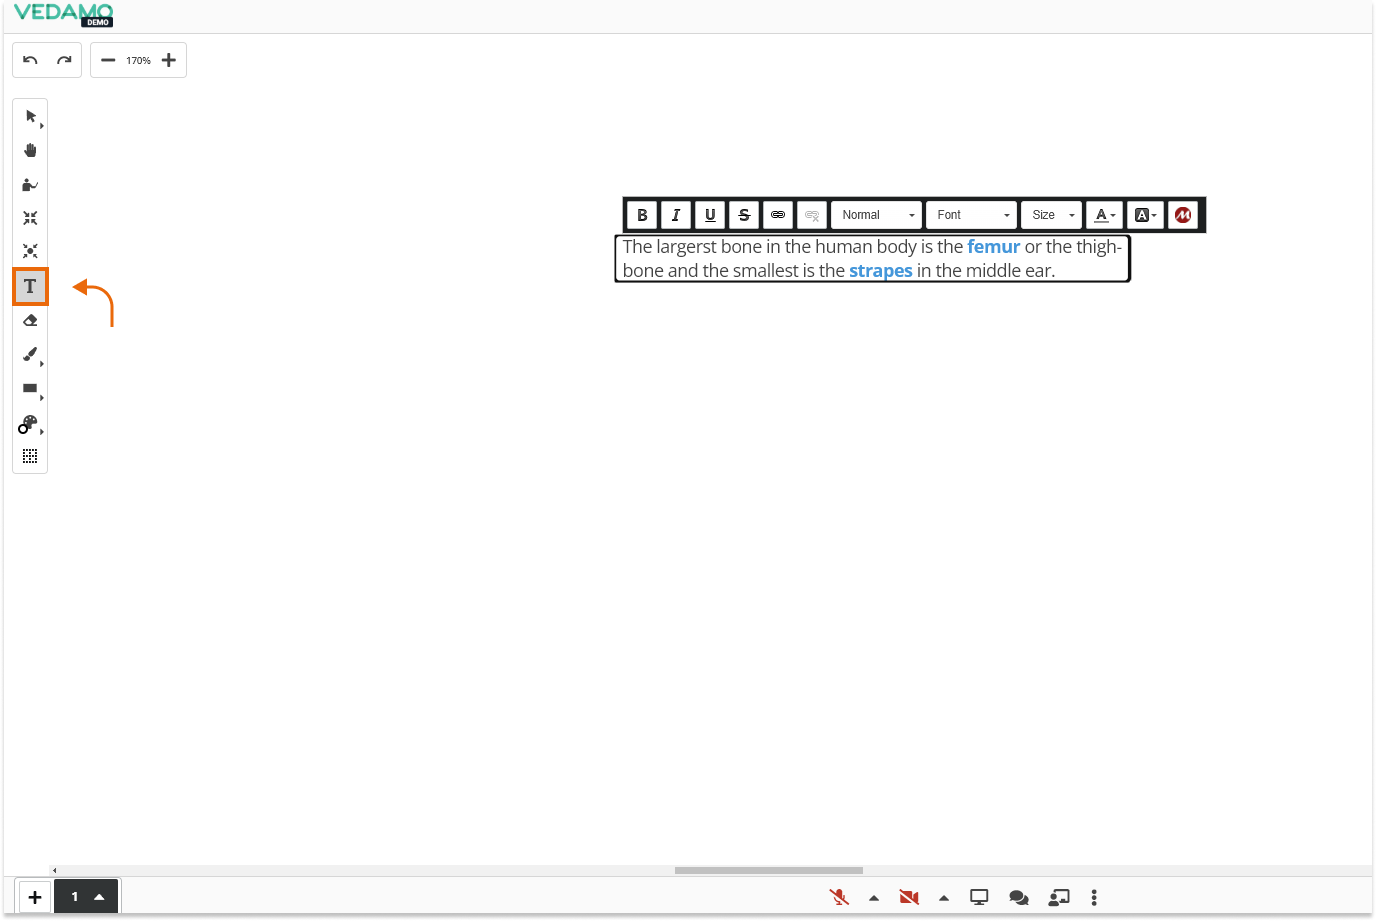
You can also add links from the text tool. To do that simply click on the link button in the text toolbox and a new pop-up window will appear.
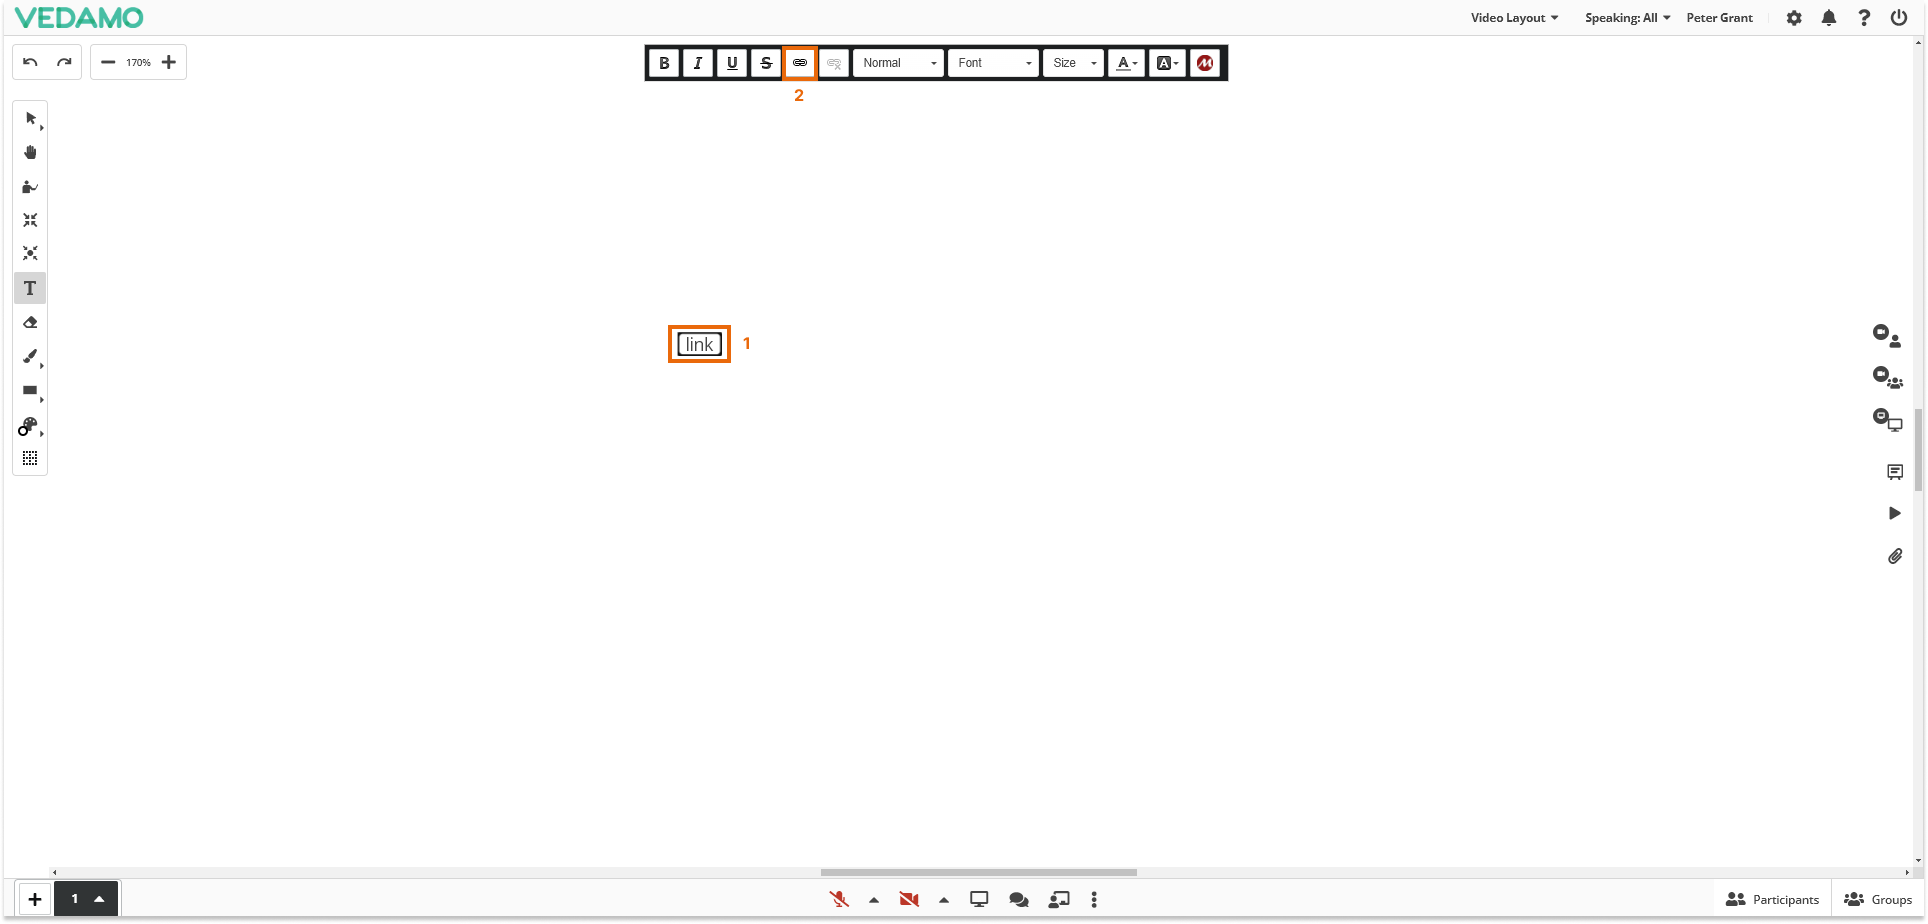
In the new window, you will see two important sections: “Display text” and “ URL”.
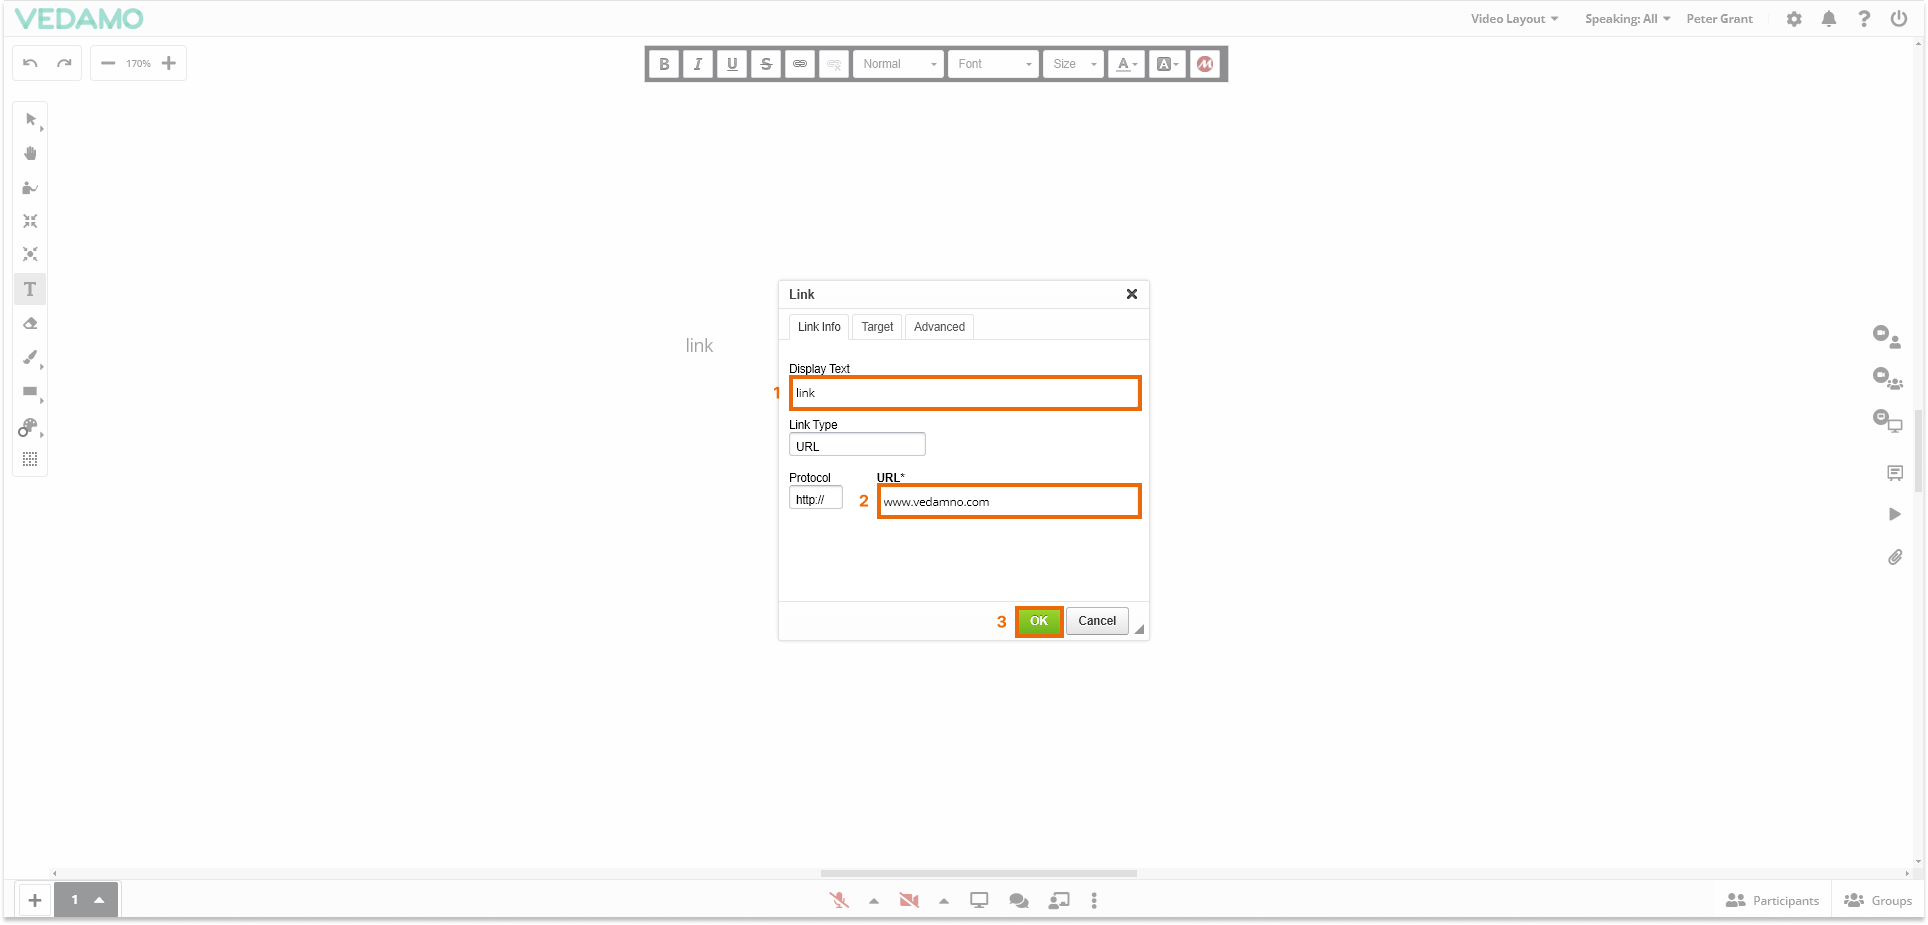
- Display Text (1) – In this section you can add a text that will be shown on the whiteboard as a hyperlink. You can either select an existing text and then click on the link button, this way the selected text will be automatically added in the “Display text” section and you will only need to add your link, or you can type out a text in the section and then add your link.
Note: If you have no selected text and the “Display text” section is empty and you add a link and click on “OK” the URL will be displayed on the whiteboard.
- URL (2) – in this section, you should add the link. After you have added the link, simply click on the green “OK” button and you are all set.
Note: iOS users will have to confirm the popped-up window in order to open the link.
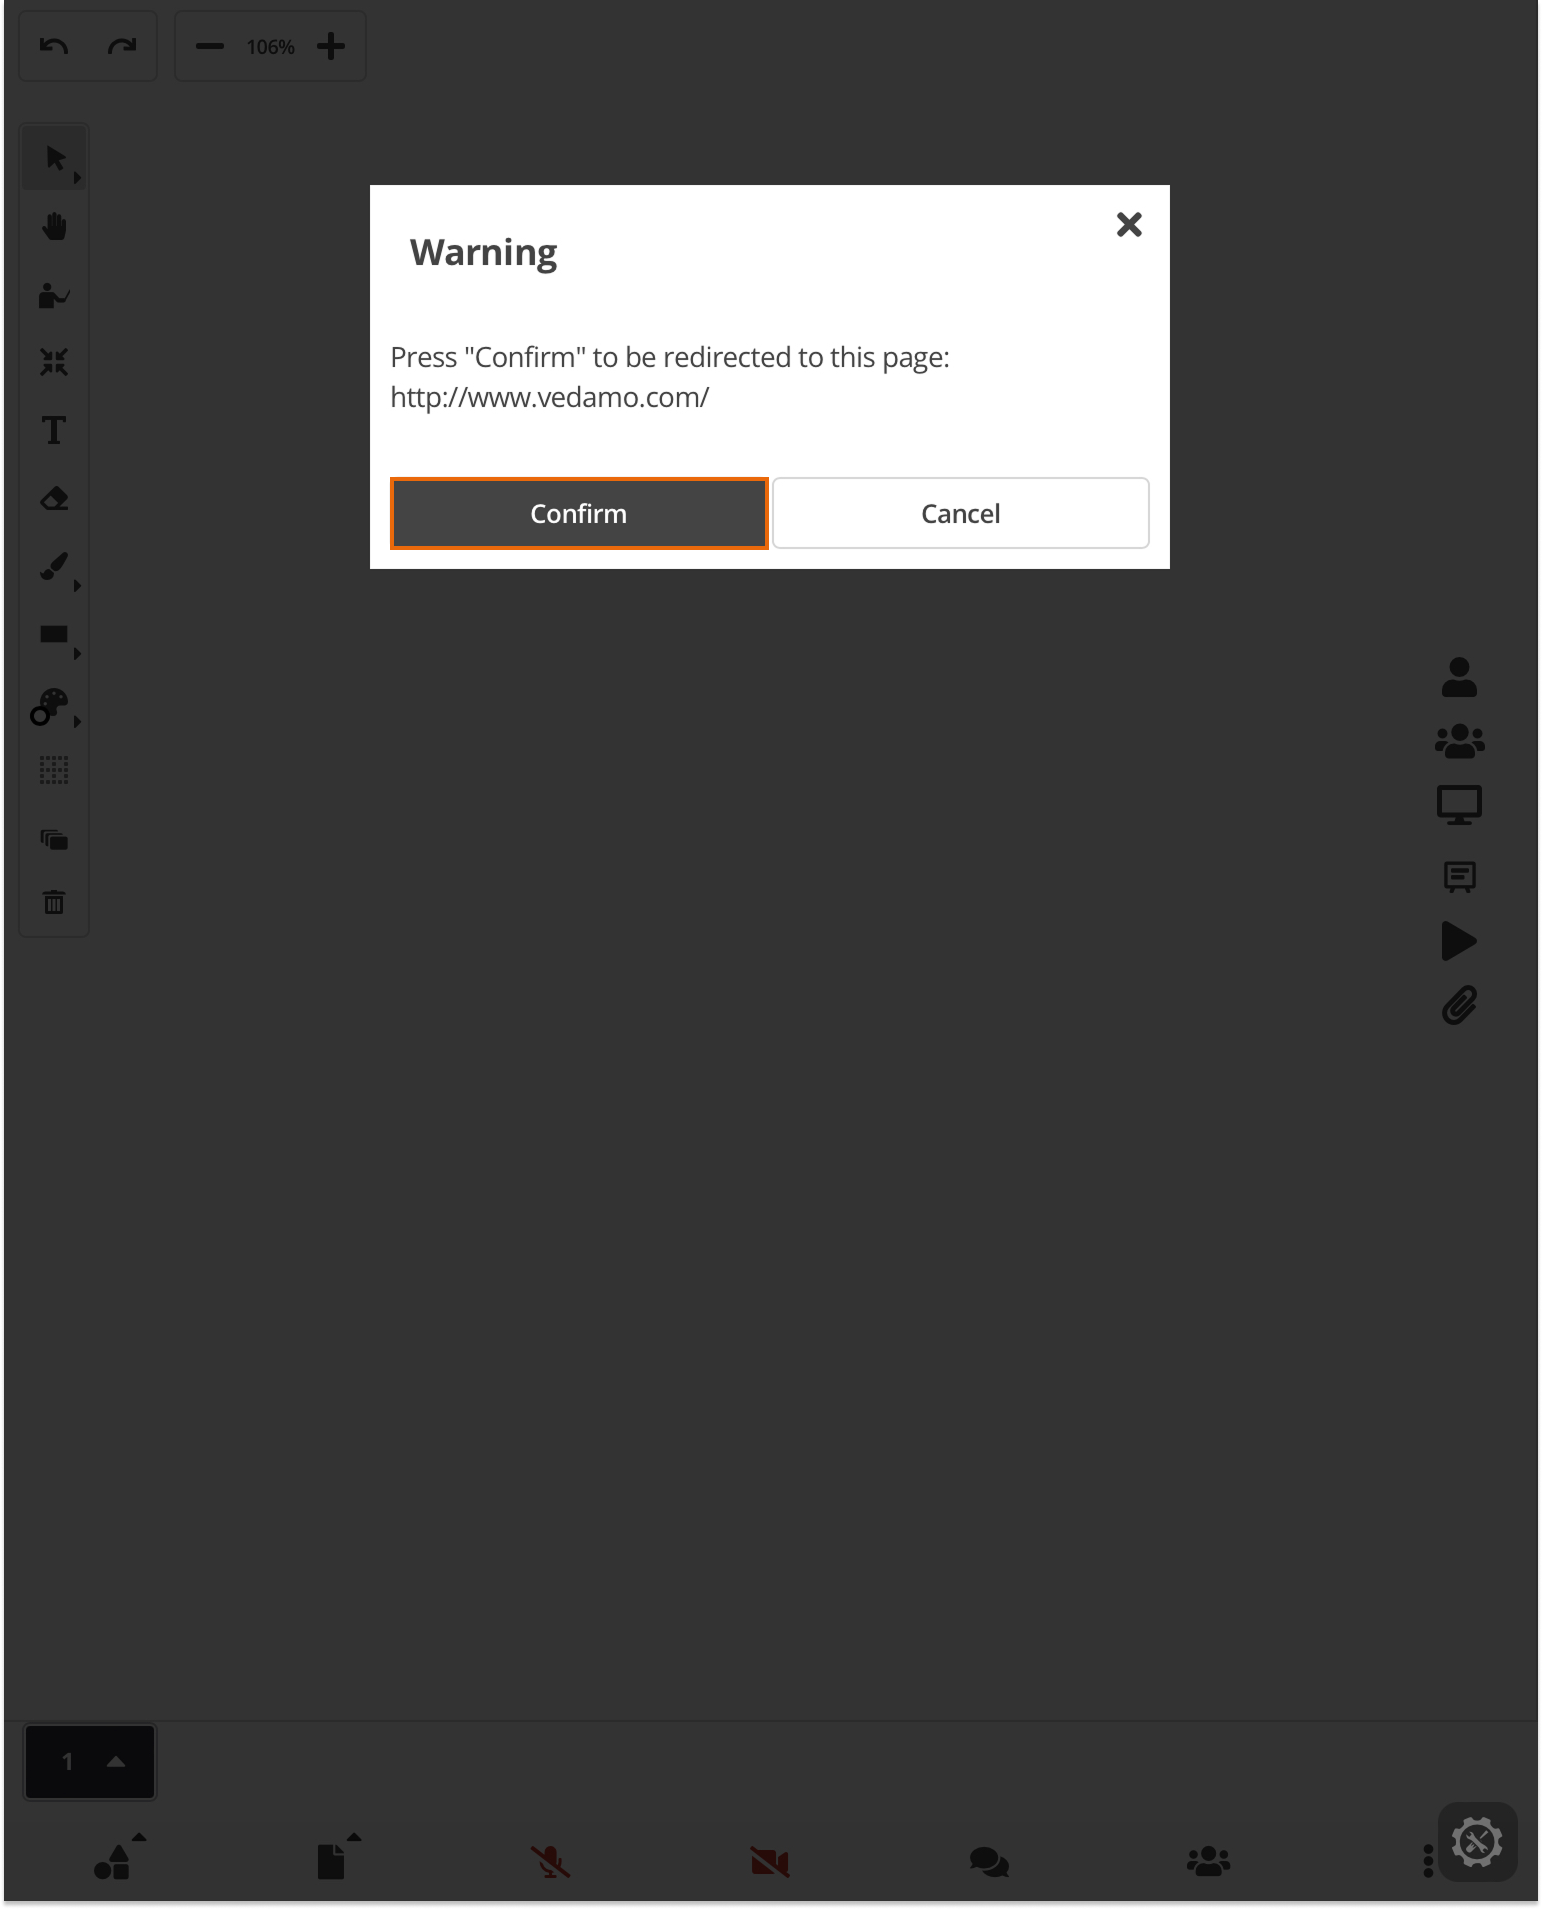
The line tool (Line) aids the host in drawing straight lines onto the whiteboard. You can use the line tool to underline a certain portion of text or build a geometric shape with several mouse gestures.
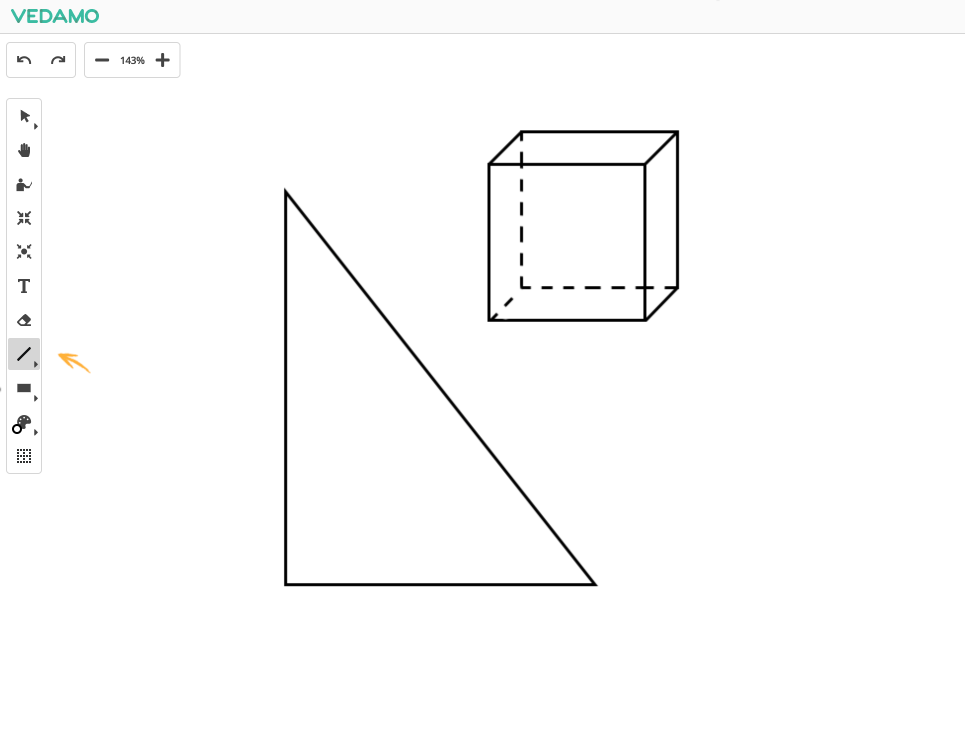
The Rectangle/Square tool (Rectangle/Square) allows you to create rectangles, squares, or freehand rectangles. The freehand function means that you can simply sketch the outlines of a rectangle as if using the brush tool and it will be automatically converted into a rectangle with the same dimensions. (Rectangle/Square)
The Ellipse tool (Ellipse) allows you to create ellipses, circles. As with the rectangle tool above, this tool also offers a freehand drawing option. (Circle/Ellipse)
The pre-defined shapes tool (Shape library) allows you to tap into a library of pre-defined shapes, which you may use in your lessons.
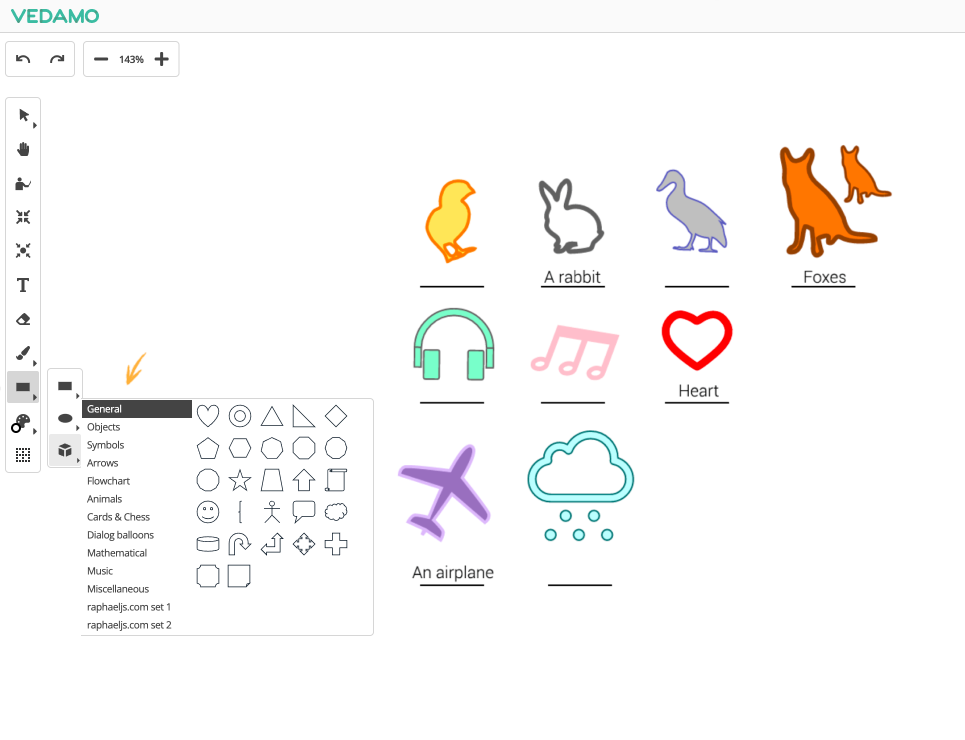
Select element fill color (Element fill color) – select the element and then choose from the Fill Color Palette.
Choose element stroke color (Stroke color) – select the element and then choose from the Stroke color palette.
Change element stroke width (Stroke Width) – select the element and then choose the Stroke width.
You can zoom in or out on the whiteboard using the combination Alt+Mouse Scroll or via the magnifying glass tools: (Zoom In/Zoom Out)
You can go back to the whiteboard’s default view using the Center Canvas tool: (Center Canvas)
This brings you back to the center of the whiteboard where you start out by default. It is useful if you’ve moved far away from the center while using the pan tool and want to go back.
The Focus tool can be used to show/highlight any particular content on the whiteboard. When pressed all users will automatically see the same position of the Whiteboard (viewpoint) as the host.
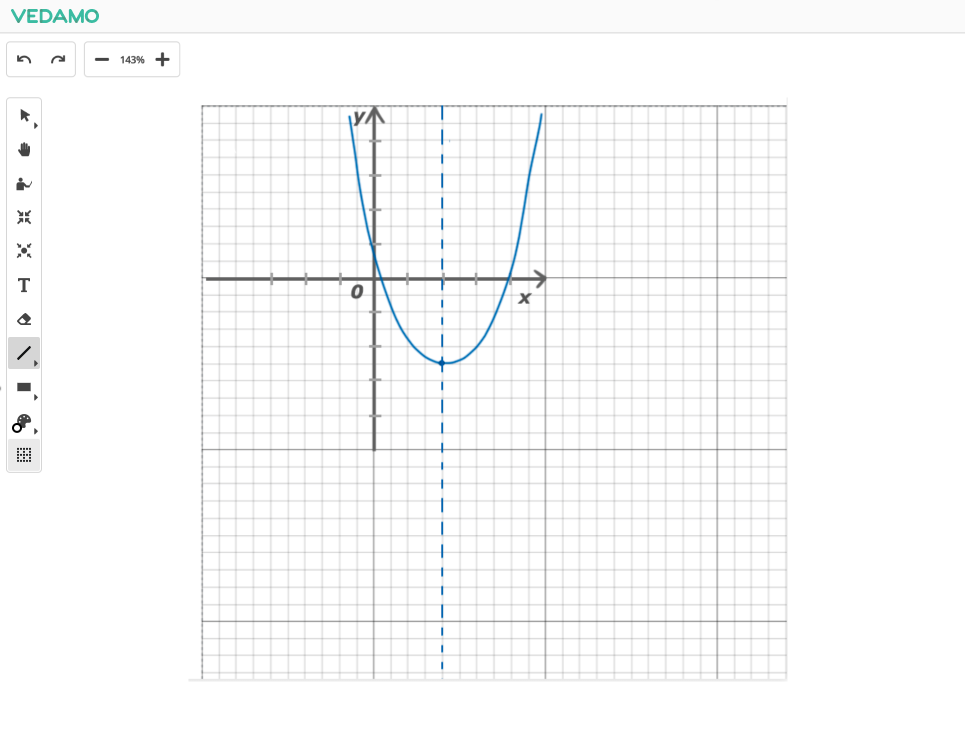
The Grid tool (Grid) can be used to apply a grid to the whiteboard and is useful if you’re teaching mathematics or economics, for example.
Undo (Undo) will back drawing actions (50 commands limit) only available if the permission to Edit Objects Created by Others is turned on.
Redo (Redo) will forward drawing actions (50 commands limit) only available if the permission to Edit Objects Created by Others is turned on.
Private elements (Padlock) when switched on, any elements created by you, can be moved or edited only by you.
Duplicate / Copy element – select the element(s) and right-click Copy (Ctrl+C) then Paste (Ctrl+V) or select the Duplicate tool (Duplicate) that creates a duplicate element right next to the original.
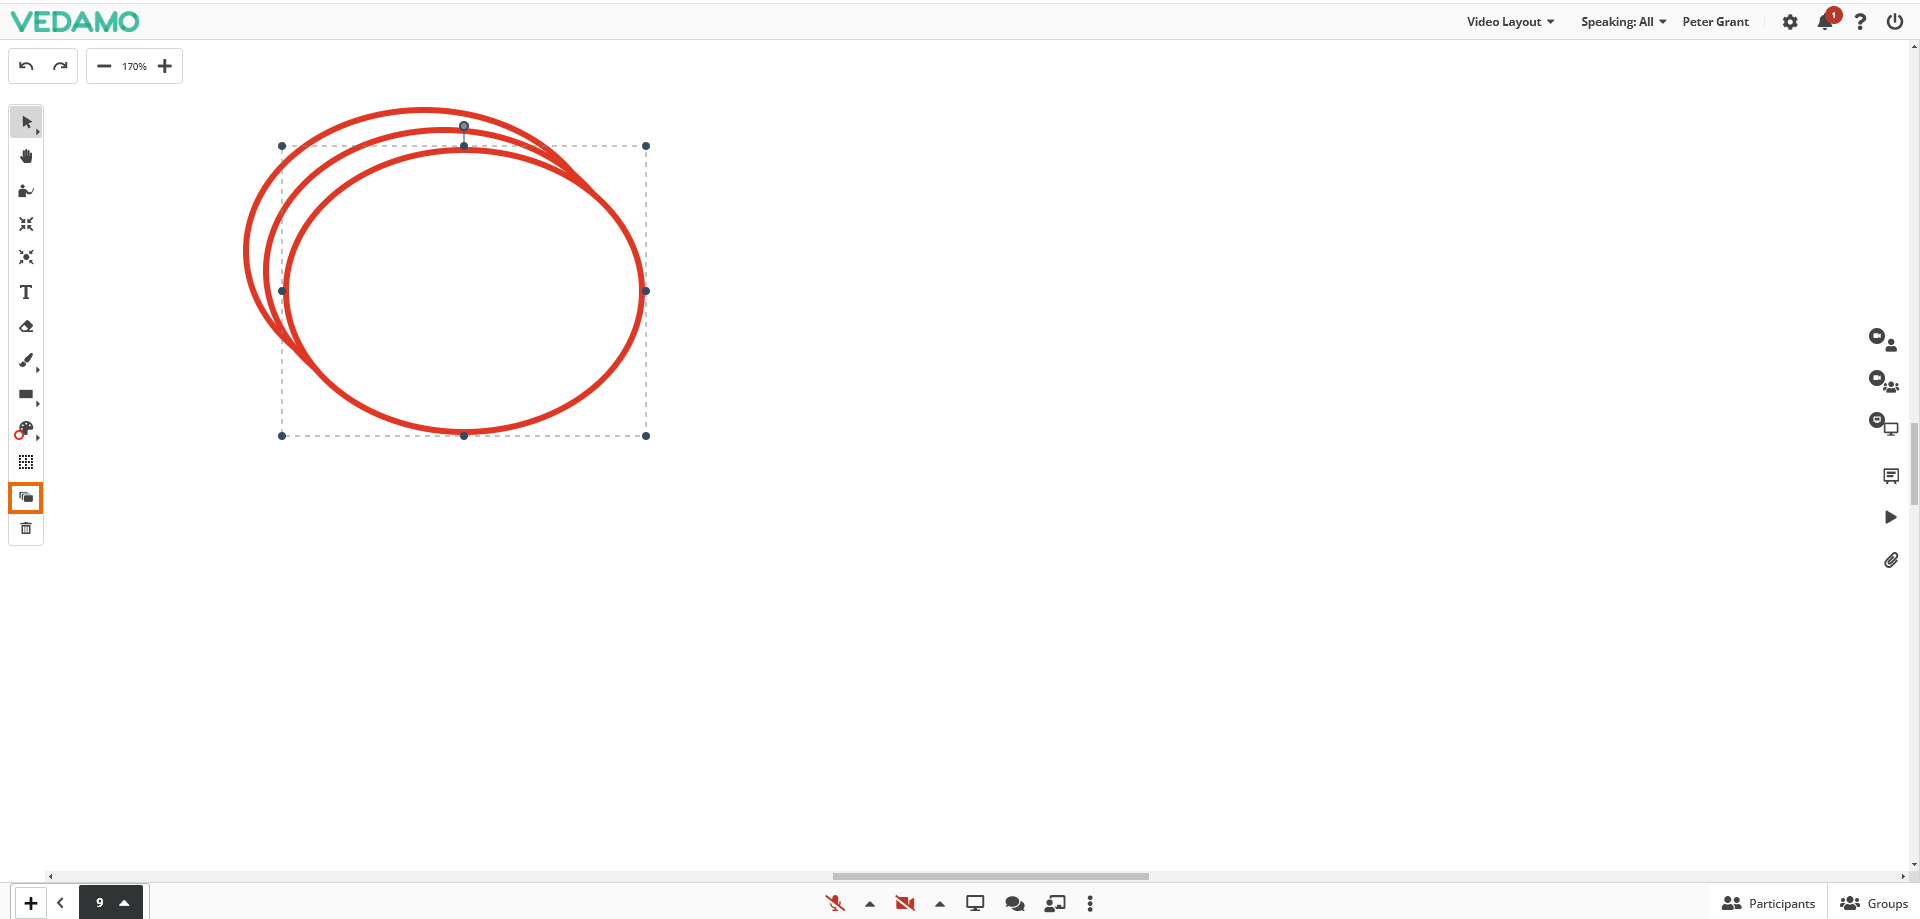
You can also use standard desktop shortcuts, such as: Ctrl+A (Select All), Ctrl+C (Copy), Ctrl+V (Paste), Ctrl+X (Cut)
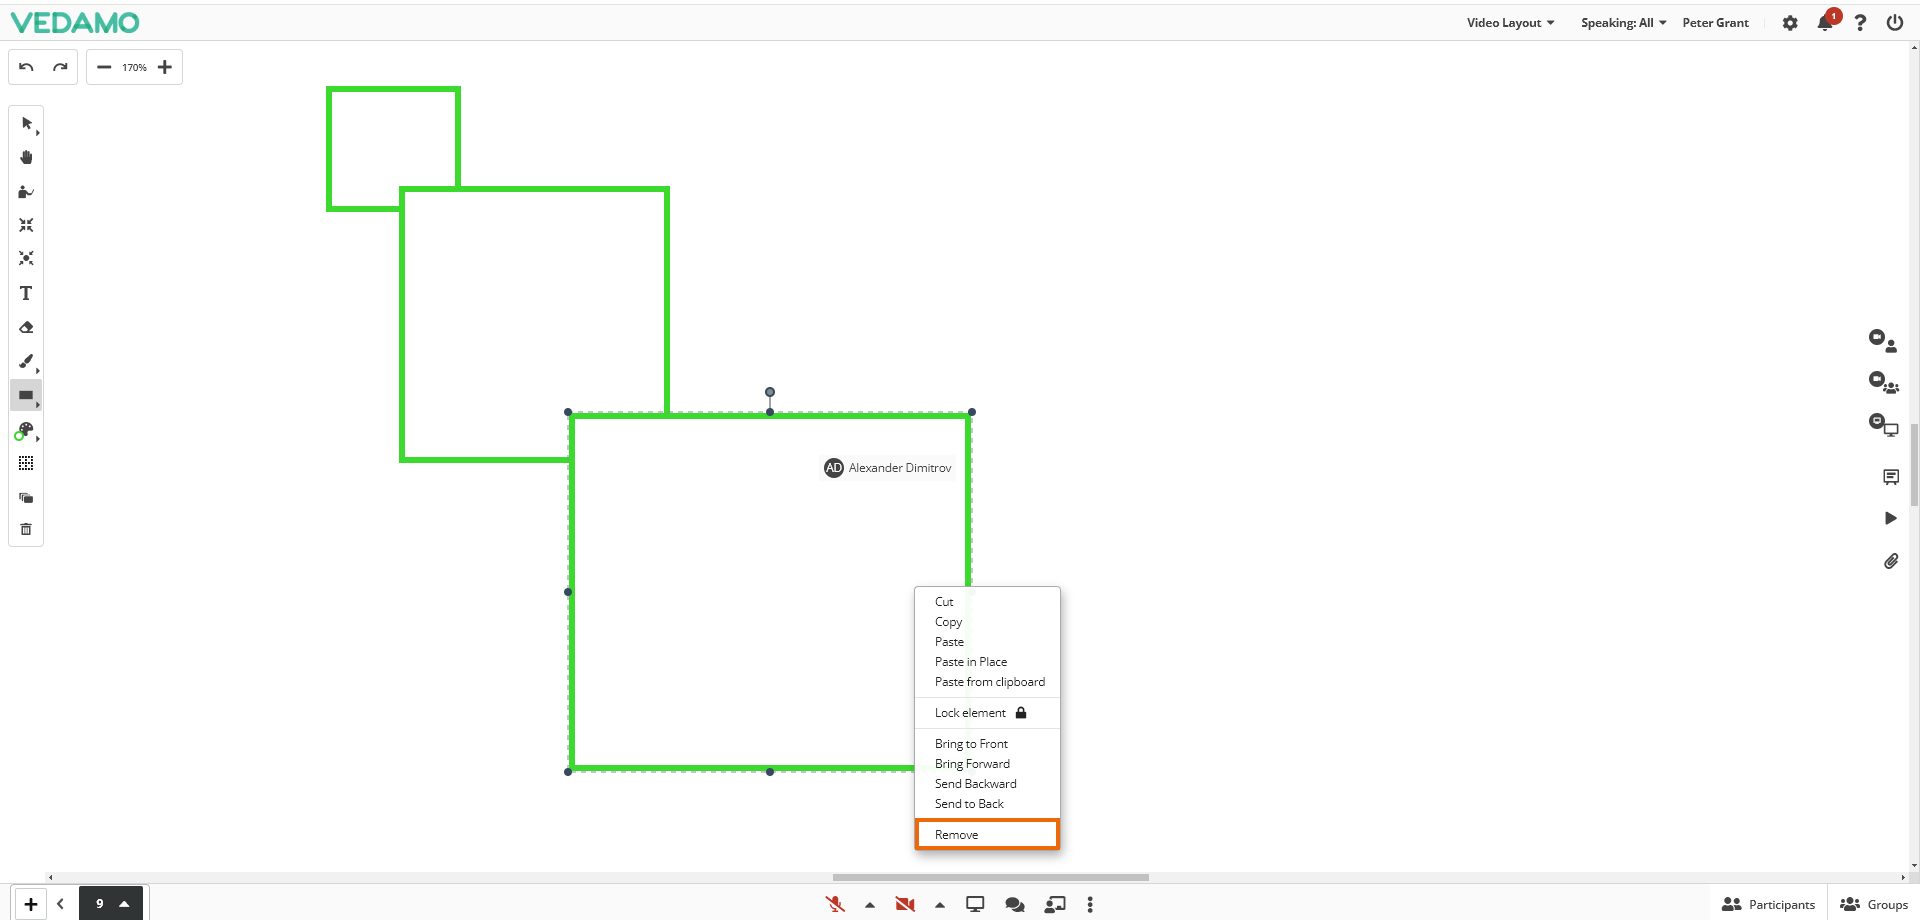
Delete element (the Trash) – there are several ways to delete elements. Select the element(s) and press the Delete button or right-click and select “Remove”. You can also use the keyboard buttons Del and Backspace.
Lock element This feature (available for hosts only) will grant you the option to “lock” any element created or uploaded to the whiteboard, thus disabling the following actions to all users: move, copy, resize, delete, or the use of layering.
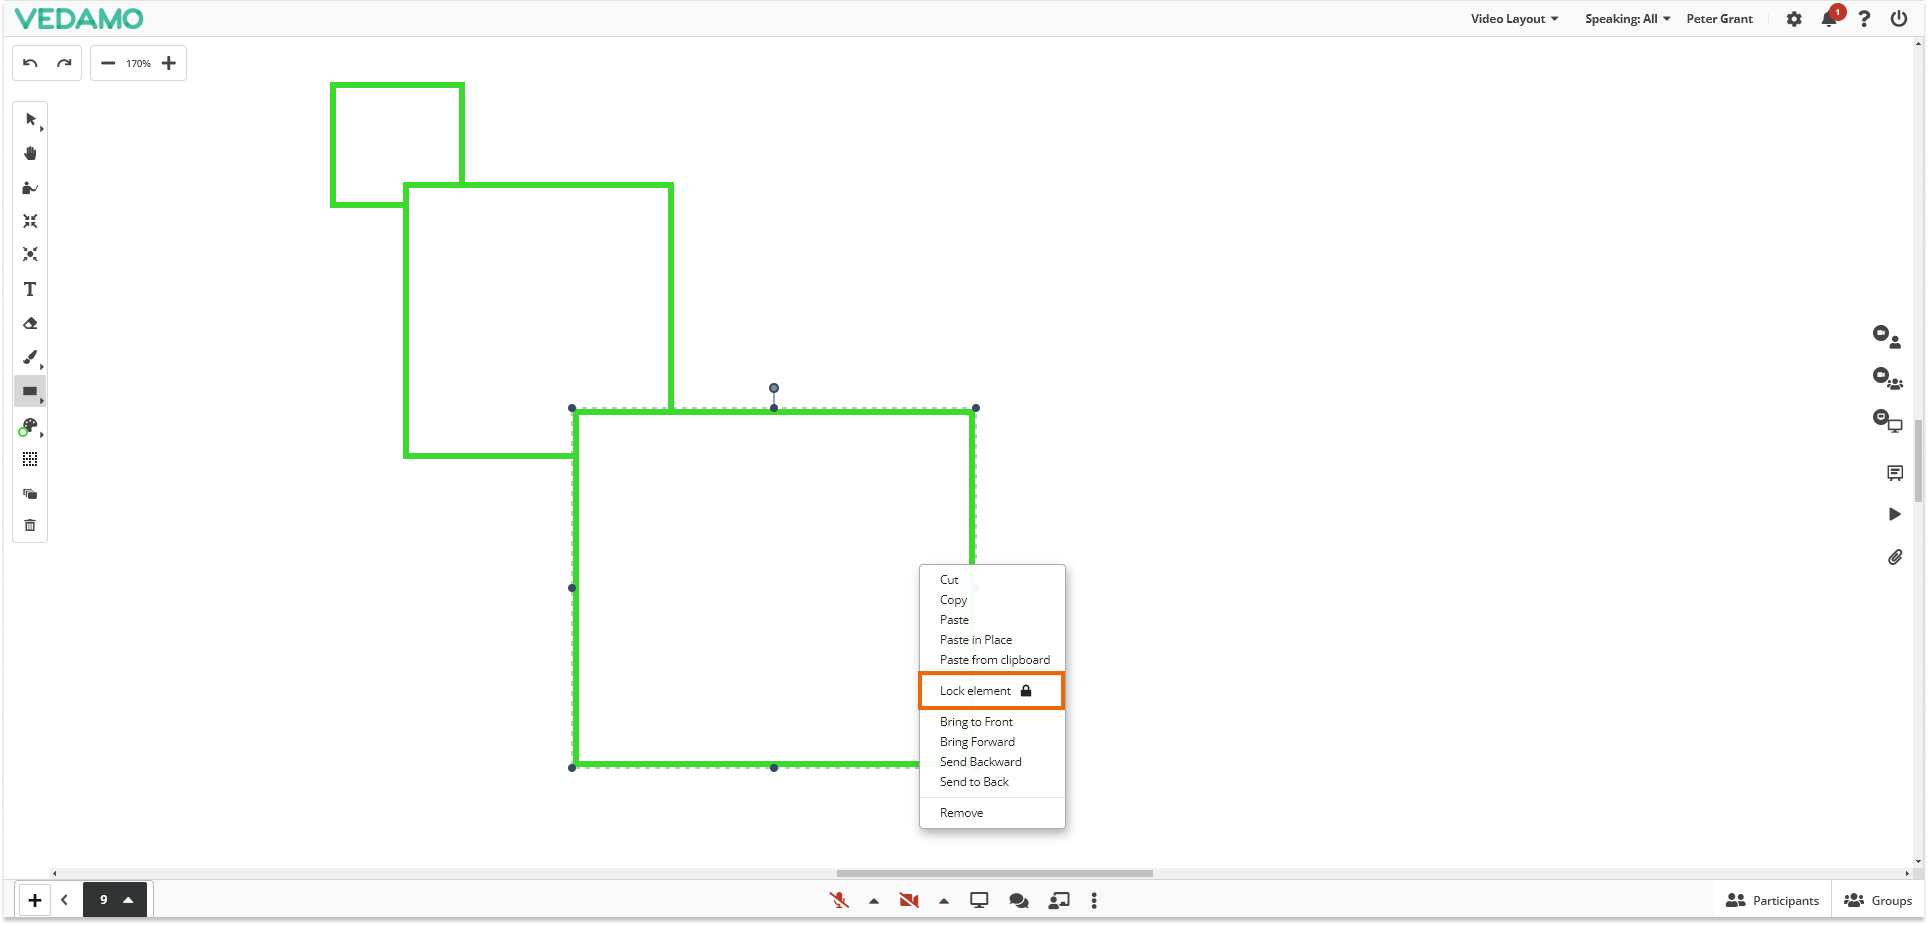
Note: Hosts won’t be able to manipulate the locked element until they use the “Unlock element” feature.
Manipulate objects (on the whiteboard) in layers. Layering objects (created by you or the other participants) gives you the freedom to arrange your materials in any layout you desire. By pressing the right mouse button the user can manipulate the order (layering) of the objects via the options in the box. The objects can be manipulated in any order (top, bottom or in between) via the 4 options displayed on the screenshot below.
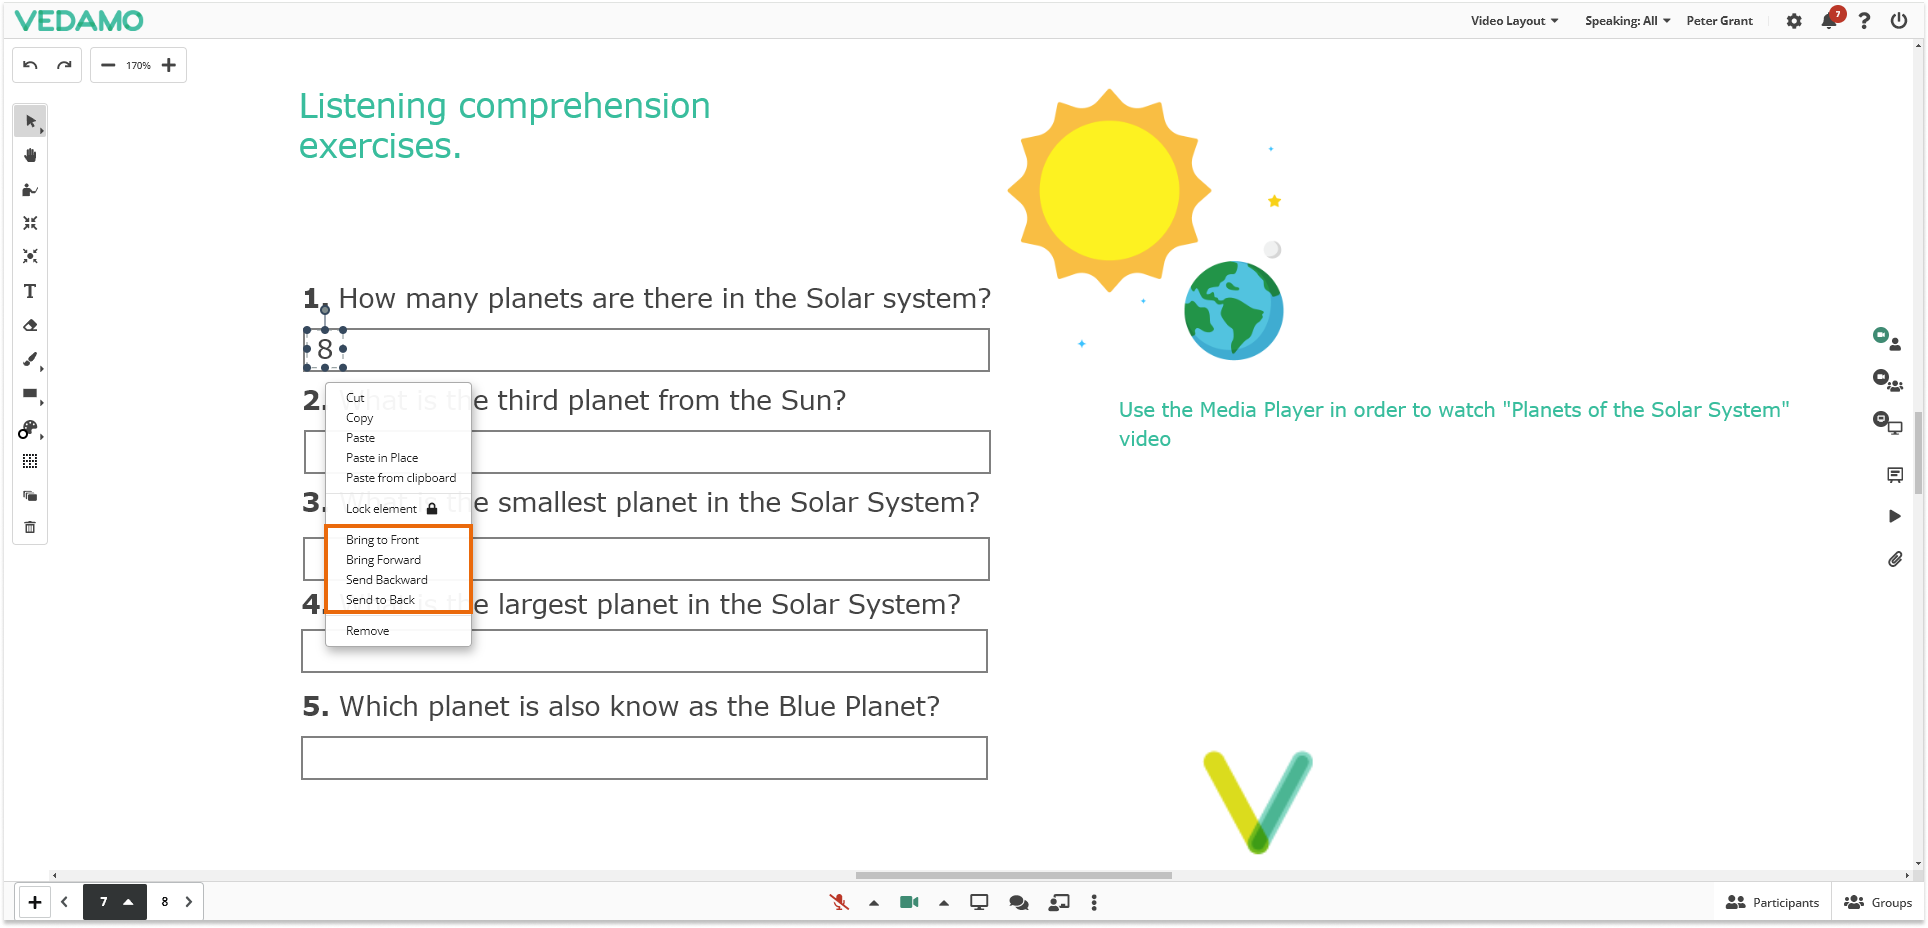
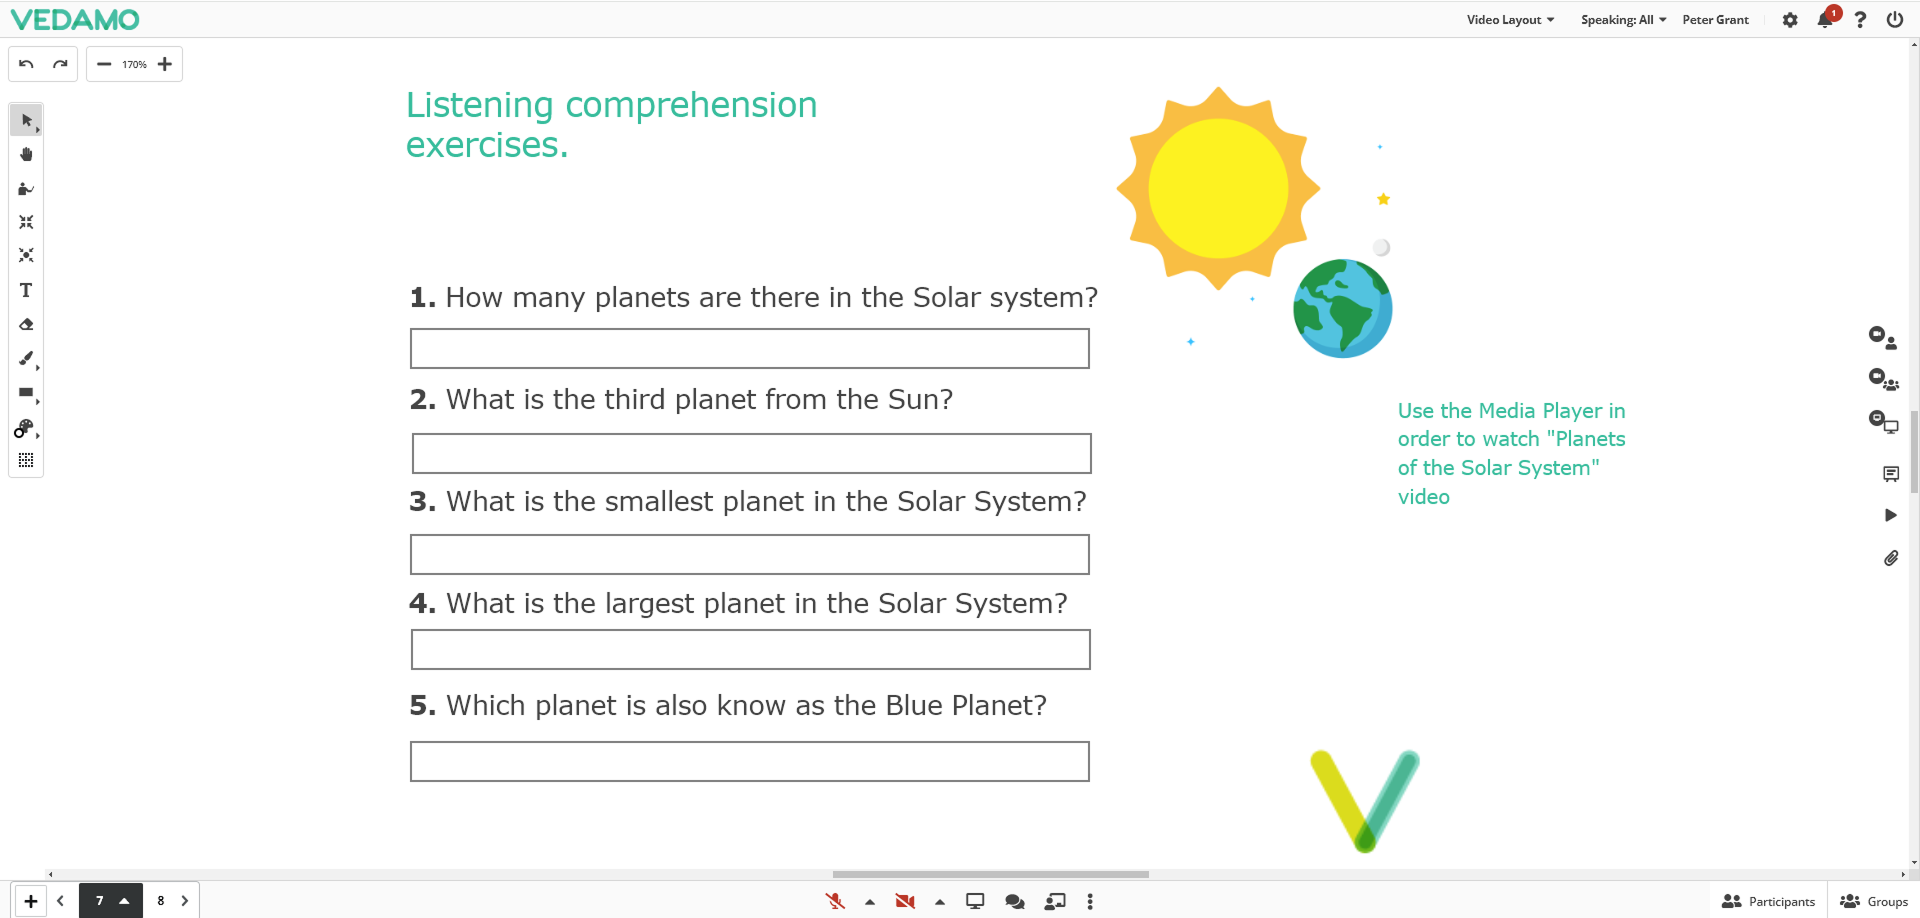
For example in this case the answer (8) has been hidden behind the text field with the “Sent to back” option.
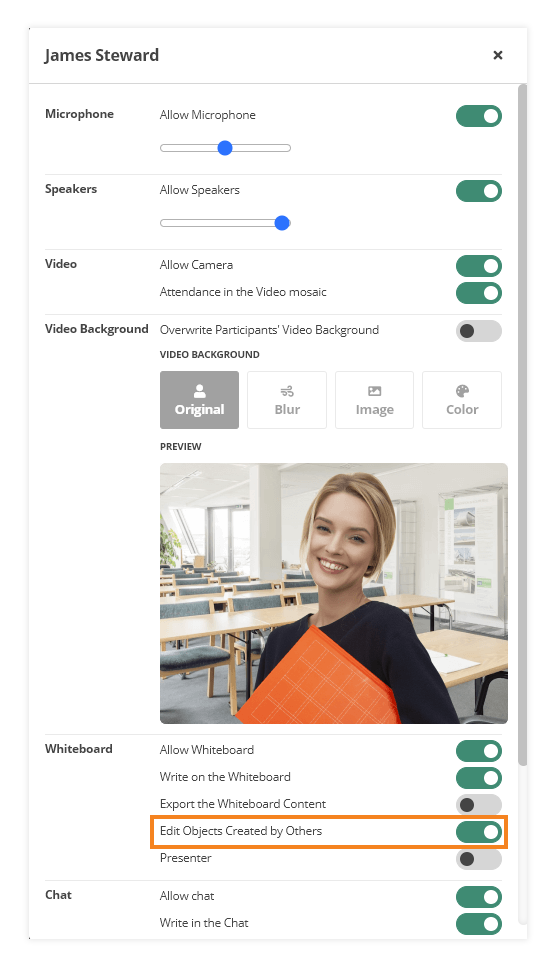
The layering controls are allowed for all participants by default, the host can additionally control the functionality by going to the participants settings (individual or for all participants) and toggle the “Edit Objects Created by Others” setting.
Note: At the moment this functionality is compatible only to PC users.
You can check the attached links for assistance with other functionalities like Whiteboard Settings and Whiteboard Pages.
The page links option allows you to click on a particular object or text and to have multiple options afterwards like going to another page, visiting a website, or playing a video. To set the option select the object/text and right click on it. Then select the “Link to” option:
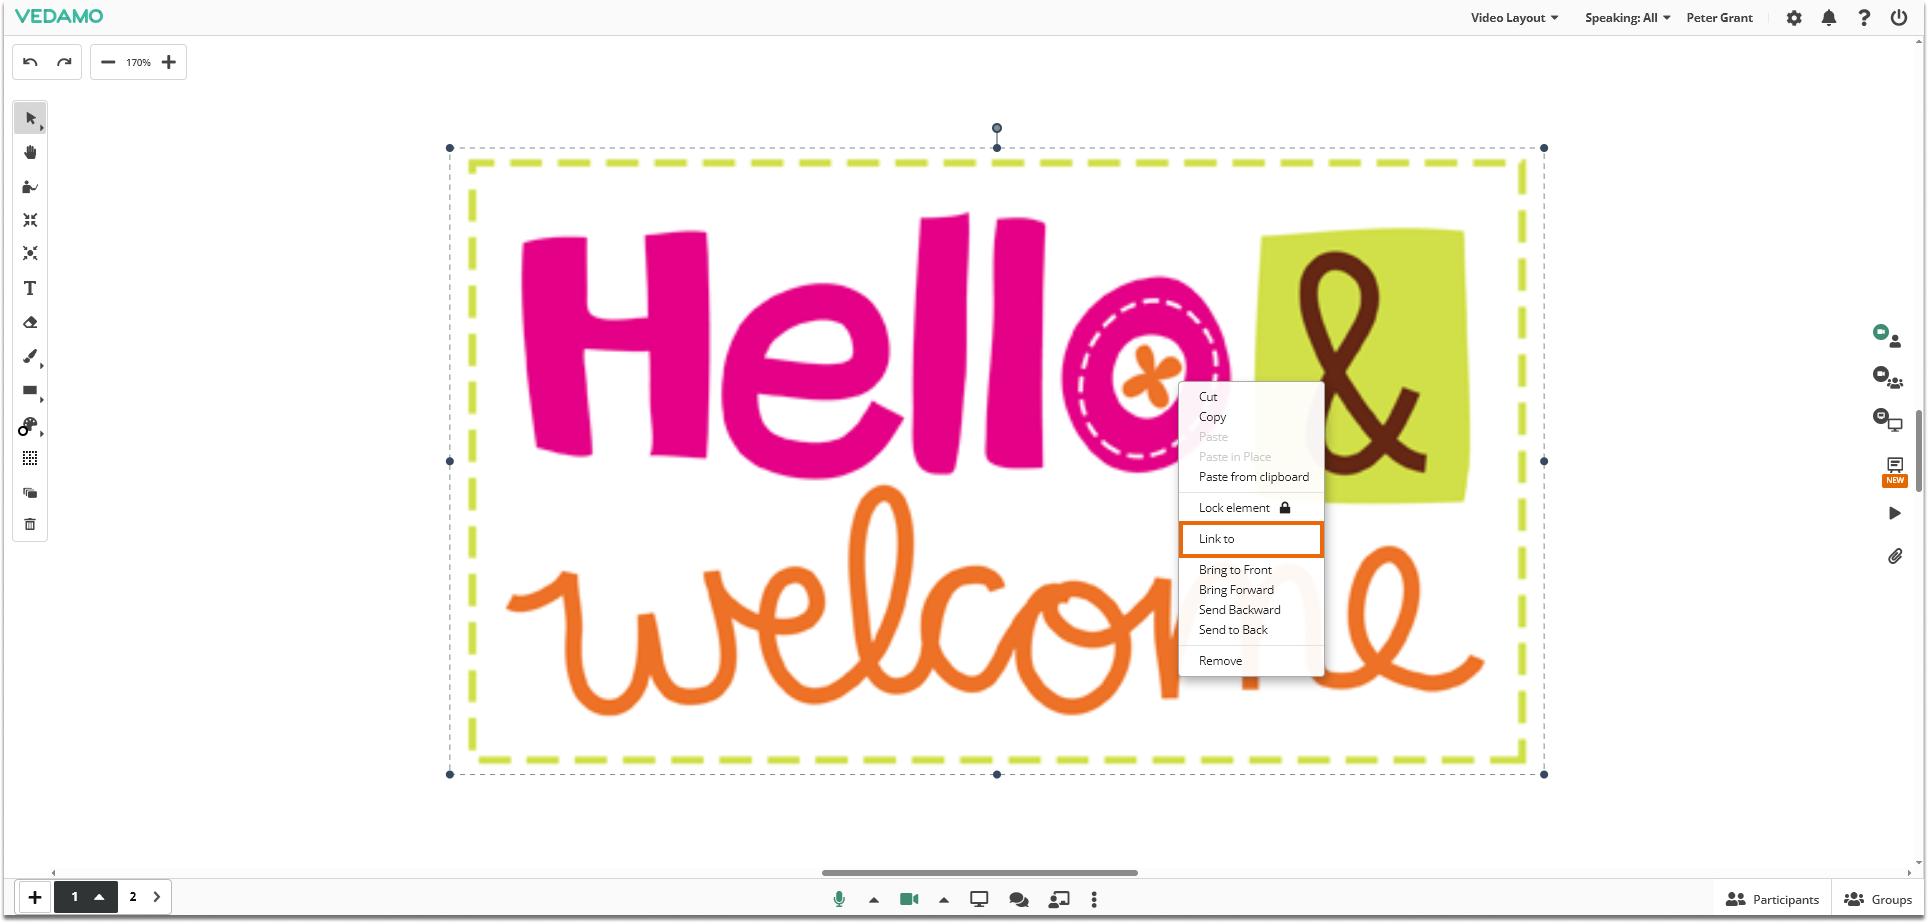
After that a new window will appear that will allow you a few new options. The first option is to visit a website.
Choosing that option means students will be able to go to the website you put inside the URL option:
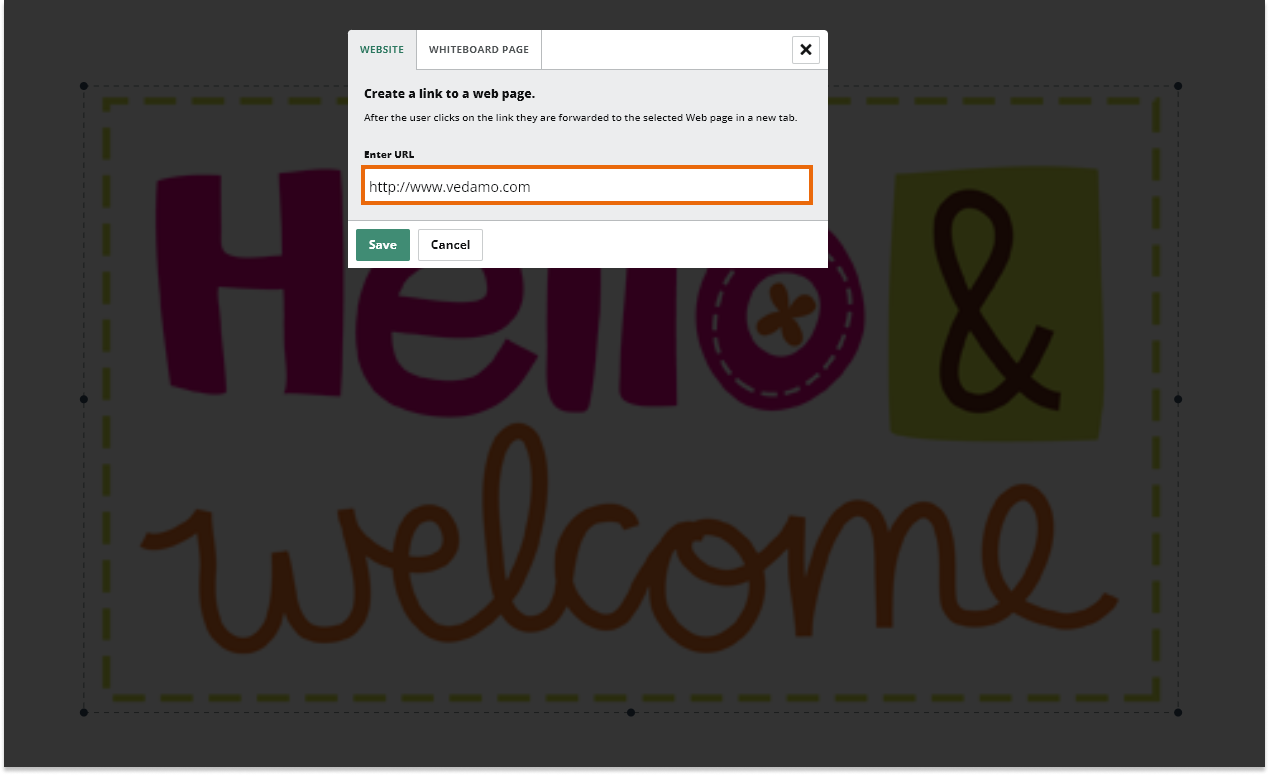
After typing the website address click on the green “Save” button to apply the changes:
Another option you have is to go to other pages. This will allow the users to go to a certain page after clicking the object/text.
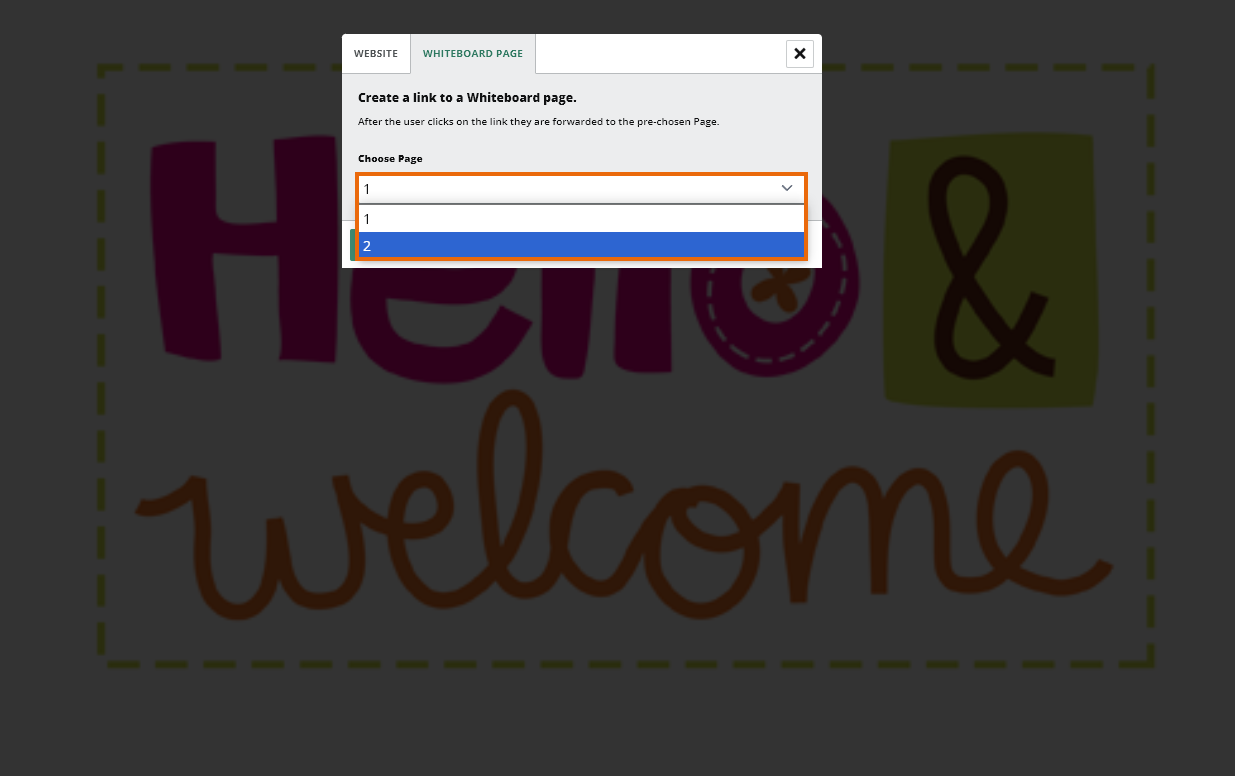
Then proceed by clicking the green “Save” button.
The last option is to play a video from your file library or directly from YouTube/video:
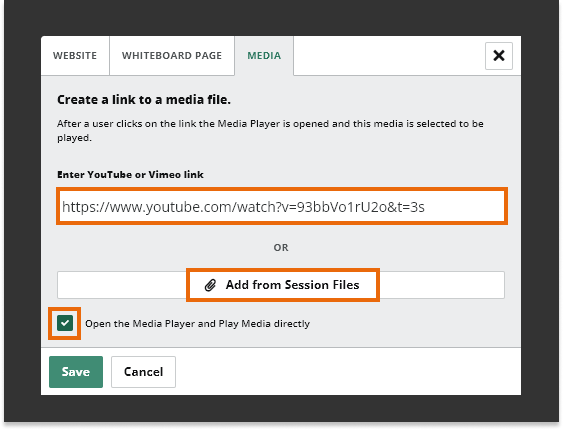
The “Open the Media Player and Play Media directly” is a way to sync the host with the participants so the video starts for all participants at the same time after the hosts starts playing the video. After you have made the necessary changes don’t forget to save them.
Then proceed by clicking the green “Save” button.
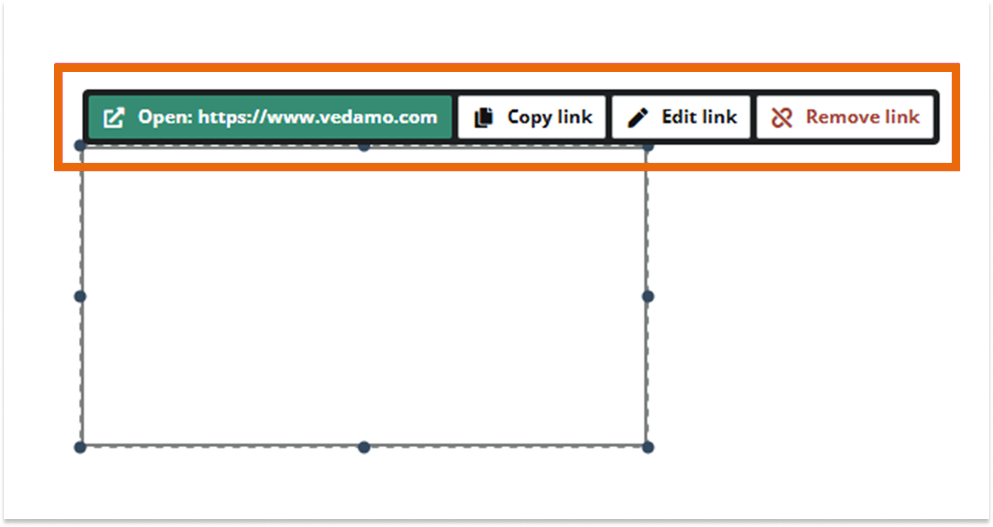
Note: This functionality can be used in the session templates as well.
Note: This functionality wont work in the Presentation/Simple modes.